Difficulty: EXTREME
Time: 8+ HOURS
Distance: 5 MILES
Elevation Gain: 2000 FEET
Foot Traffic: VERY LOW
Challenges: Dangerous Free Climbing, Narrow Ridges with Steep Dropoffs, Muddy, Overgrown, Endurance Challenge
Sights: Windward Side, Honolulu, Diamond Head
What to Bring: Courage, Lots of Water, Lunch, Sunscreen, Shoes with Good Grip, Long Sleeves/Pants
Hiking the Pali Notches alone is a challenging task. So hiking the Pali Notches up the "Chimney", then to Konahuanui 1, the highest peak in the Ko'olaus and then continuing along the Ko'olau Summit Trail (KST) all the way to Manoa is just crazy. But completing this beast will give you access to some incredible views as well as relatively untouched ridges, preserved only for those up to the challenge.
Ever since my hiking buddy Peter and I had gotten into more extreme ridge hiking, this route had been on our list. Going from one side of the island to the other while tackling challenging free climbs, narrow ridges, and summitting K1 had all the makings of a great adventure. However, we kept finding excuses for not doing it. After a year of talking about, Peter asked again if I wanted to do it. Despite having already done two hikes that weekend, I decided enough was enough. It was time to conquer the Notches, the Chimney, and K1.
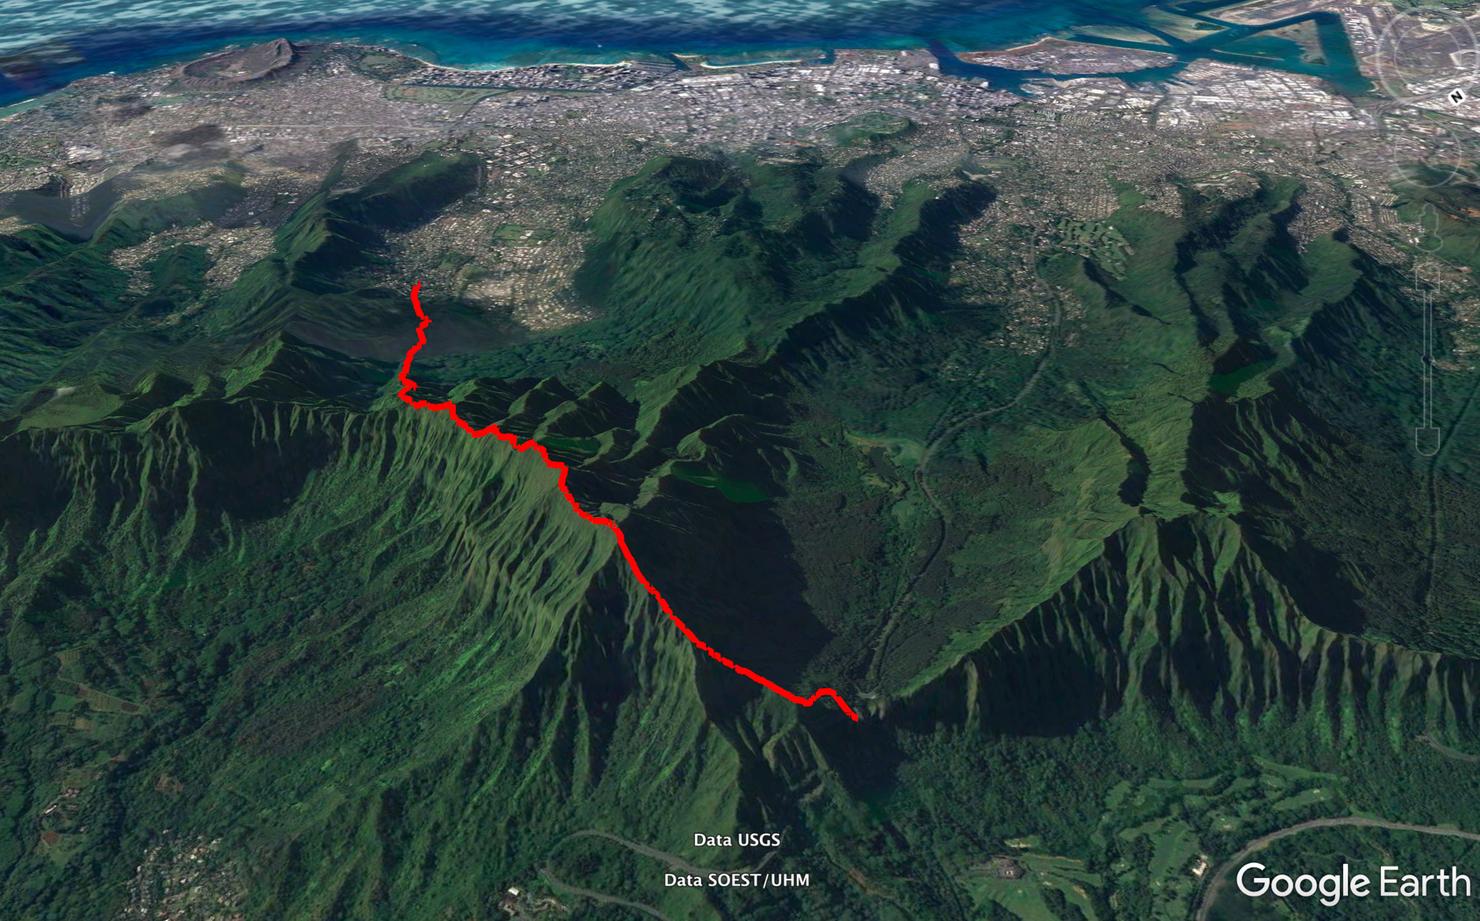
Here's an image of our route. Looks sort of like you're hiking half way across the island...which is sort of what it feels like. We staged one car on Alani Drive, at the trailhead for the Pu'u Pia and Kolowalu Trails. We then drove to the Pali Lookout to begin the hike.
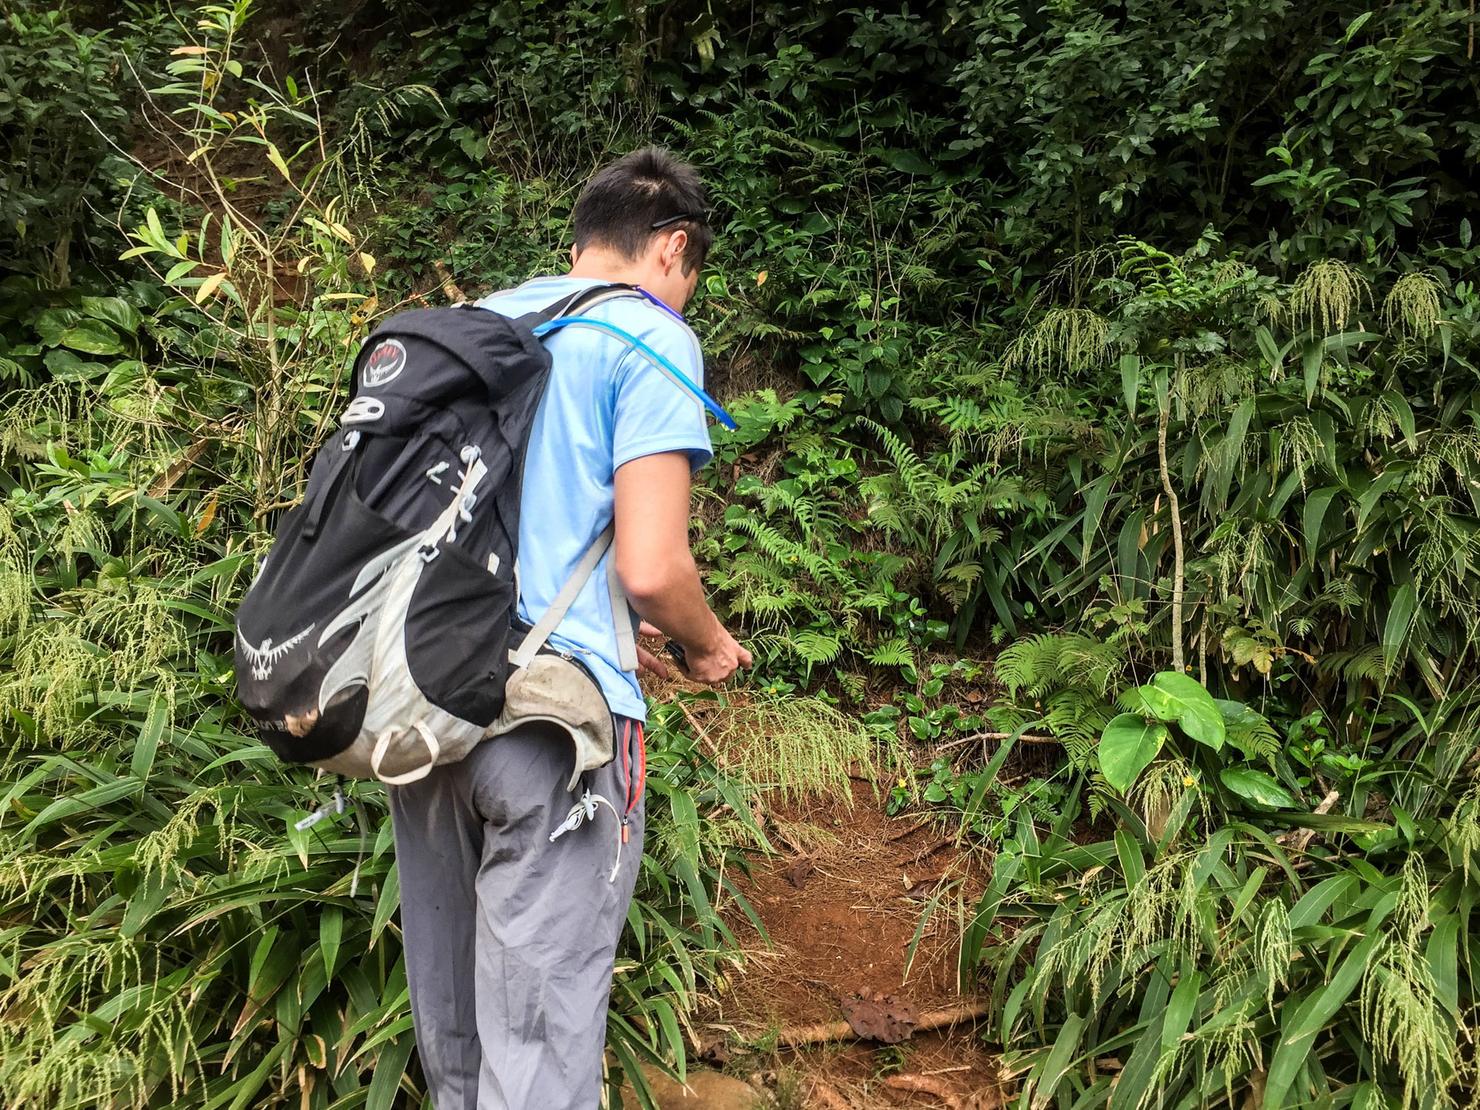
To access the Pali Notches, go through this opening in the trees near the parking lot, just behind the pay station. For a more detailed explanation of how to reach the ridge, check out my Pali Notches post.
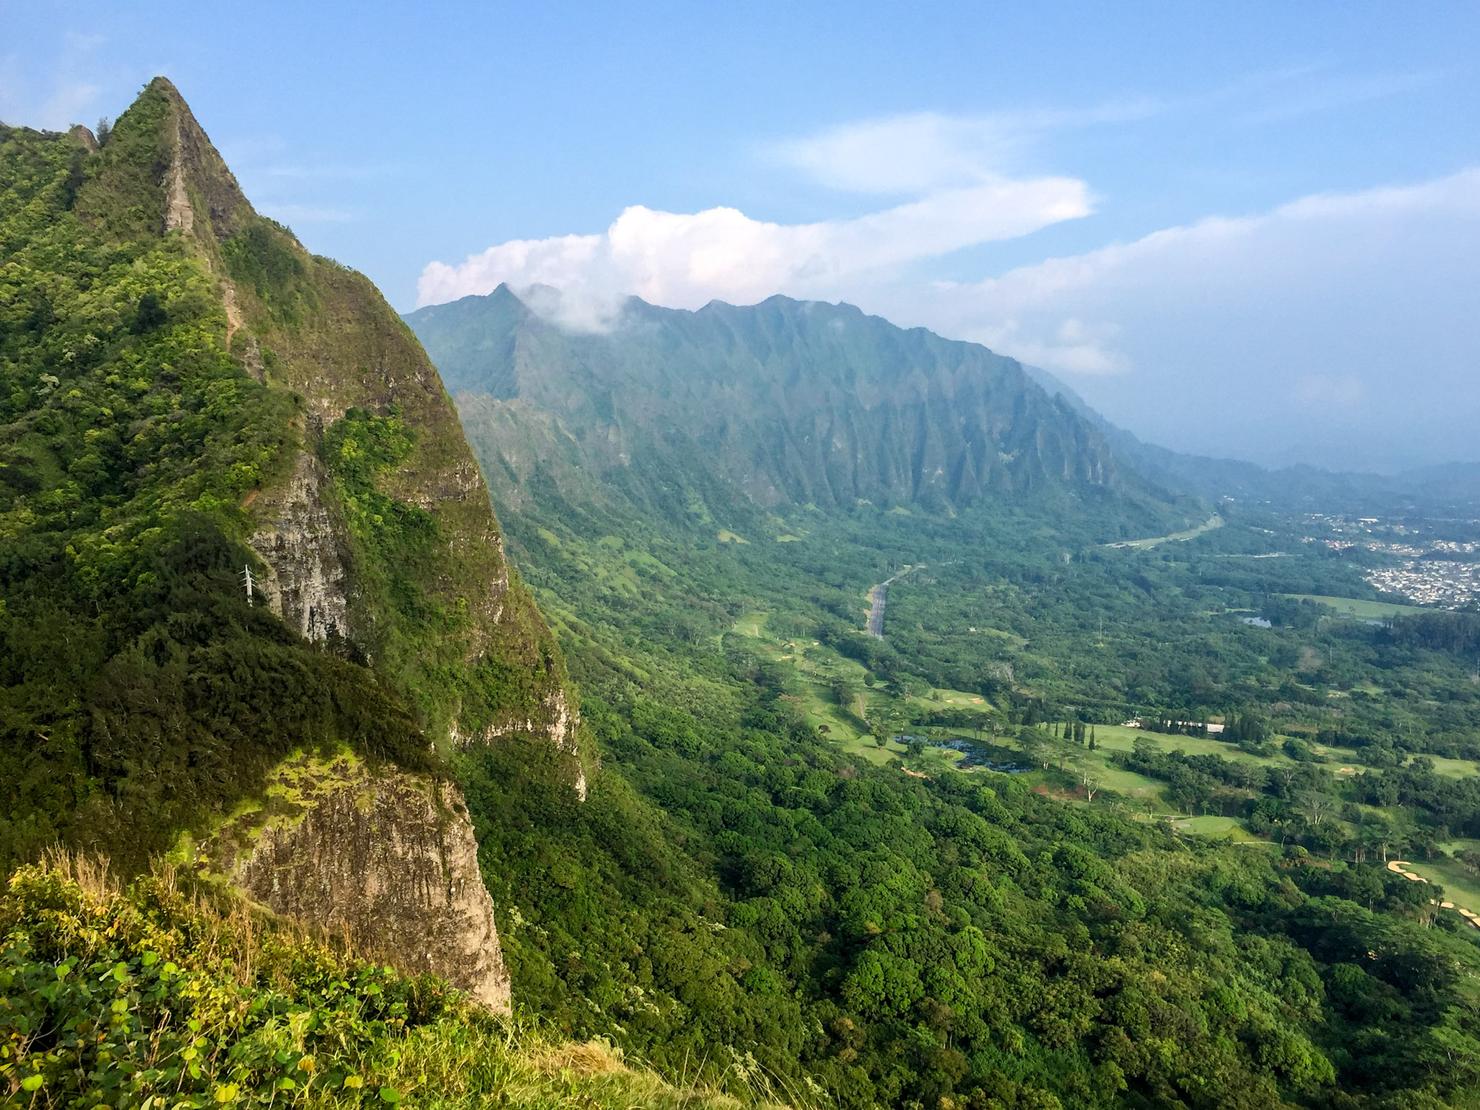
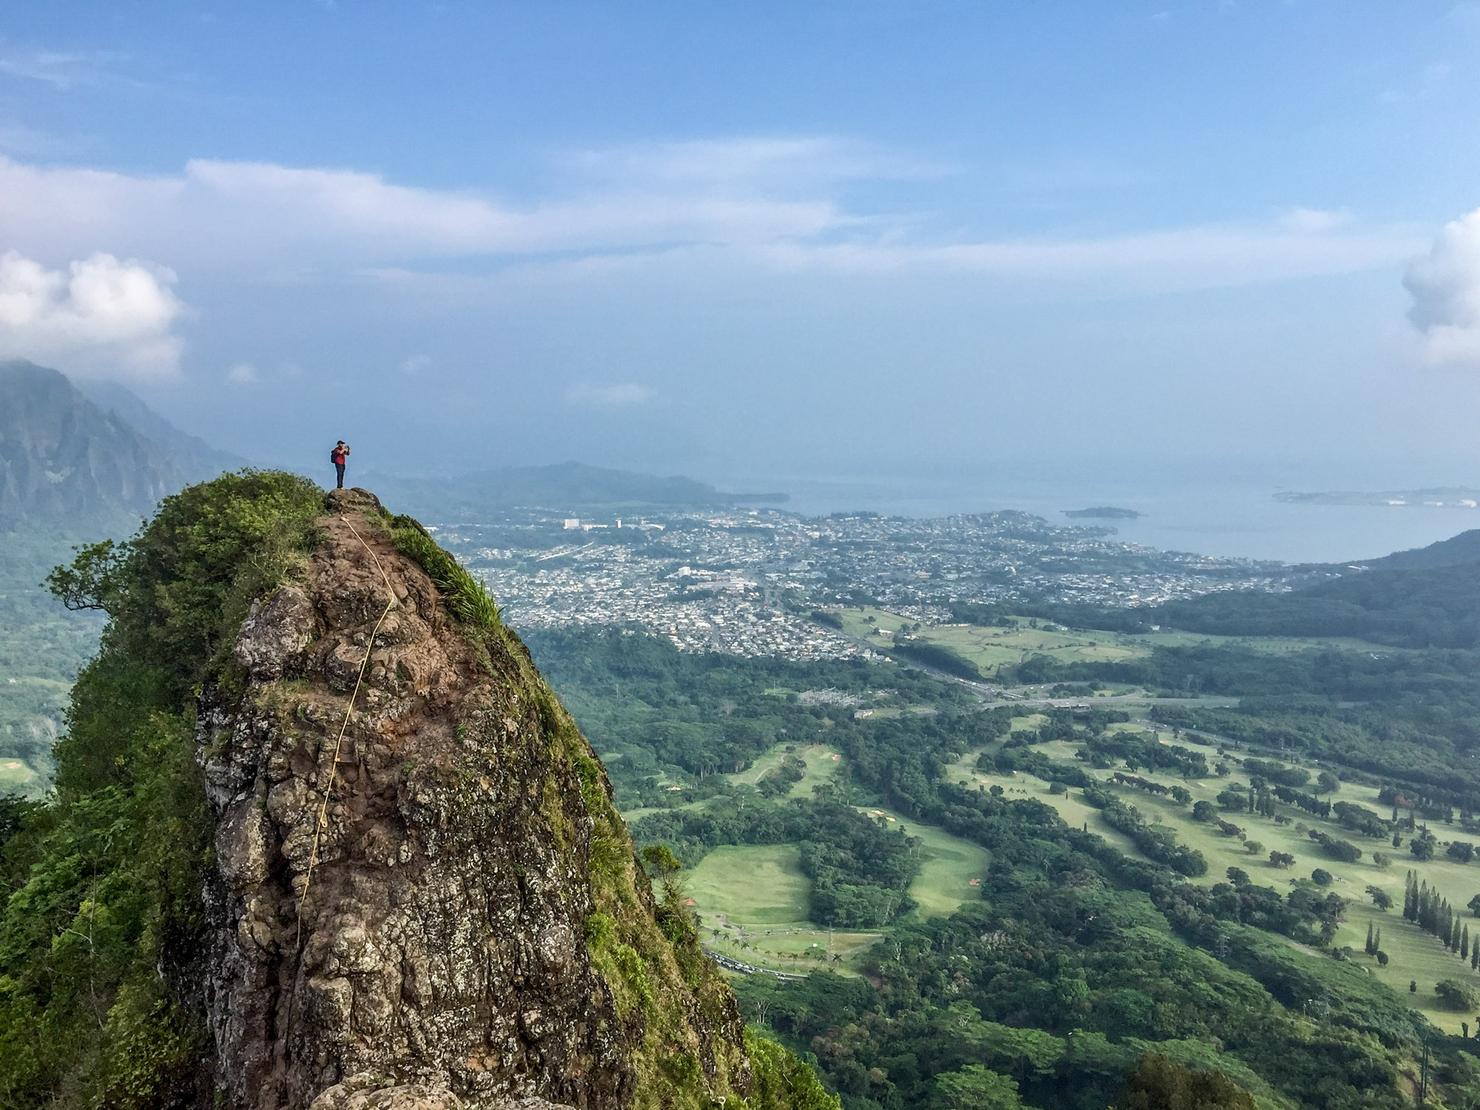
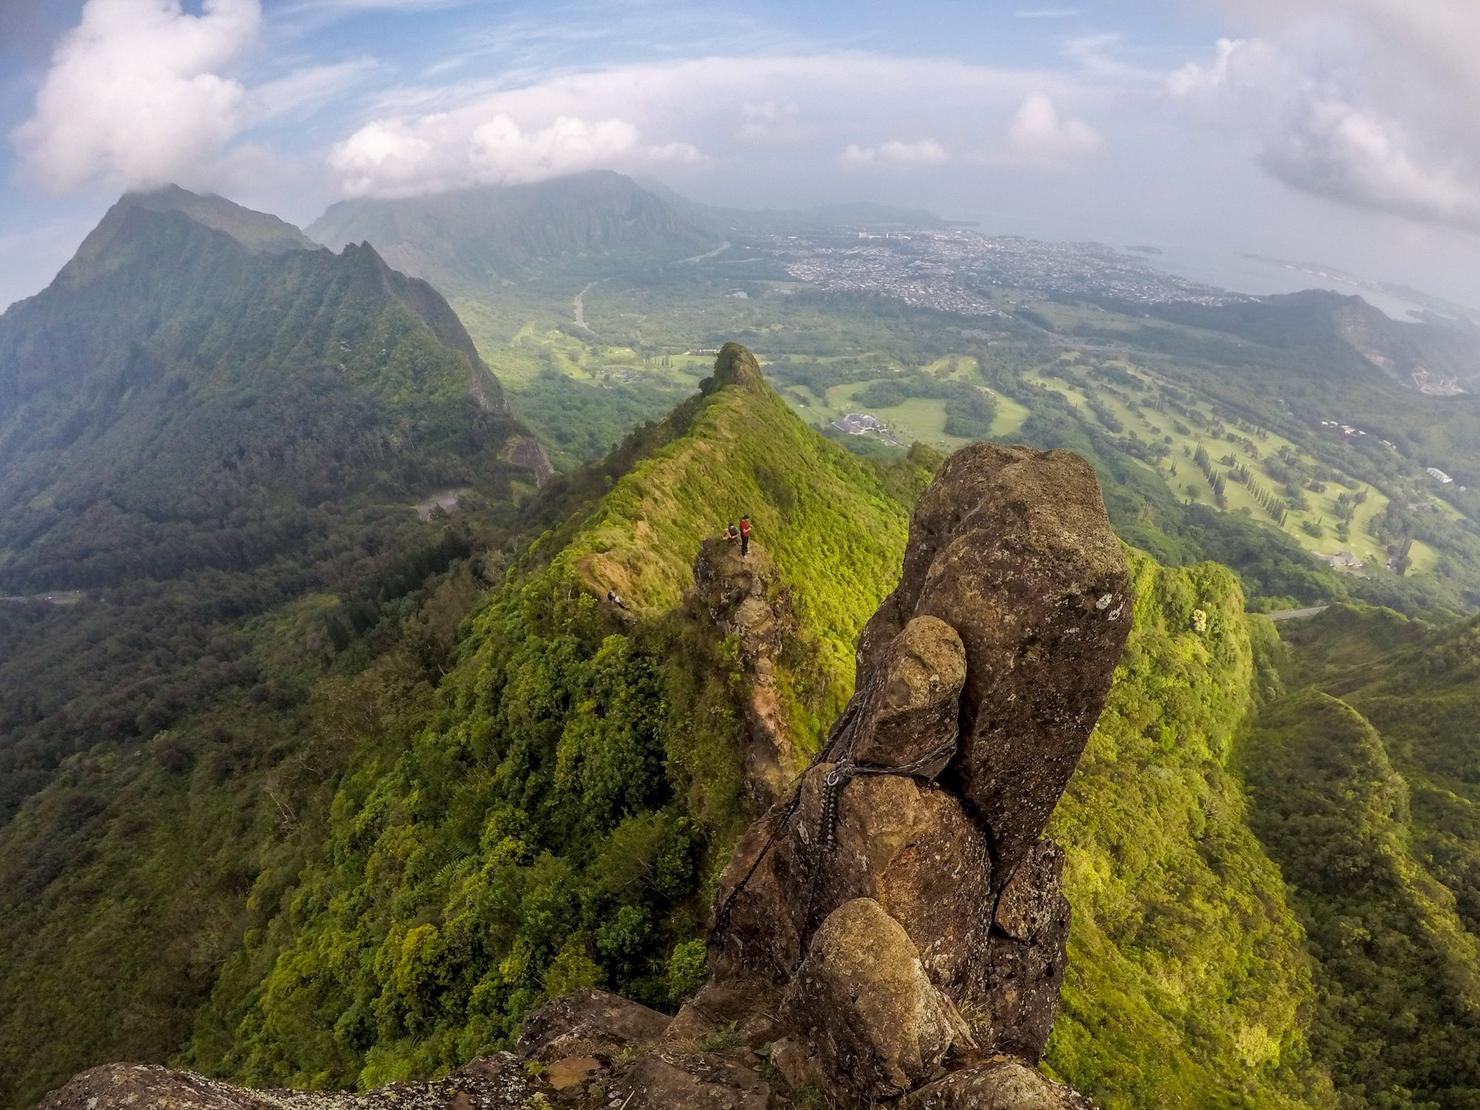
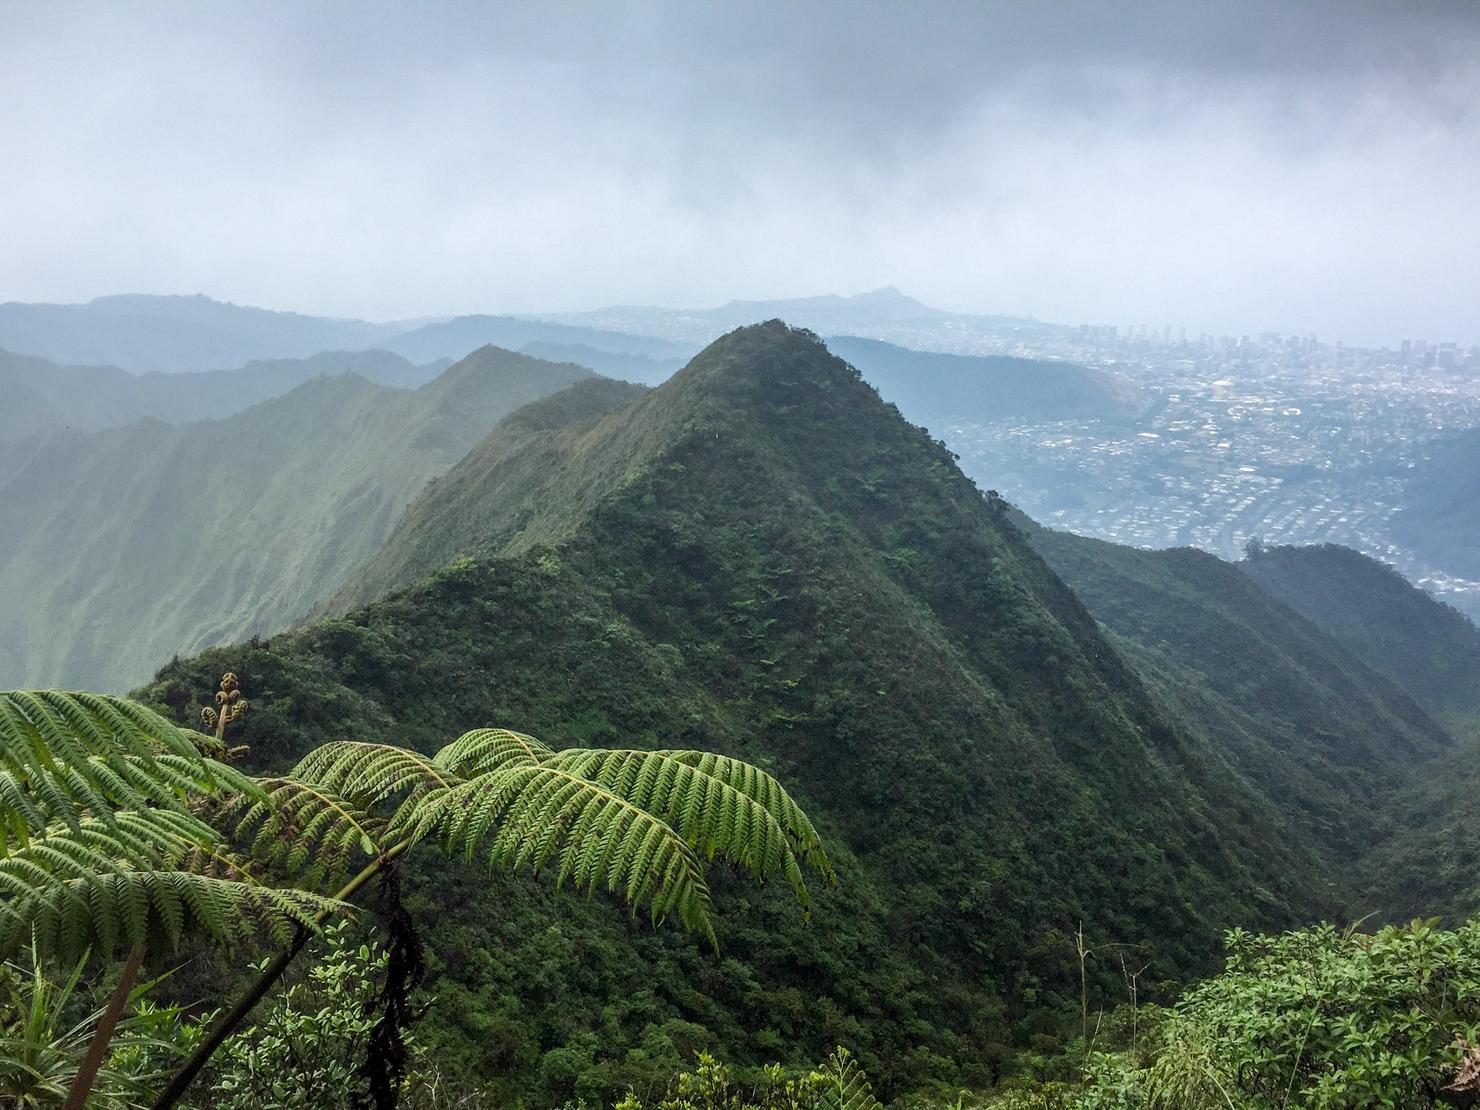
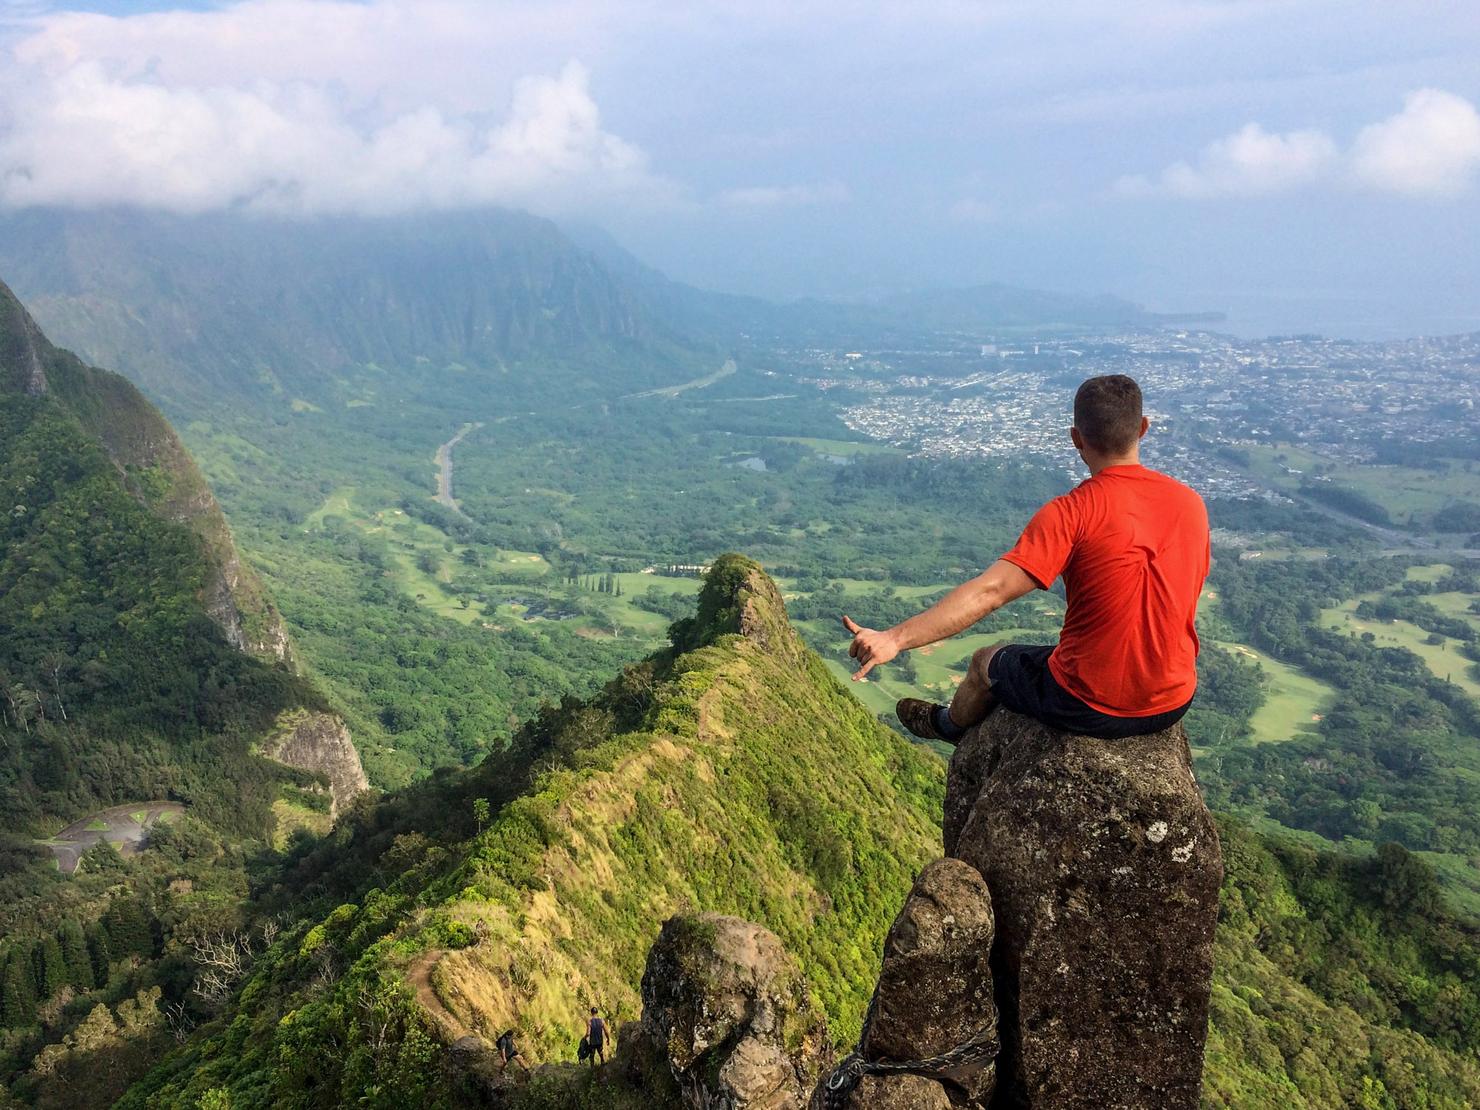
Our adventure begins up on the ridge. This is one of the most photographed areas on Oahu and for a good reason. Even on a cloudy day like this it's still beautiful.
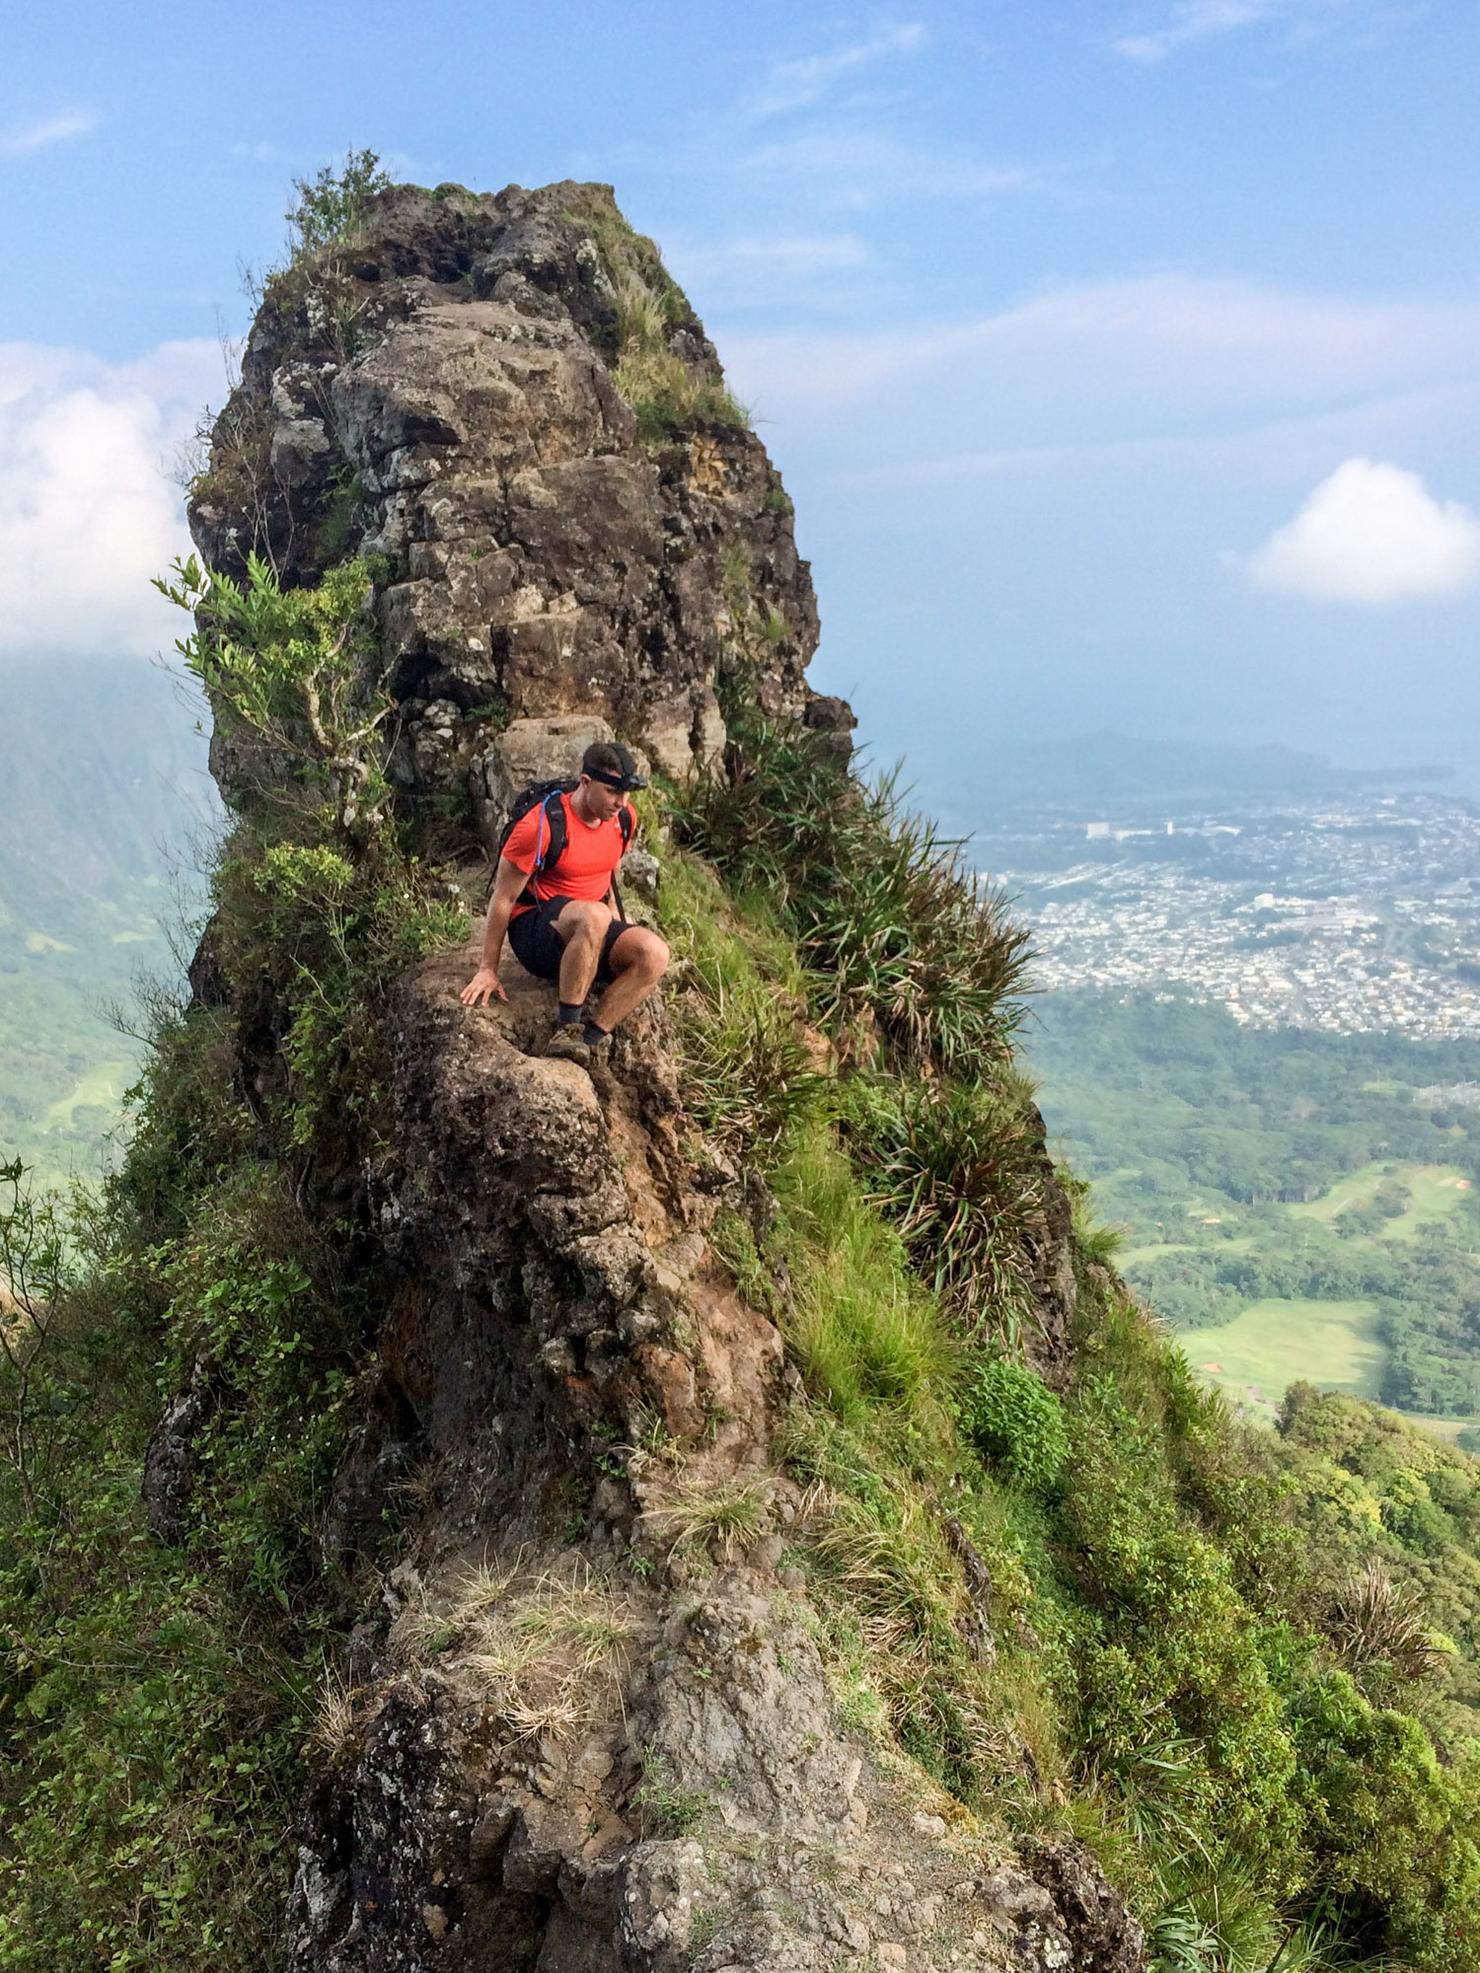
It's notch climbin' time! This is my 3rd time up here, so I've gotten comfortable with these descents. It can definitely make your skin crawl a bit if you haven't done it before. This is Peter going down notch number 1.
A shot looking back at the first notch. It was actually pretty crowded up here this morning. There were at least four other groups hiking. I seriously doubted all (or any) of them would be making the trek to K1, but we will see.
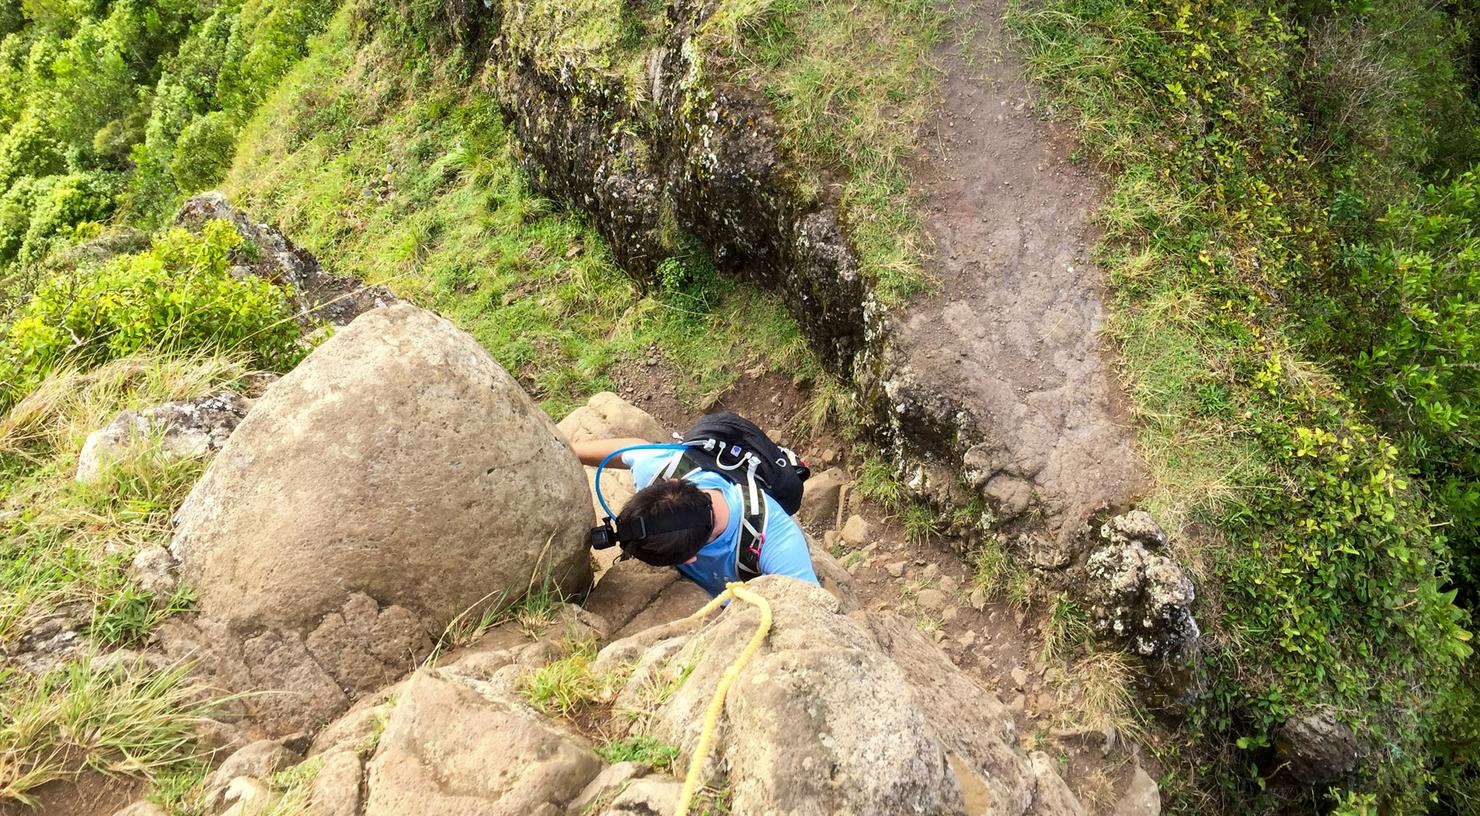
Now Notch Number 2! It may not look like much from this picture...
But I assure you it's no walk in the park. Finding the holds is sometimes tricky. I often rely on the rope more than I would like to.
Looking back at notch number 2.
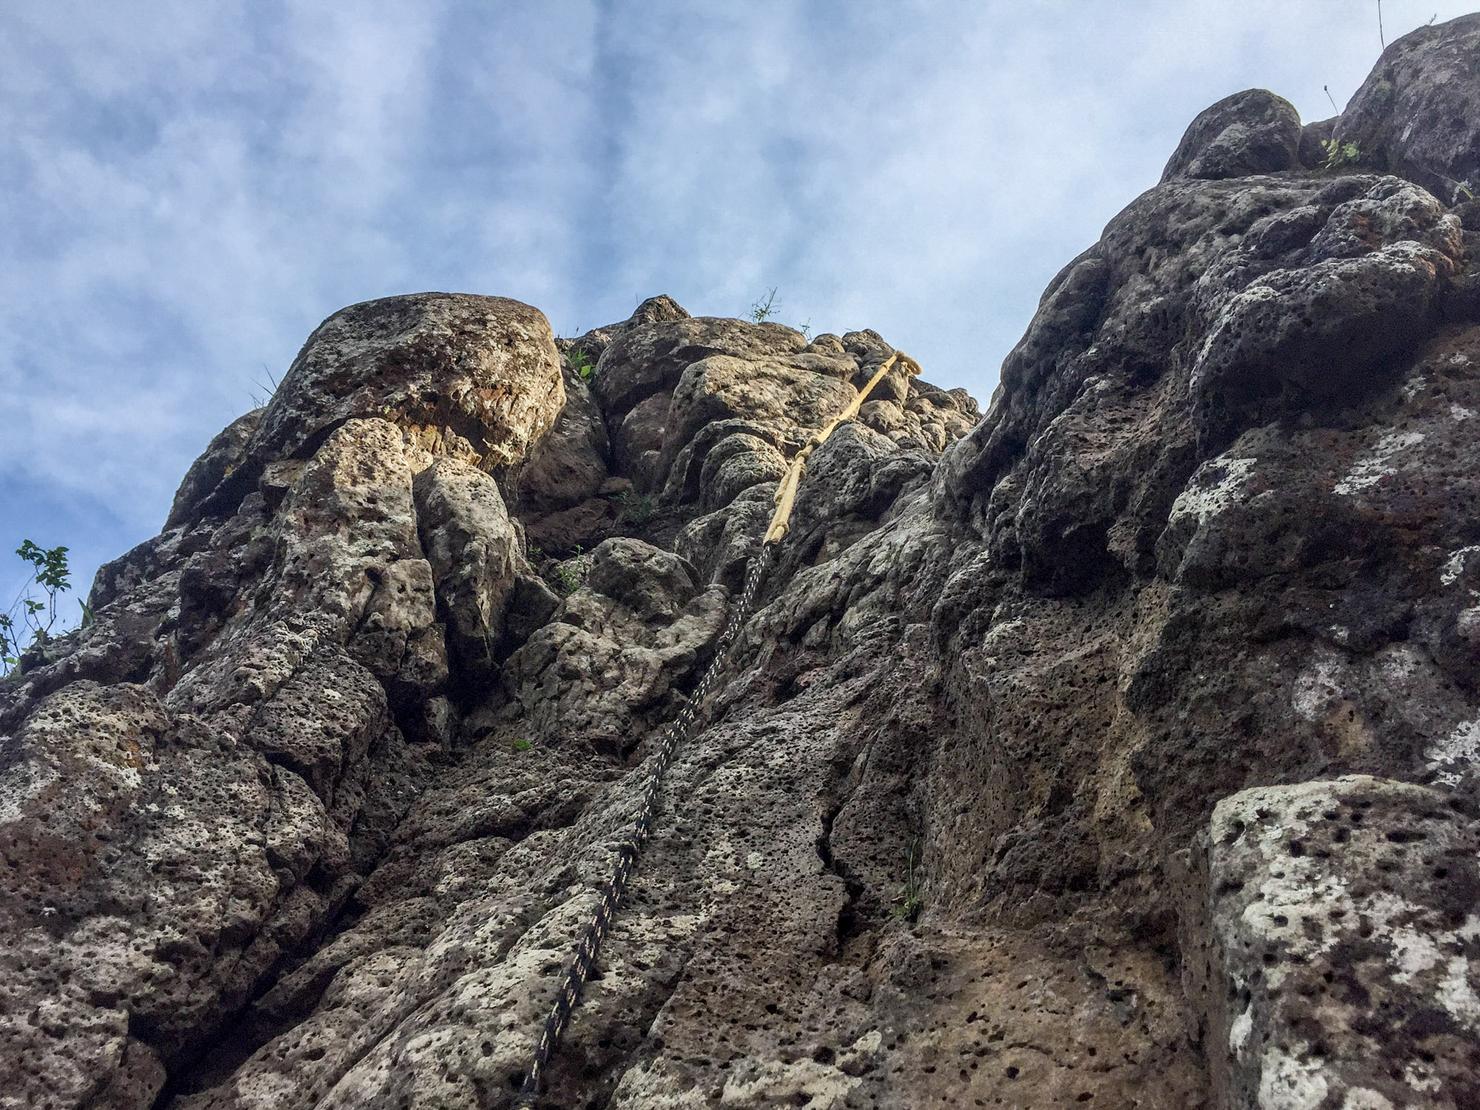
But now it's on to the most intimidating/dangerous part of this hike, The Chimney.
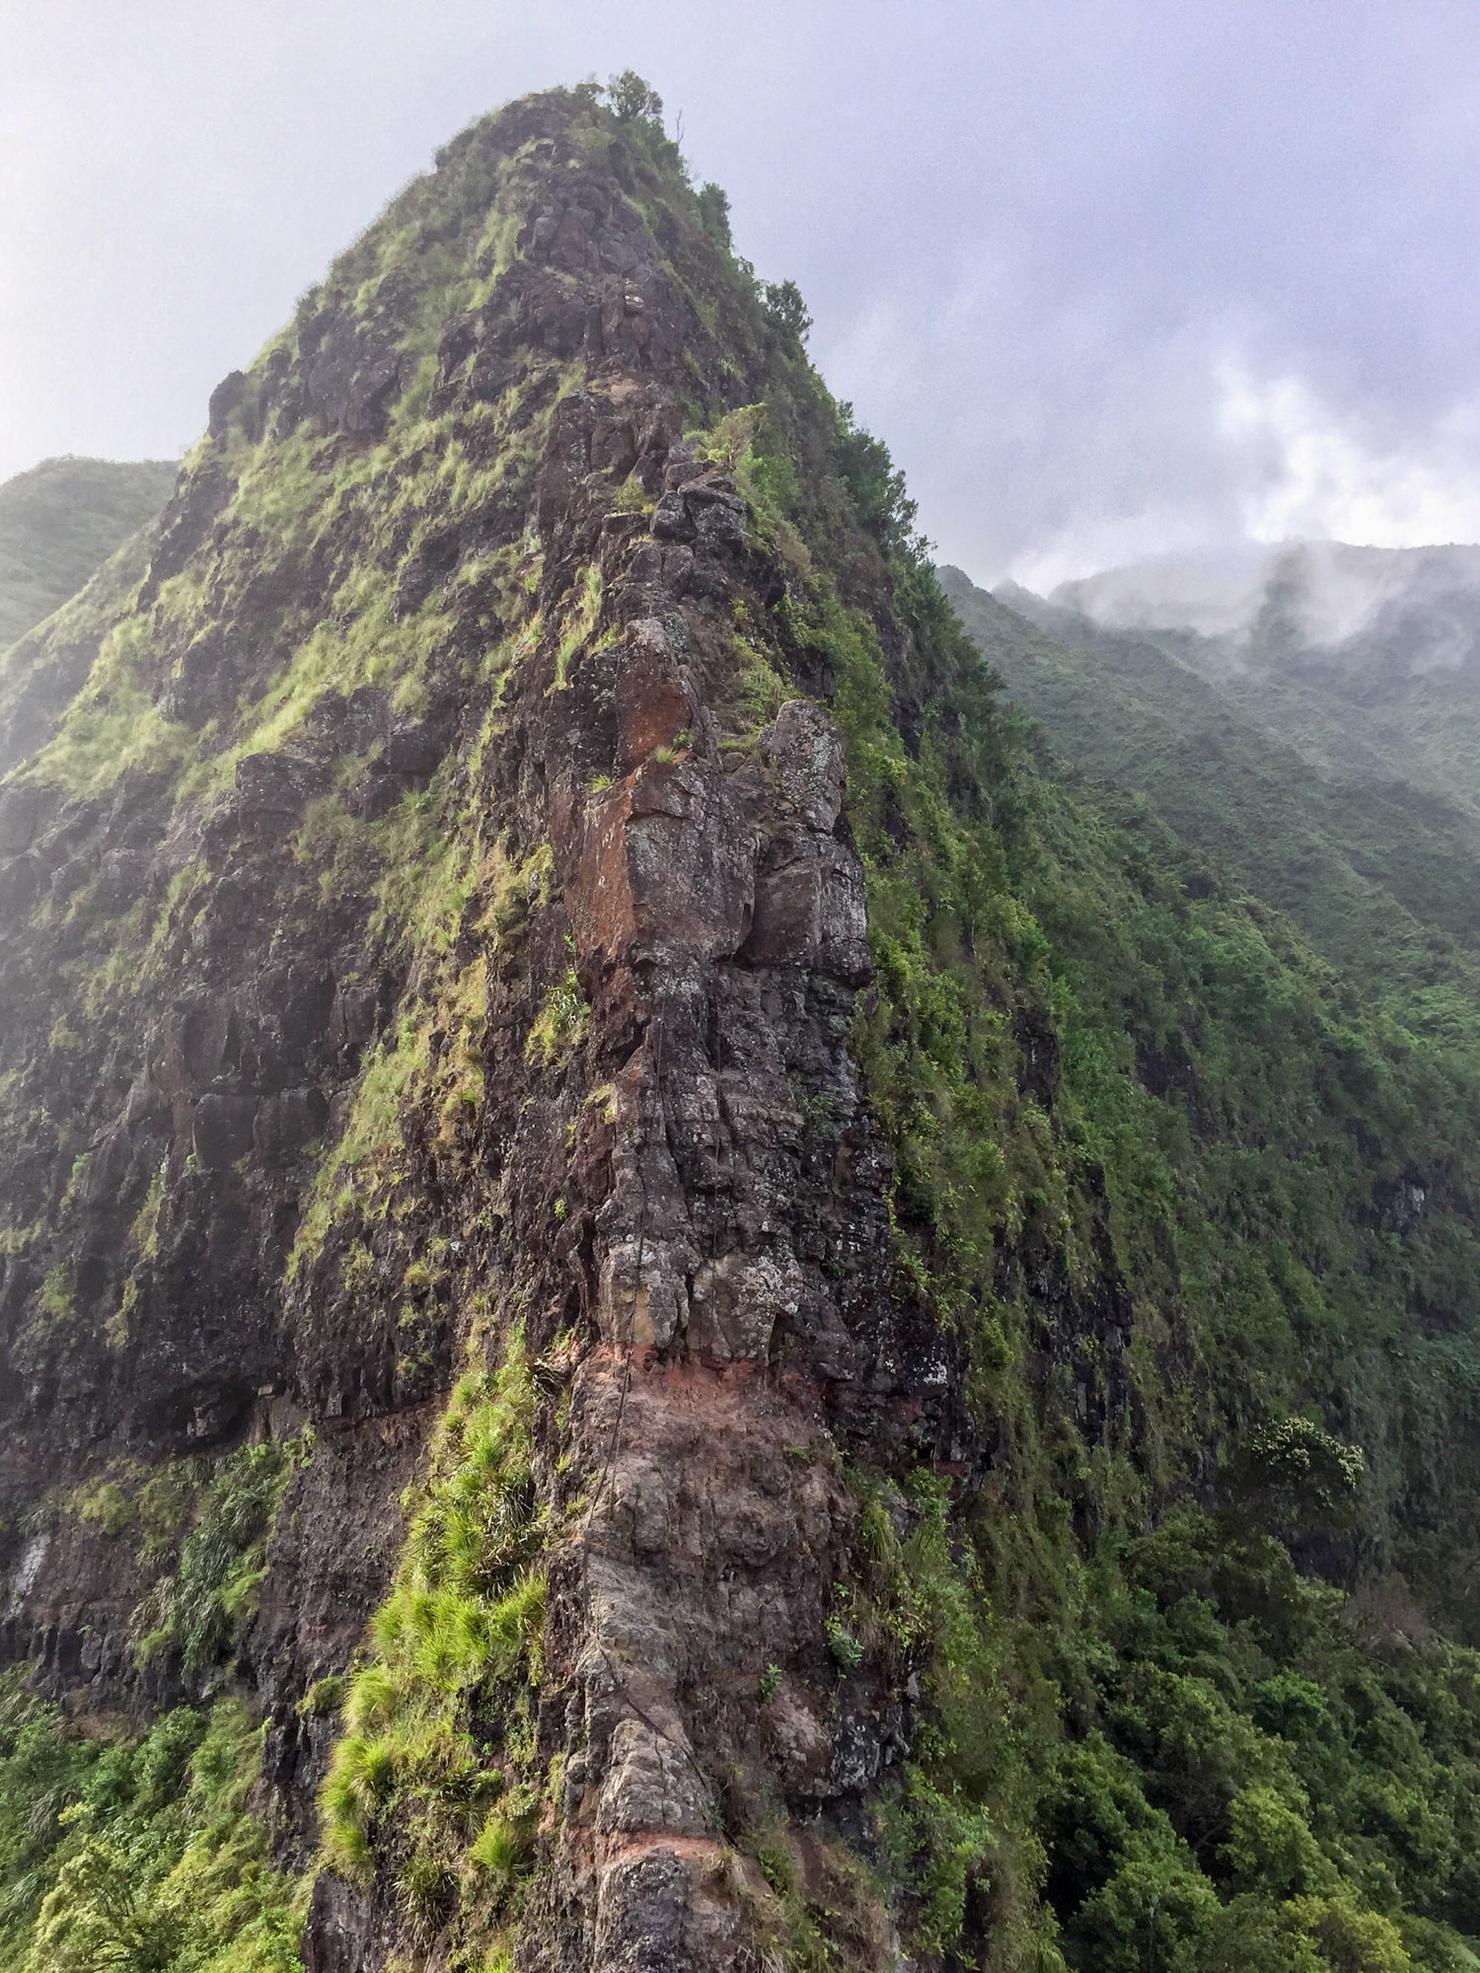
And there it is! The Chimney is a large, vertical rock face with several hundred foot dropoffs on each side. To ascend it, you are required to free climb with only the help of some previously secured ropes. During my previous to visits to this spot, I did not climb it. Today's the day.
Getting to its base even requires some effort and care.
Here I am looking super tactical with my GoPro.
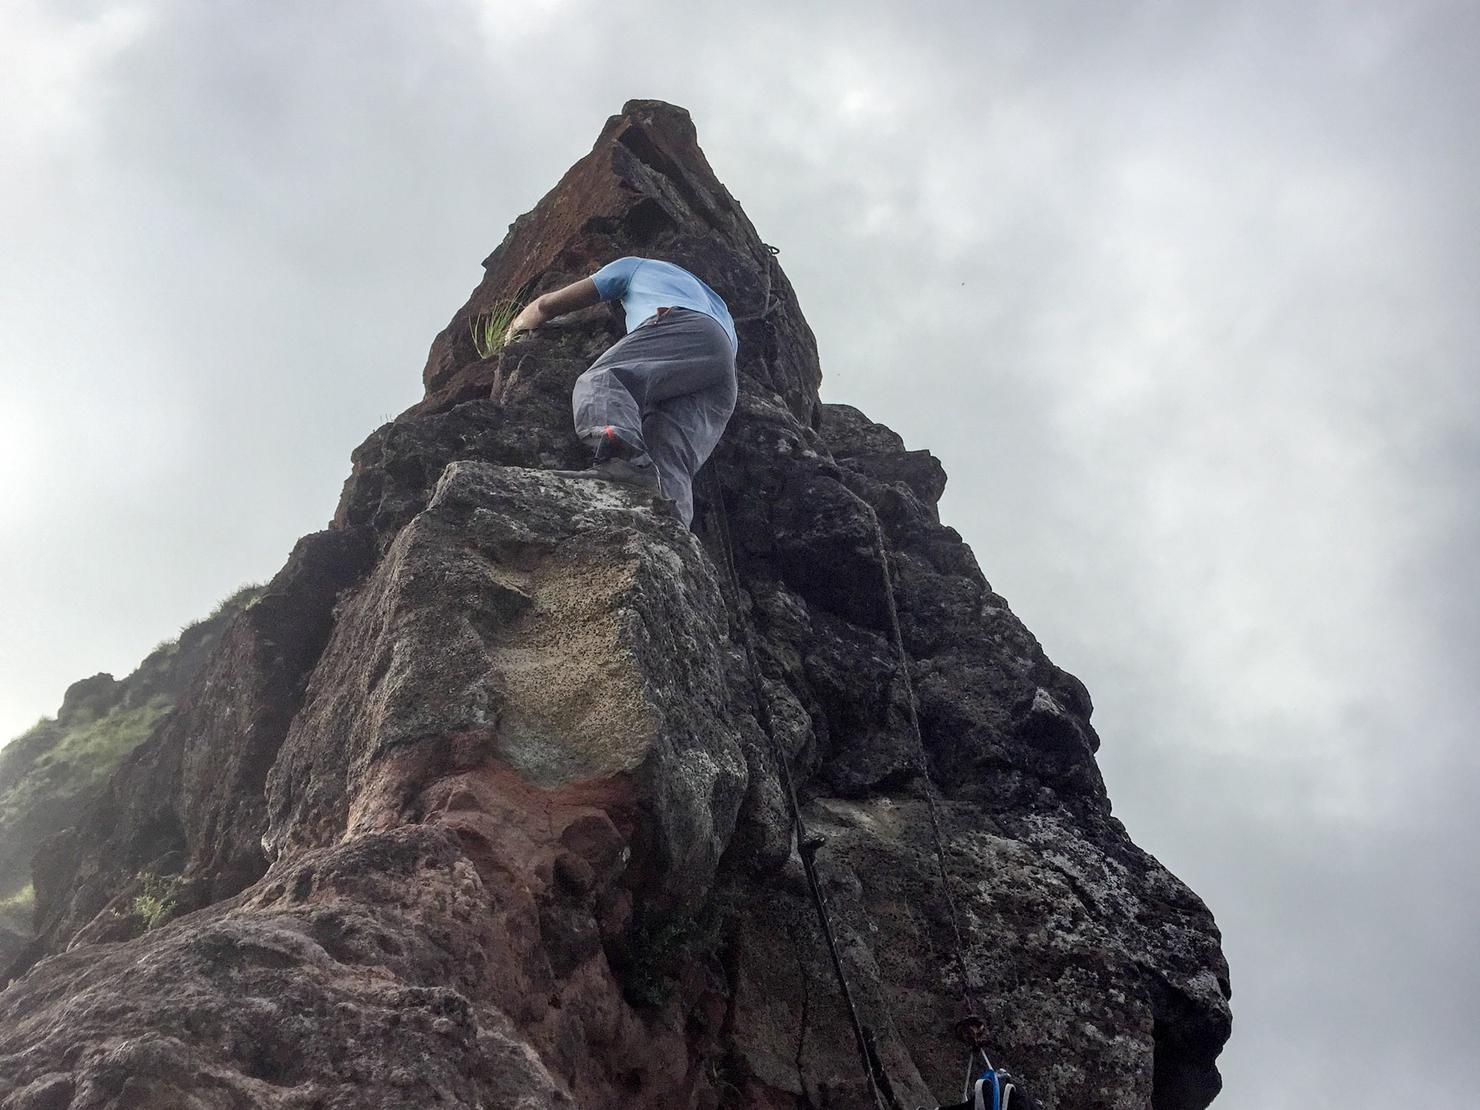
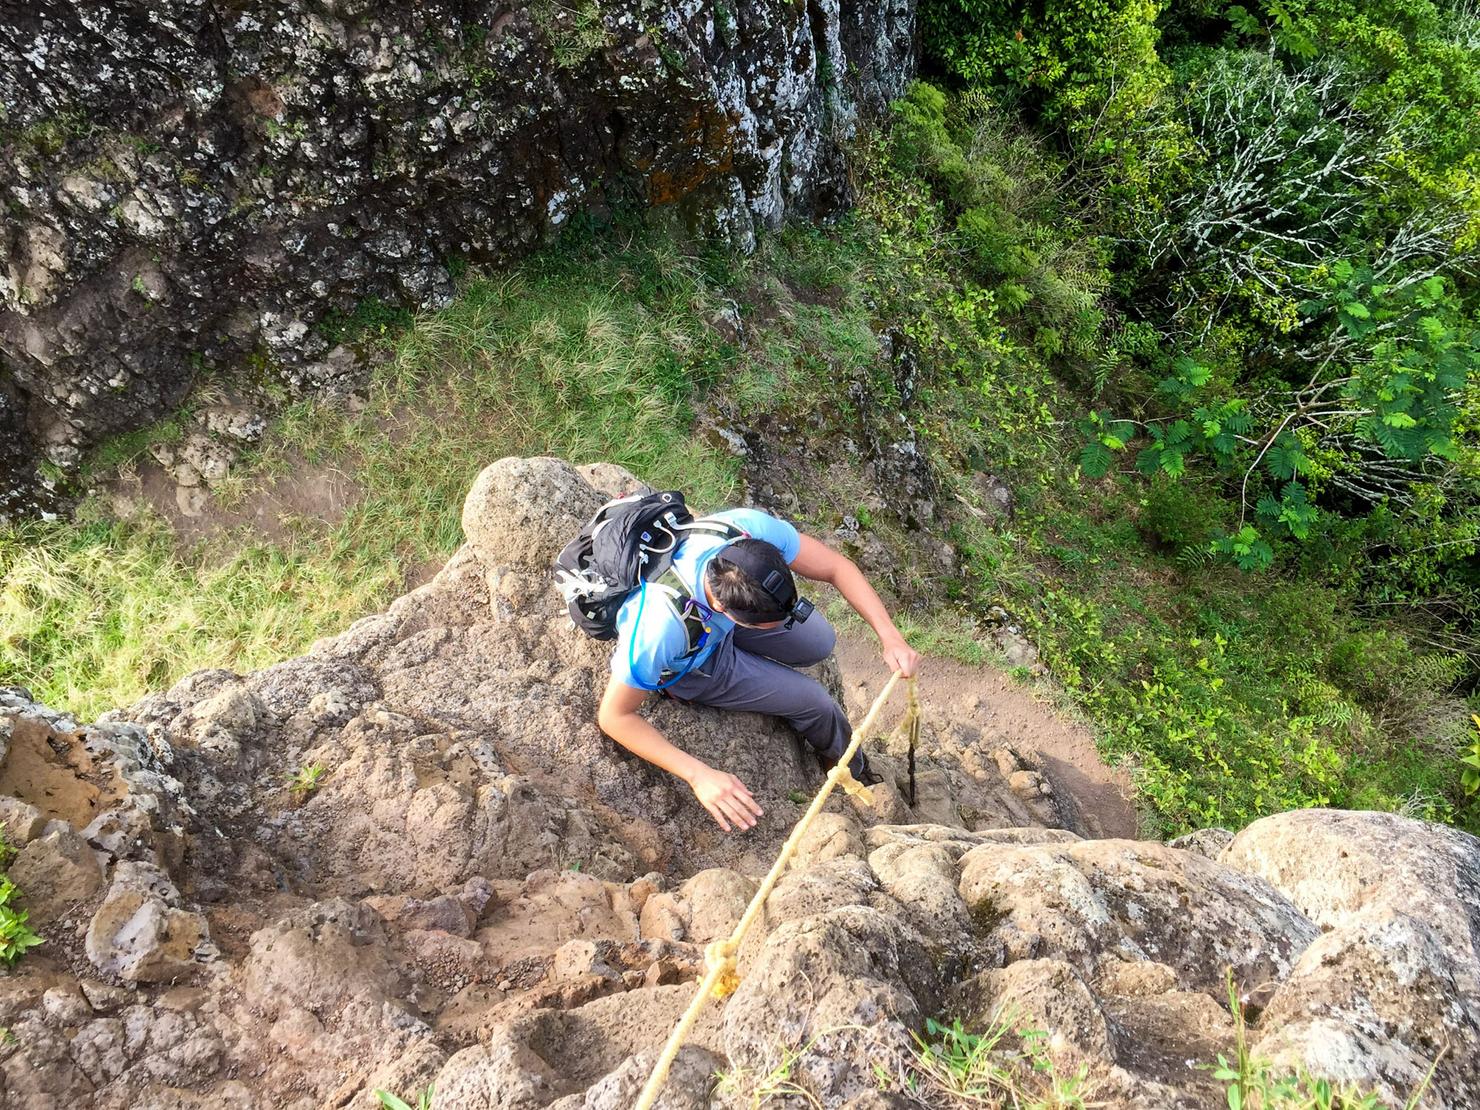
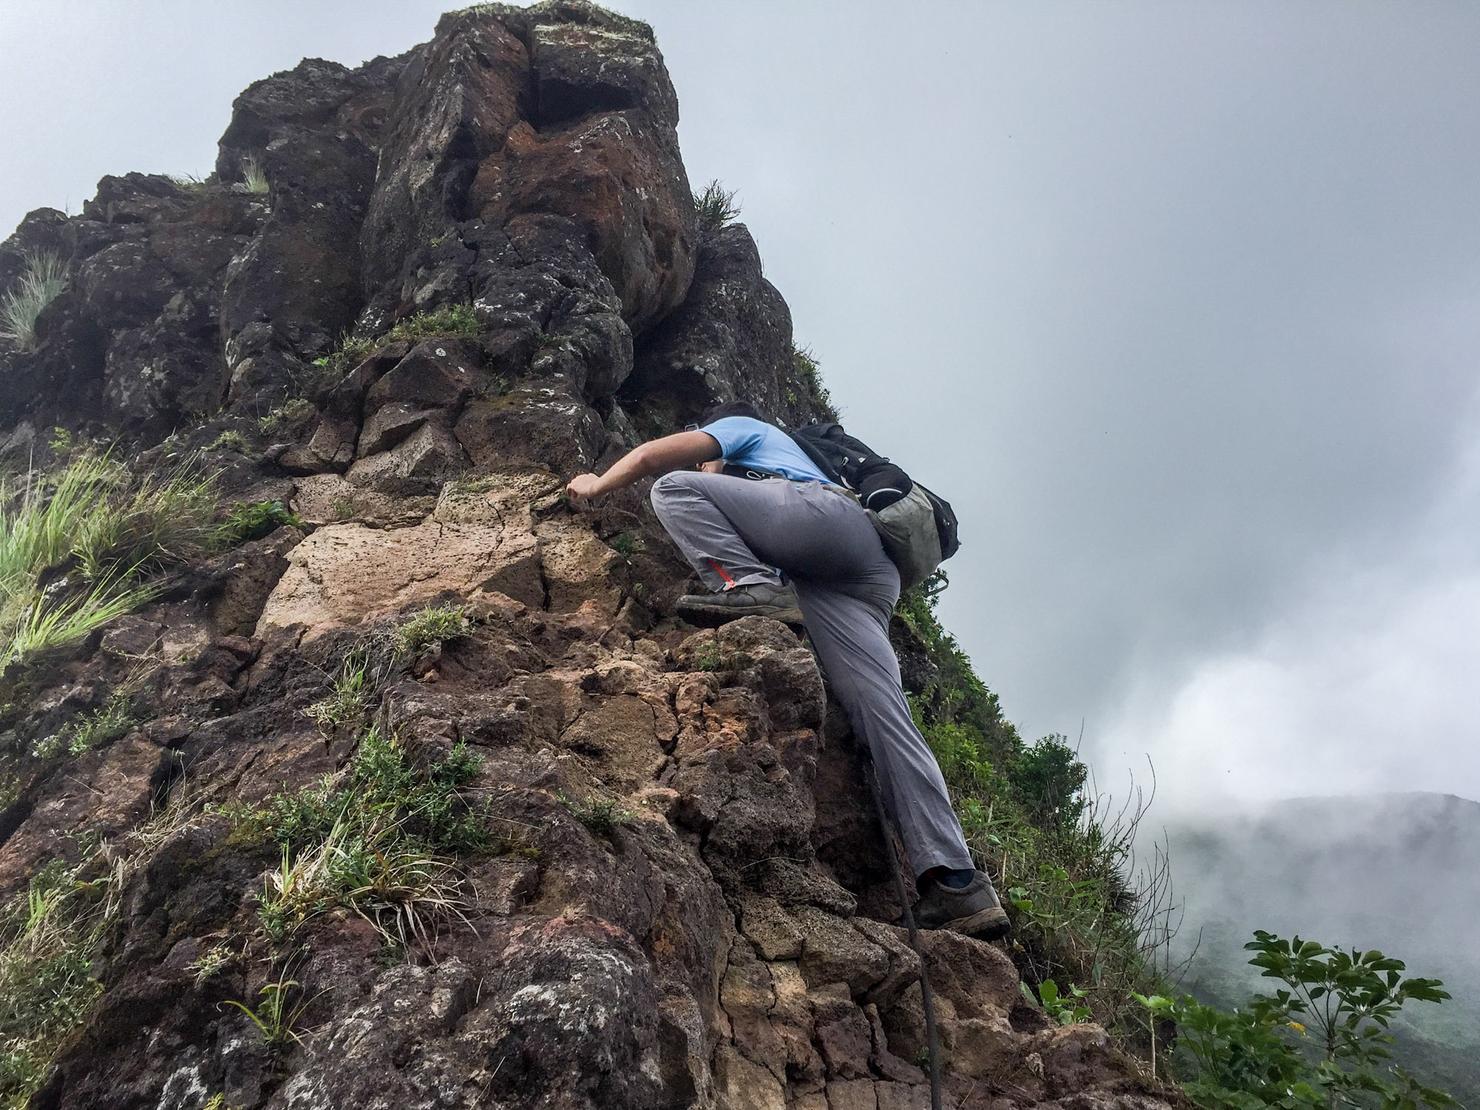
It's ascent time. Neither Peter nor I had done this before so we had to figure it out on the fly. Peter the fearless trailblazer when first. It's a trial and error climb. Make sure you find a good hold, then move on. Rely on the rope if you're out of options.

Peter actually tied off his backpack on one of the ropes so he didn't have to climb with it. It was a good idea... until the rope ran out. He was then required to put on his backpack on that little ledge. Needless to say, I decided to make the climb with my full gear.
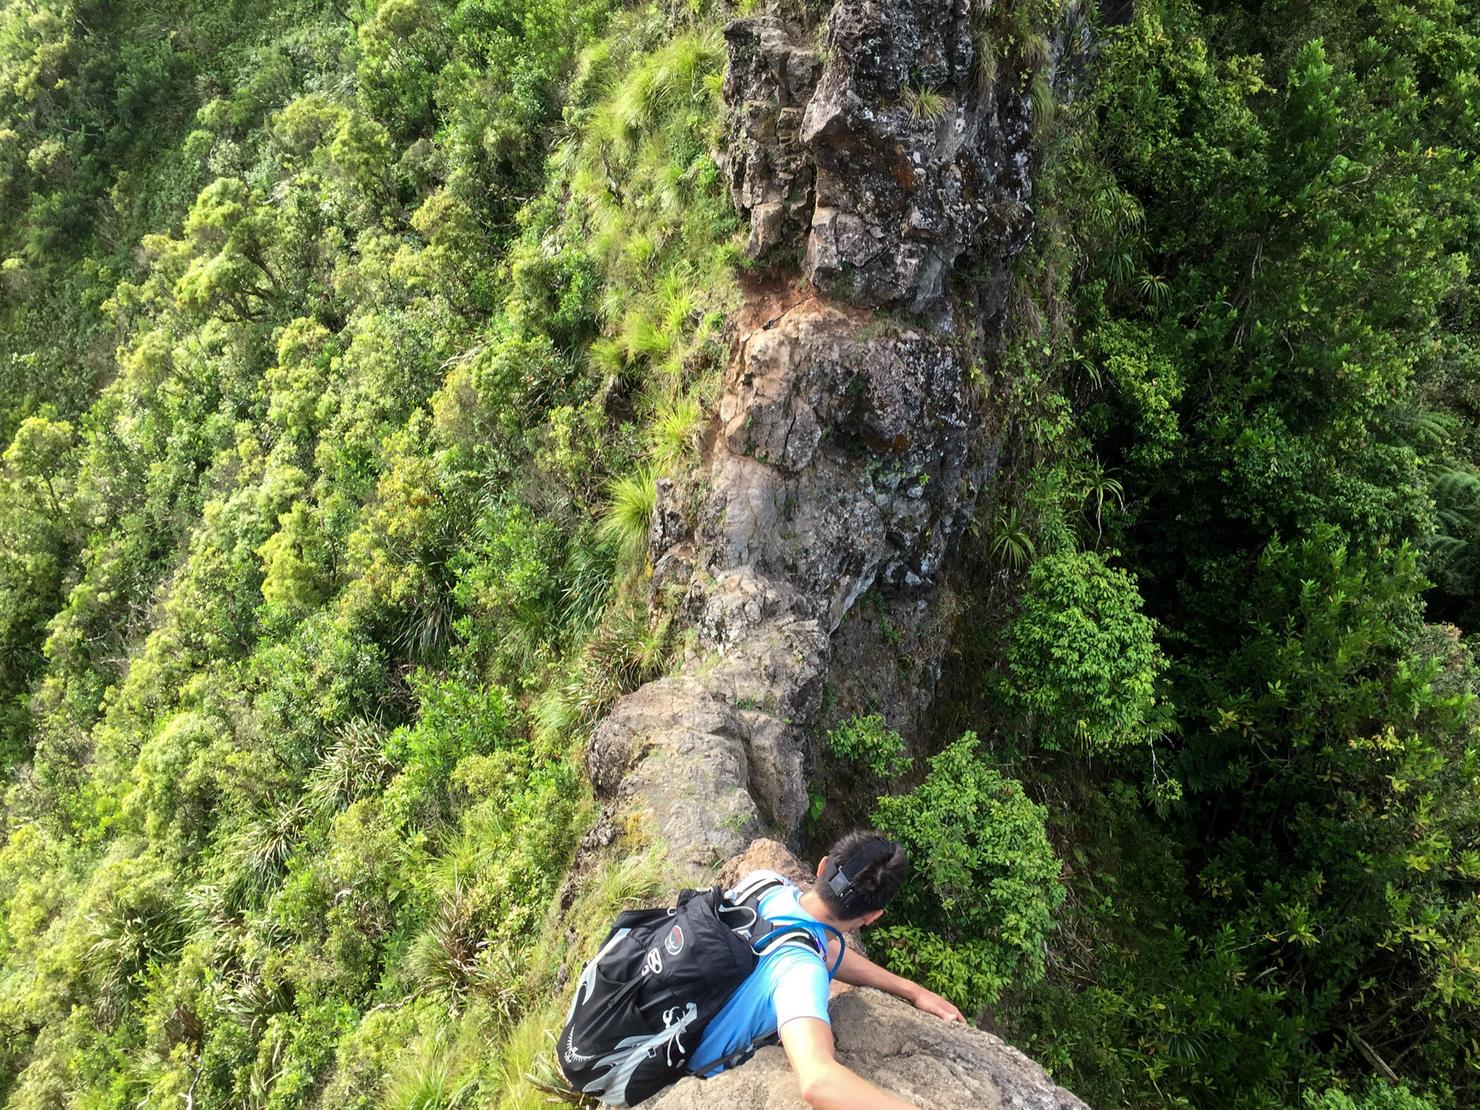
Here we go! Did I update my will? Too late now. I followed Peter's path which began on the left side of the chimney where there are some descent holds.
I then transitioned to the right side of the chimney where there are less holds but the rock is much sturdier. If you can't tell from my flexed arm, I am relying pretty heavily on the rope here. Just one final pull of faith to reach the top...
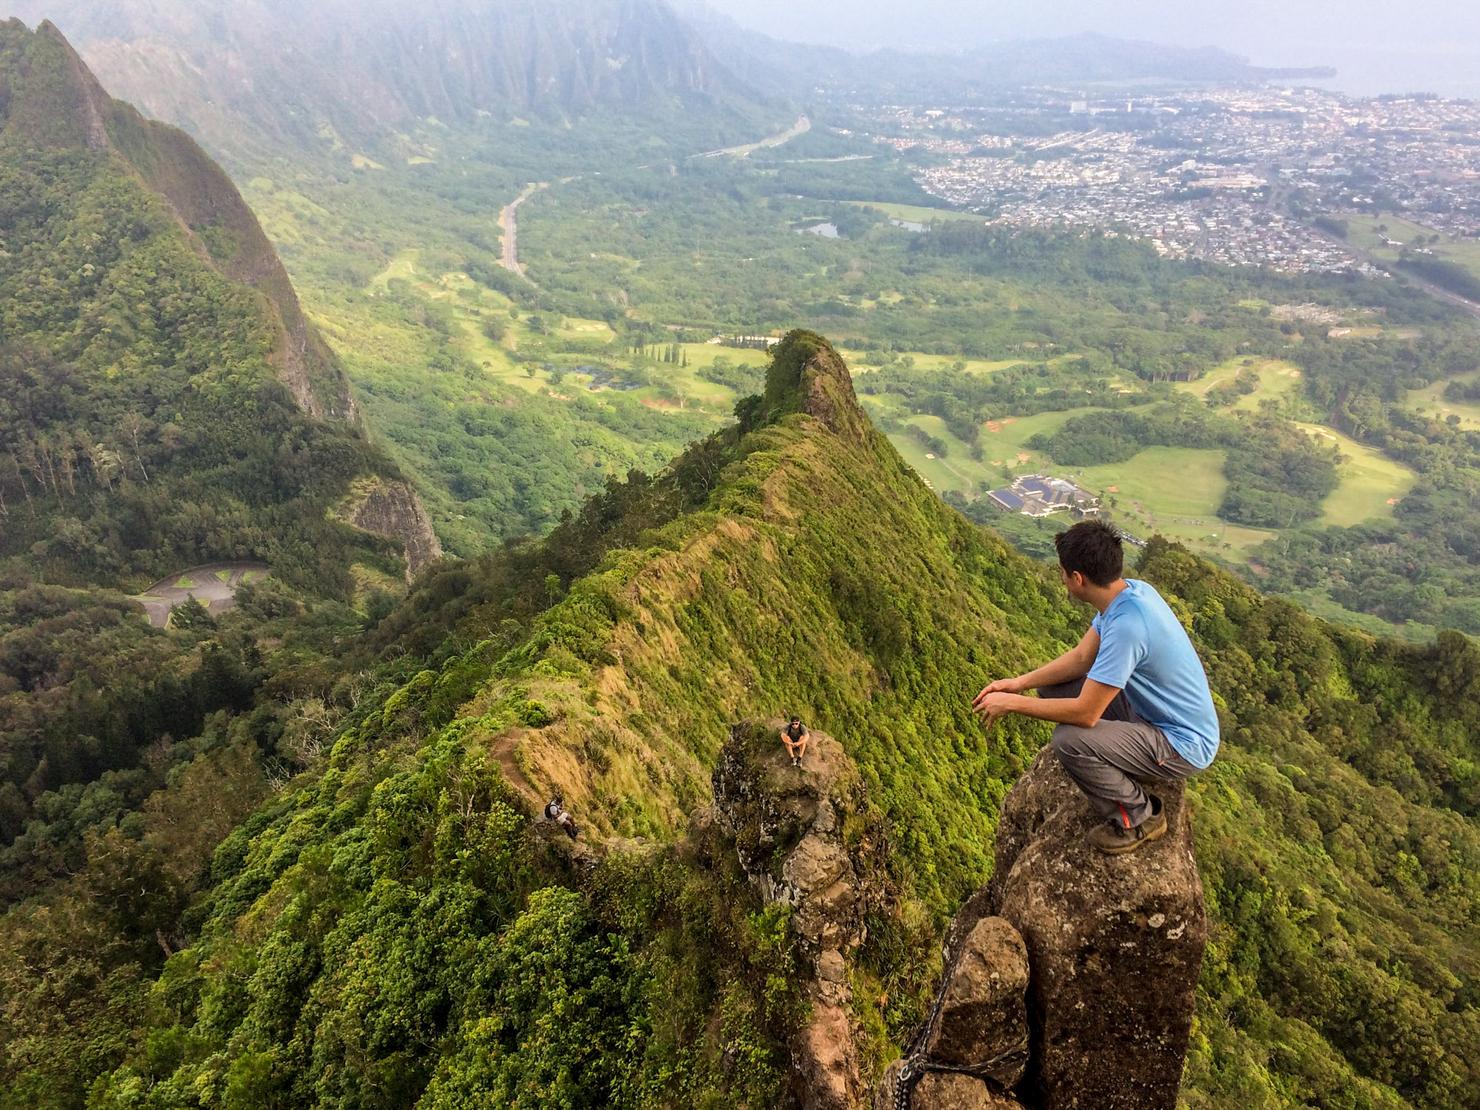
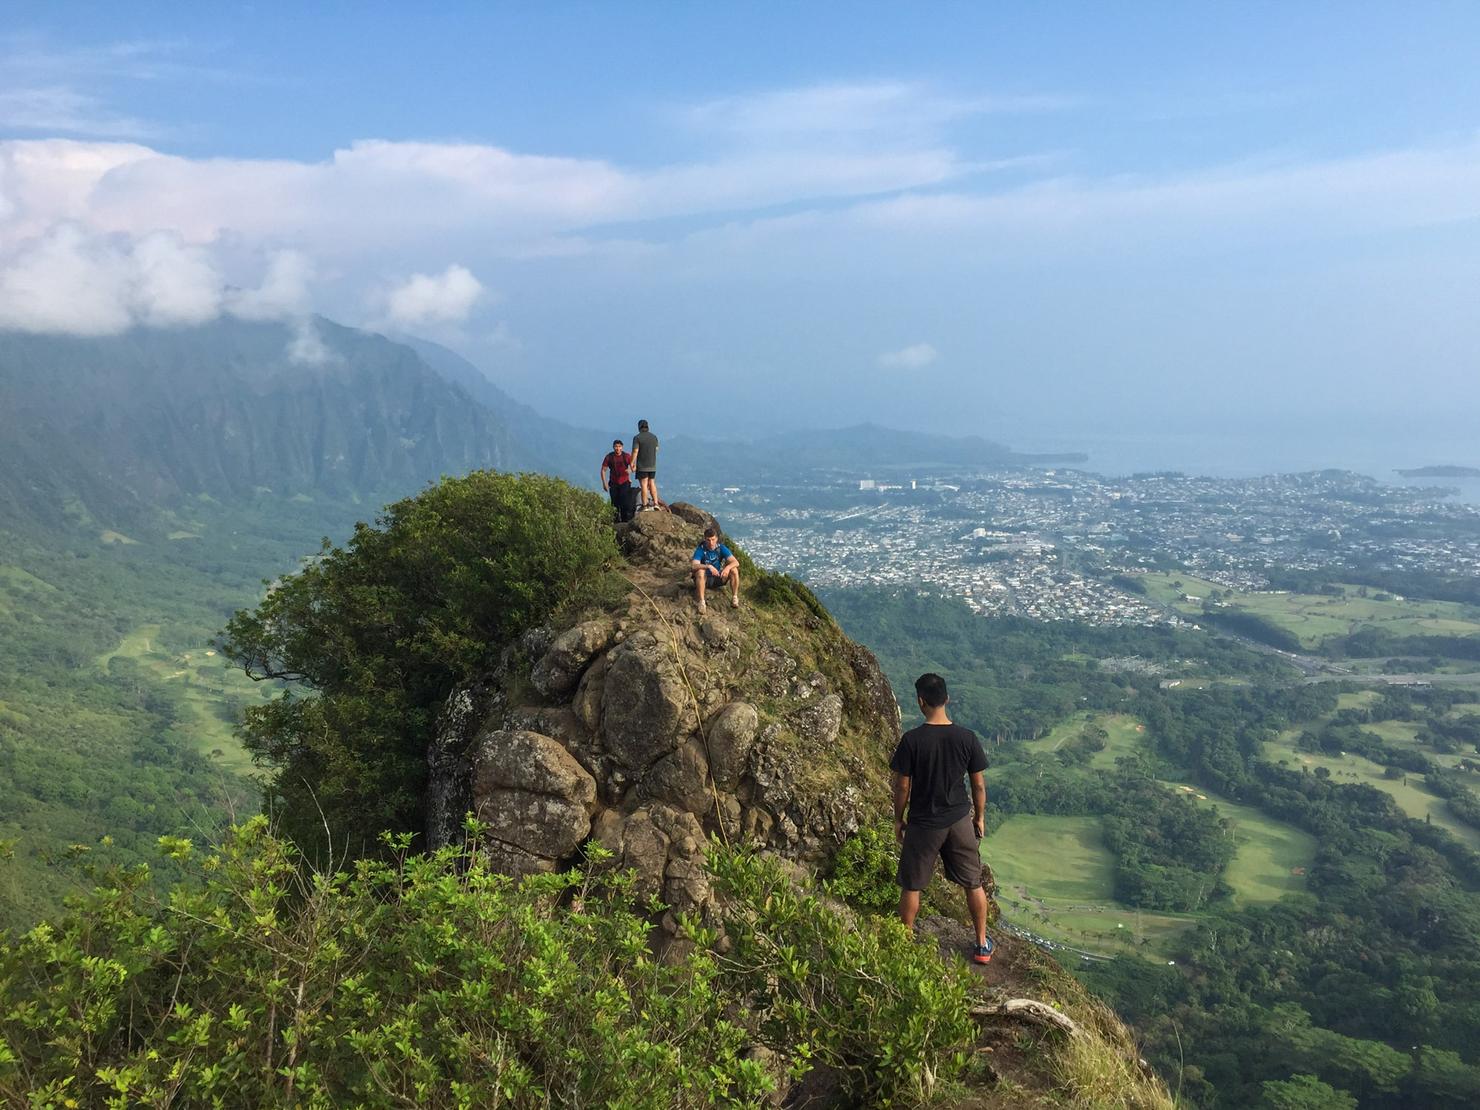
We did it! Adrenaline was coursing through my veins as I reached the top of the chimney. I'd seen so many amazing pictures of this place and now I was finally here. You know what that means...

Picture time! I told myself I wouldn't stand up on the chimney when I got up there, but alas the urge for a great insta took over and I rose. Definitely scary, but I was able to stand there for a good 30 seconds or so. I had to let the spectators below capture me for their snap stories. FYI, none of them climbed up the chimney, just us. I won't lie, it definitely boosted the ego a bit.
I love this shot of Peter on the chimney. Taking in what we'd just accomplished.
But it's time to stop thinking Peter, because we got more climbing to do! Nothing is as challenging as the chimney, but these scrambles were plenty tricky. Definitely do not let your guard down.
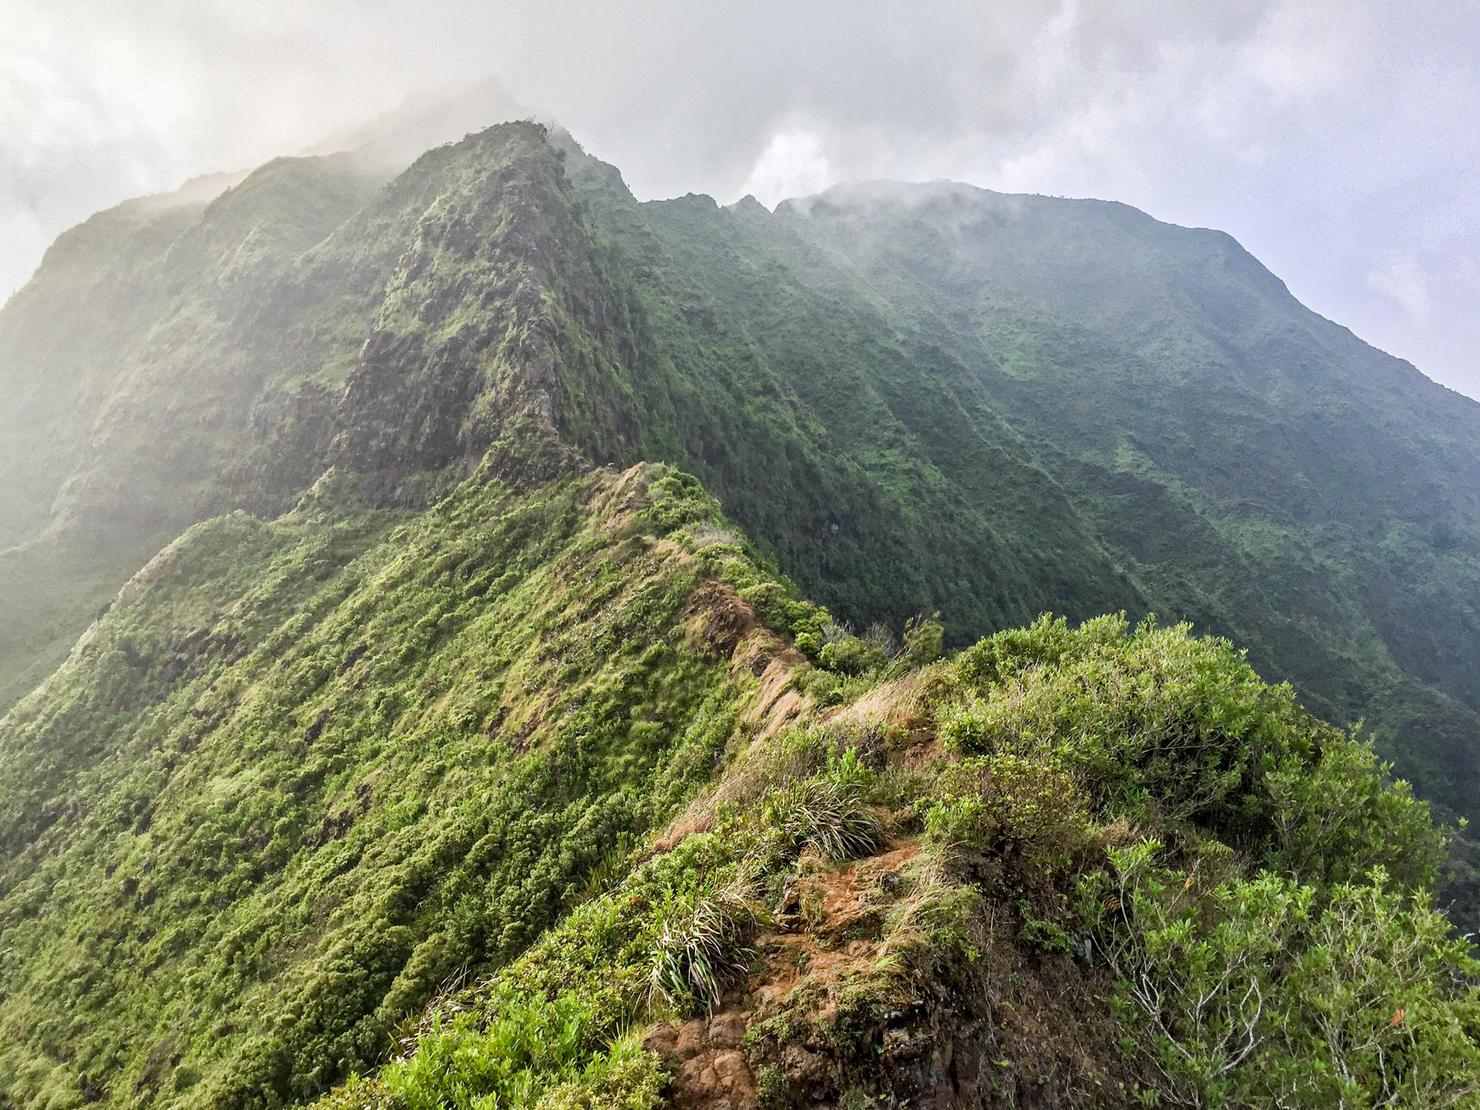
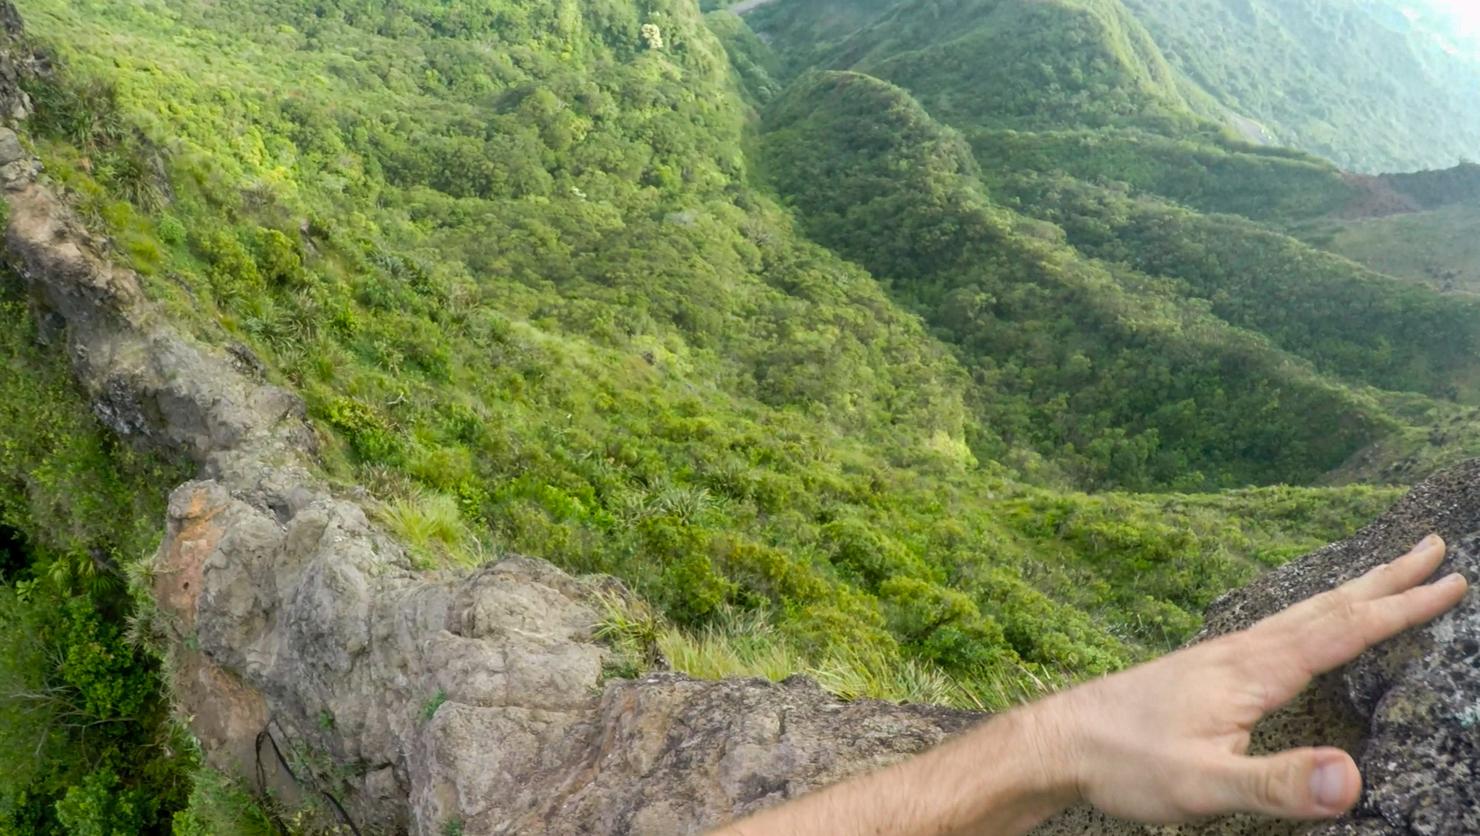
Way above the notches now.
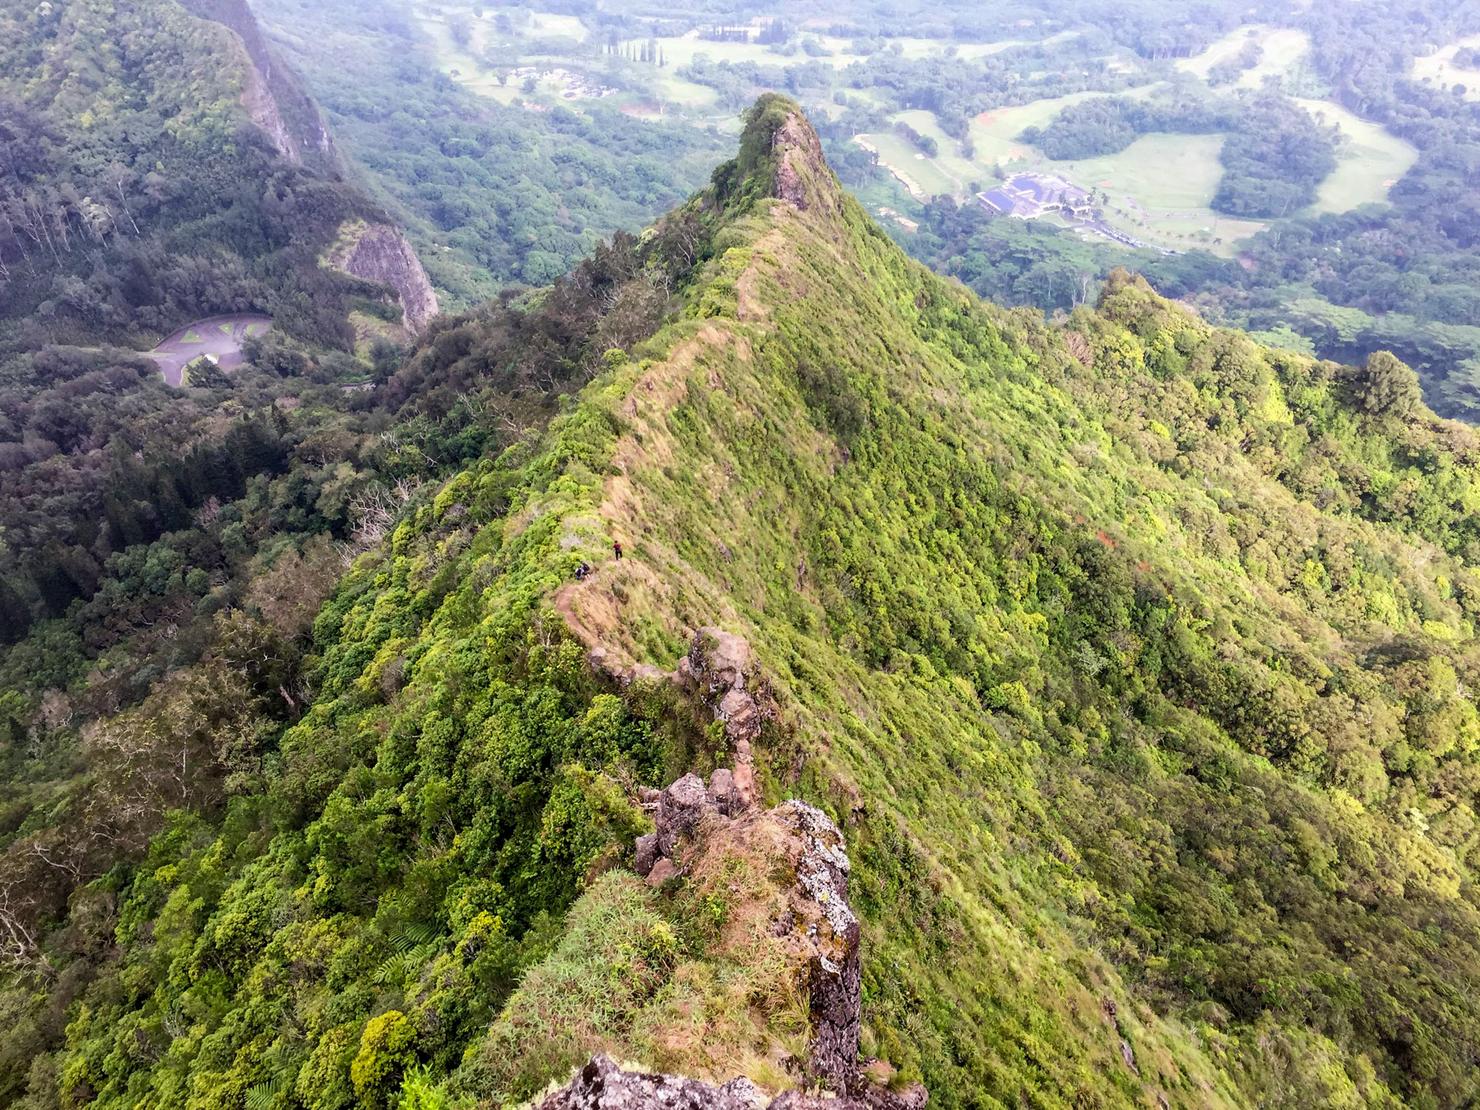
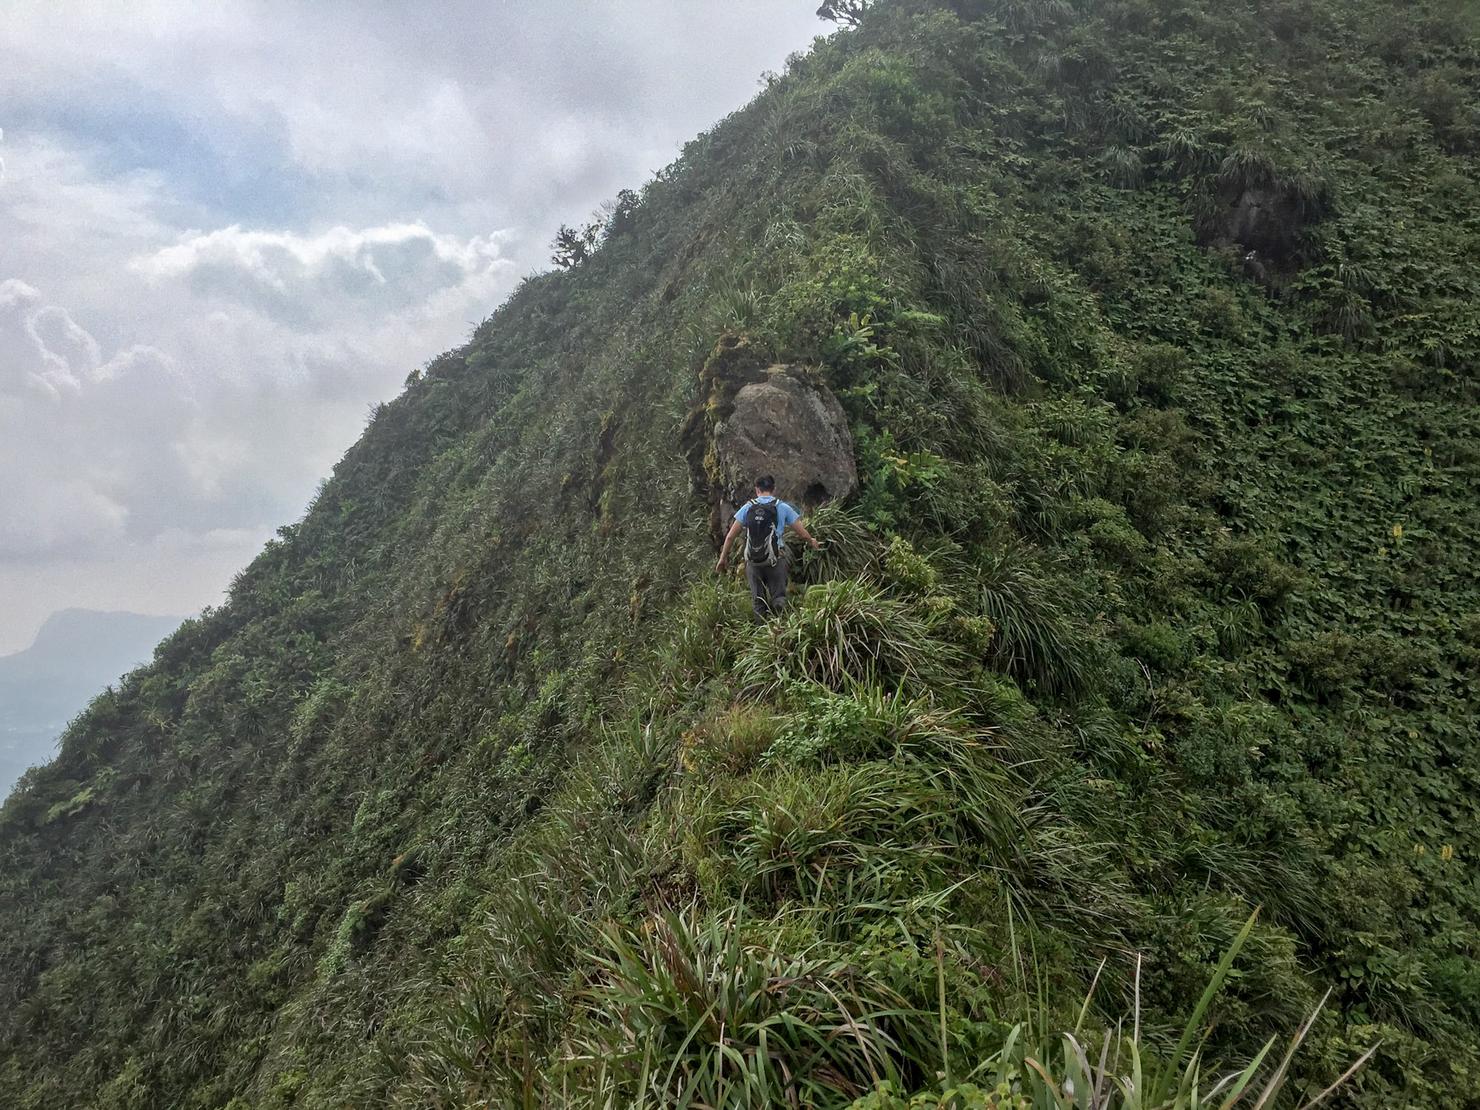
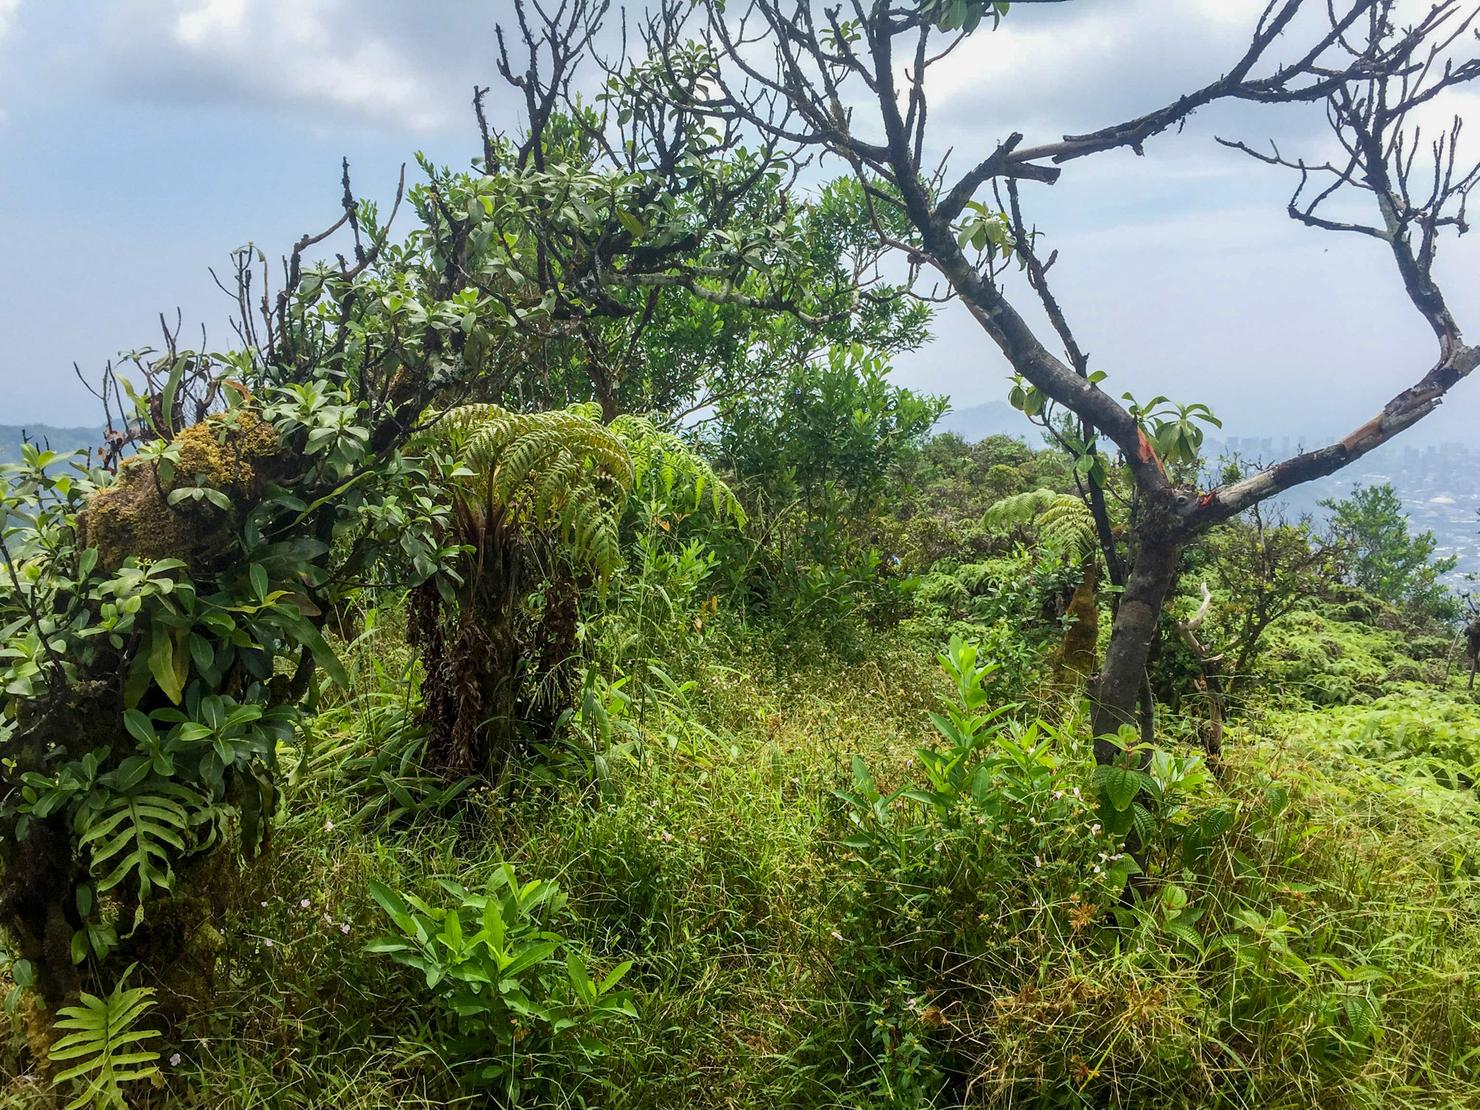
Eventually the rock climbing portion comes to an end and it turns in to a grassy ridge hike.
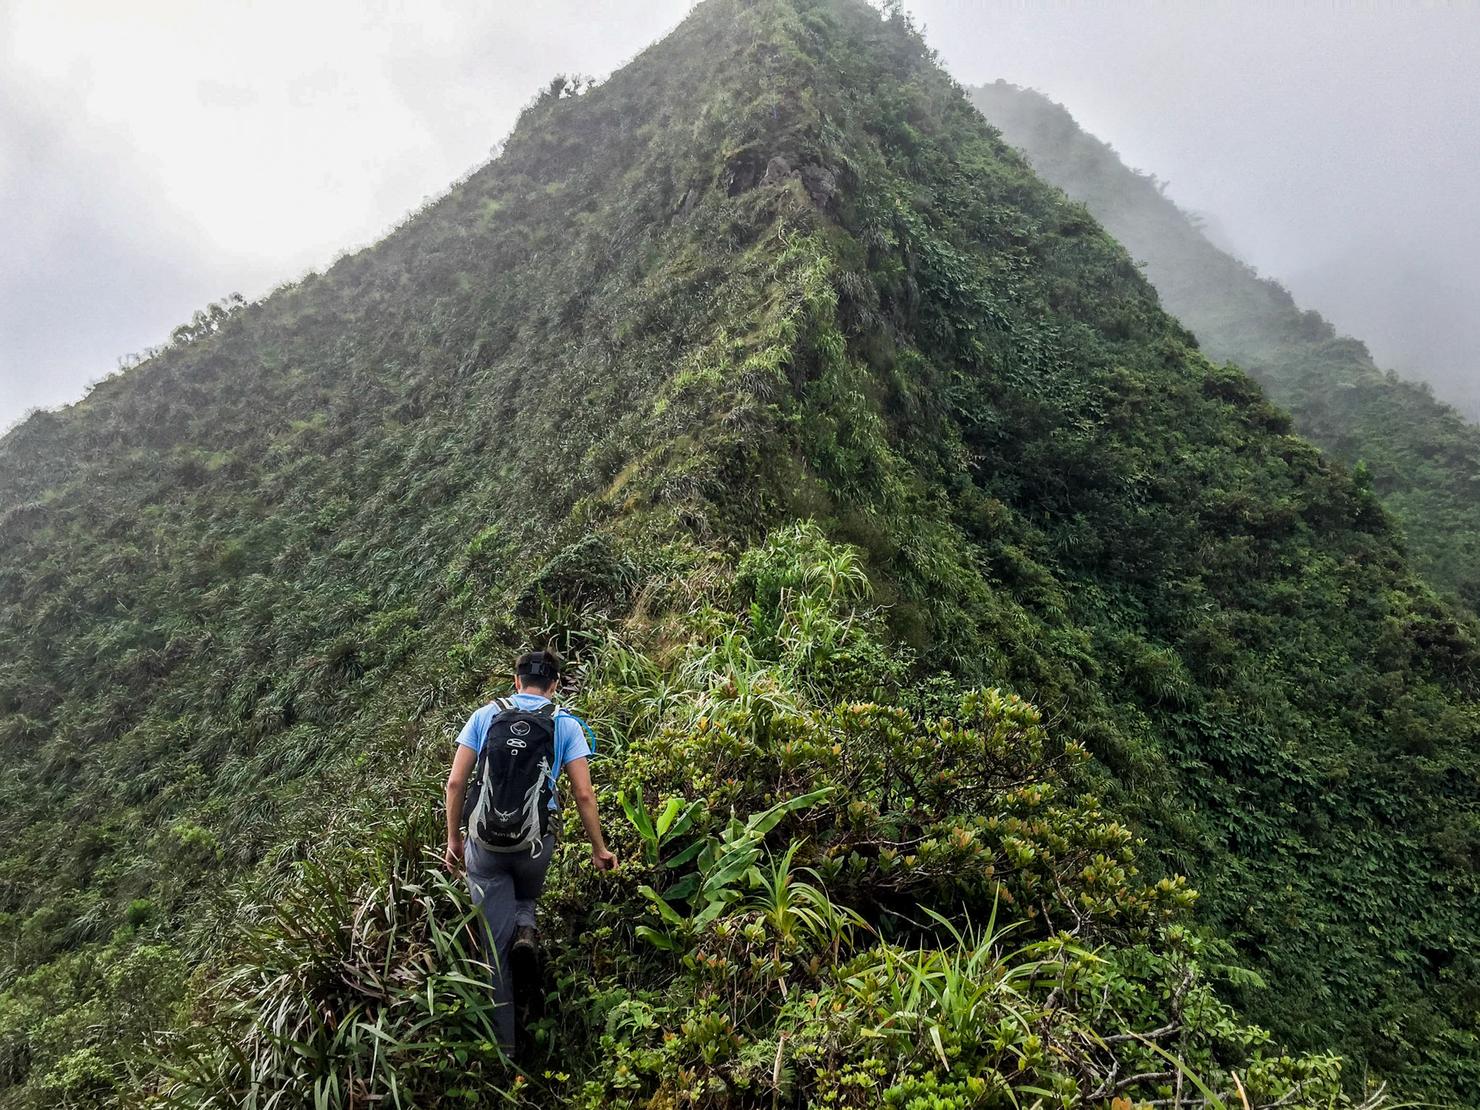
It's a lot of up and down as you climb towards K1. There were several times where I thought we reached the summit but it turned out to be a false peak.
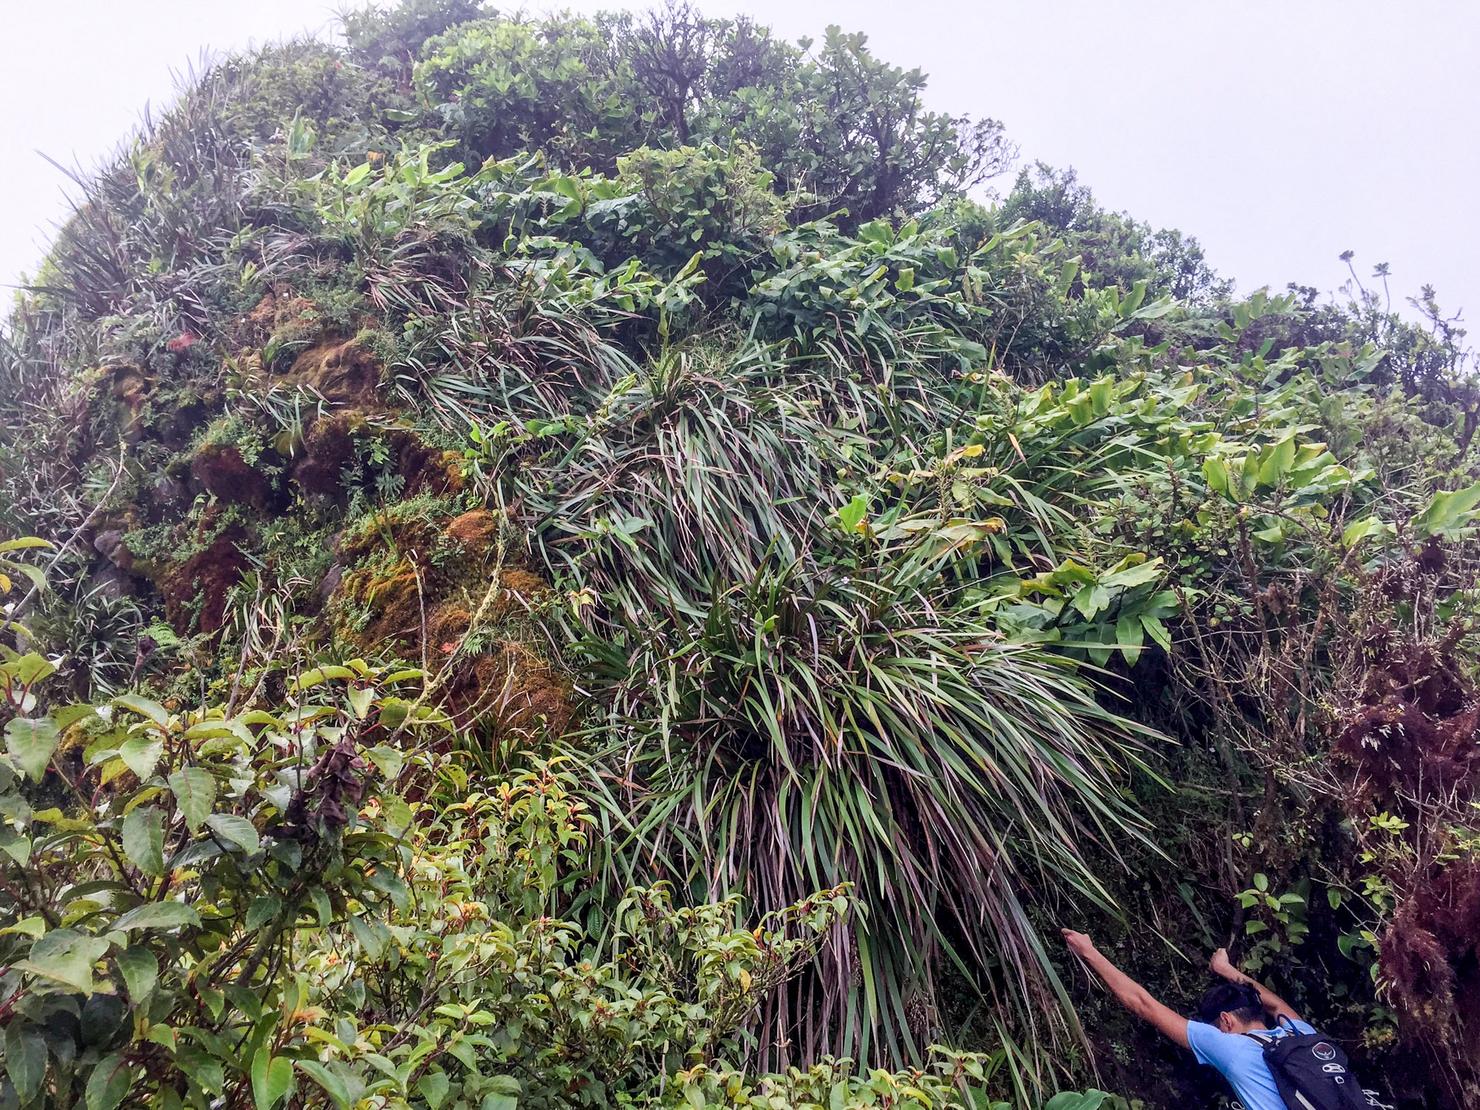
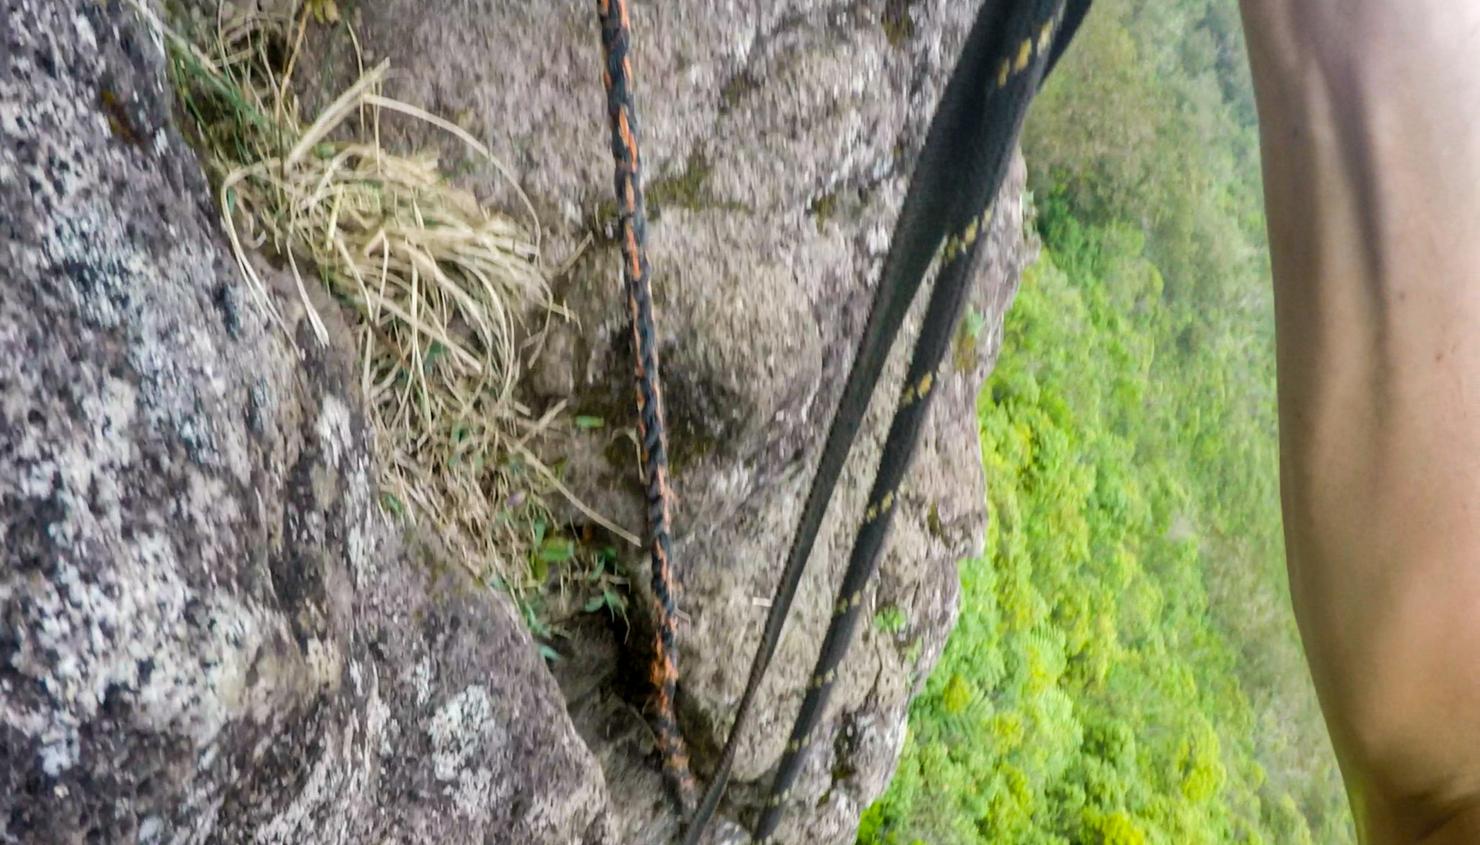
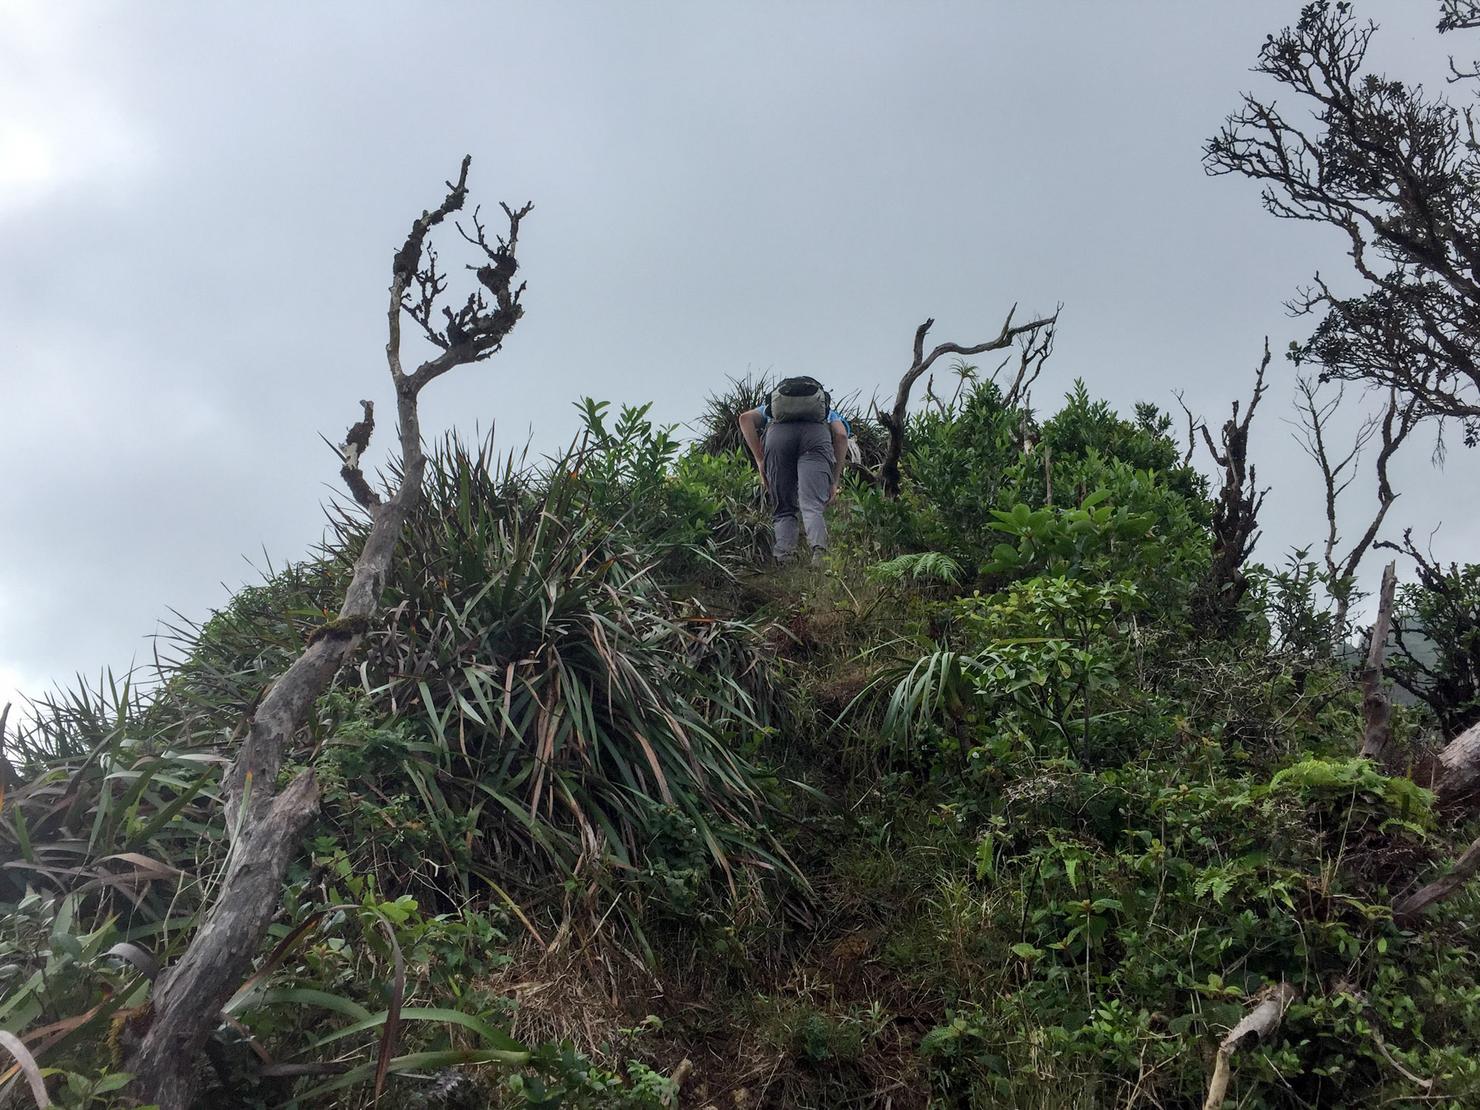
This was a unique portion that was very challenging. It is basically a near vertical grass wall you have to climb. There was a rope, but it had definitely seen better days. My technique was to grab whatever you could get a hold of to keep going upward.
Oh yea did I mention this ridge was narrow?
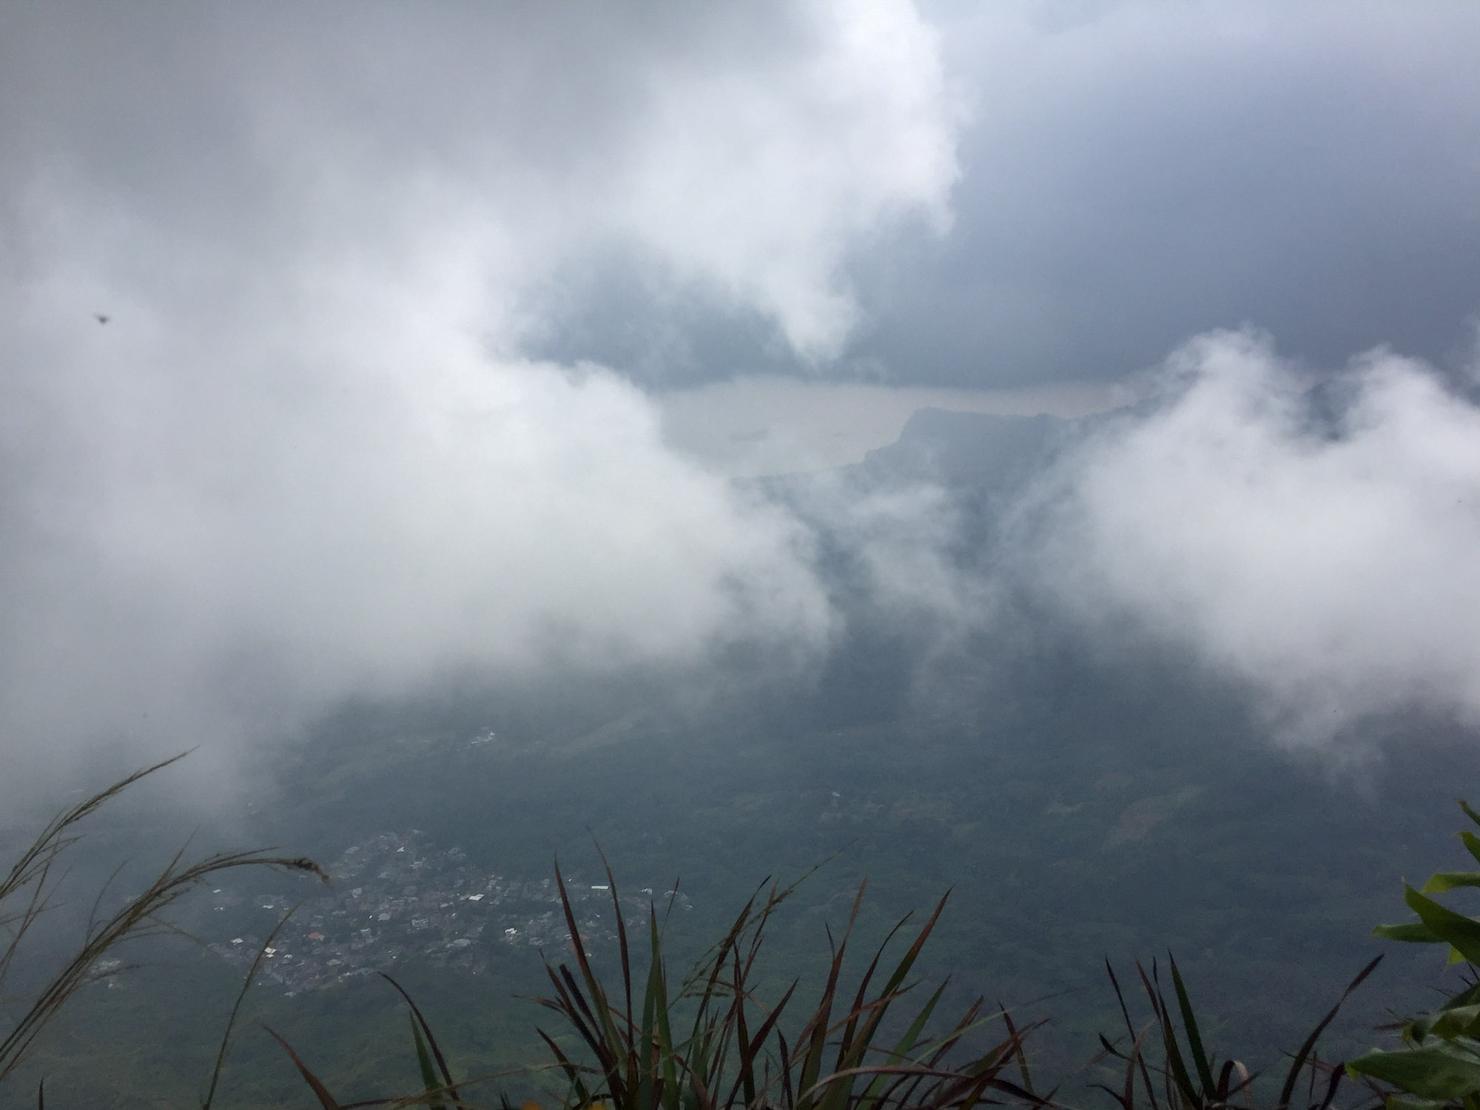
After a little less than 3 hours we had reached the summit of K1.... and of course no view. We weren't as much socked in by clouds as we were surrounded by vog, the air pollution created from Kilauea Volcano over on the Big Island. Seriously, I've never seen it this bad on Oahu. Of course it would happen when were hiking K1.
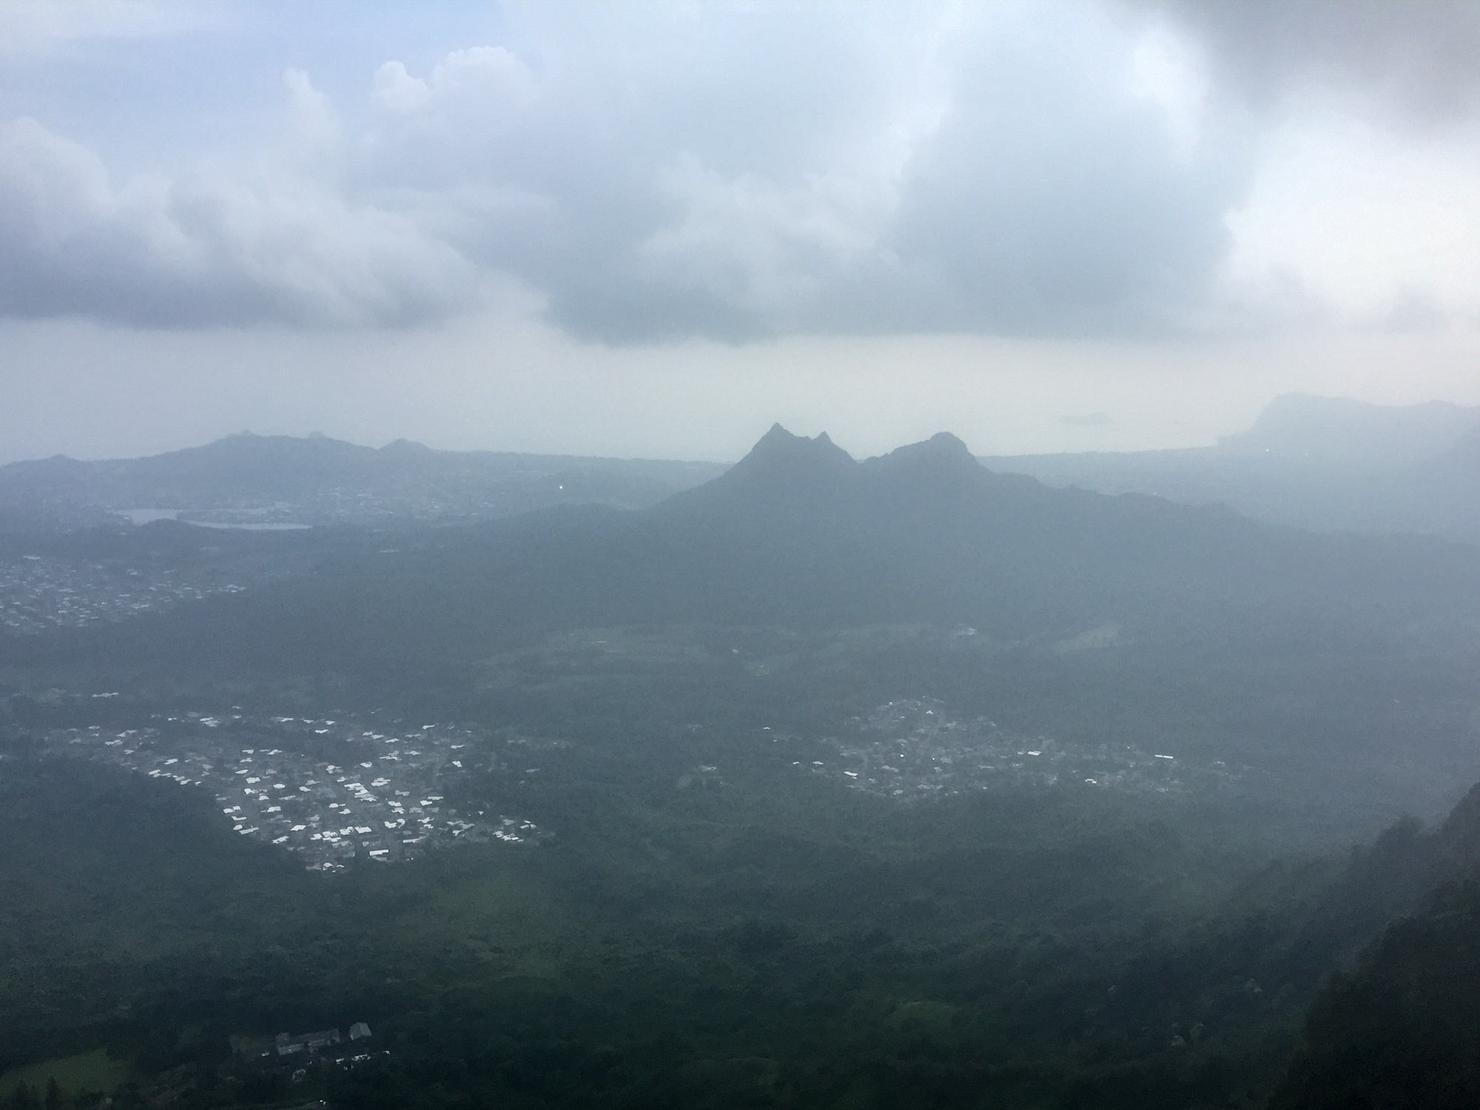
Ah there we go, Three Peaks is coming into view. The scenery really could be amazing up here, but you do have to get lucky, which we clearly were not. At 3150 feet, K1 is more often than not covered in clouds (and today apparently, vog).
We could just barely make out Honolulu through the haze.

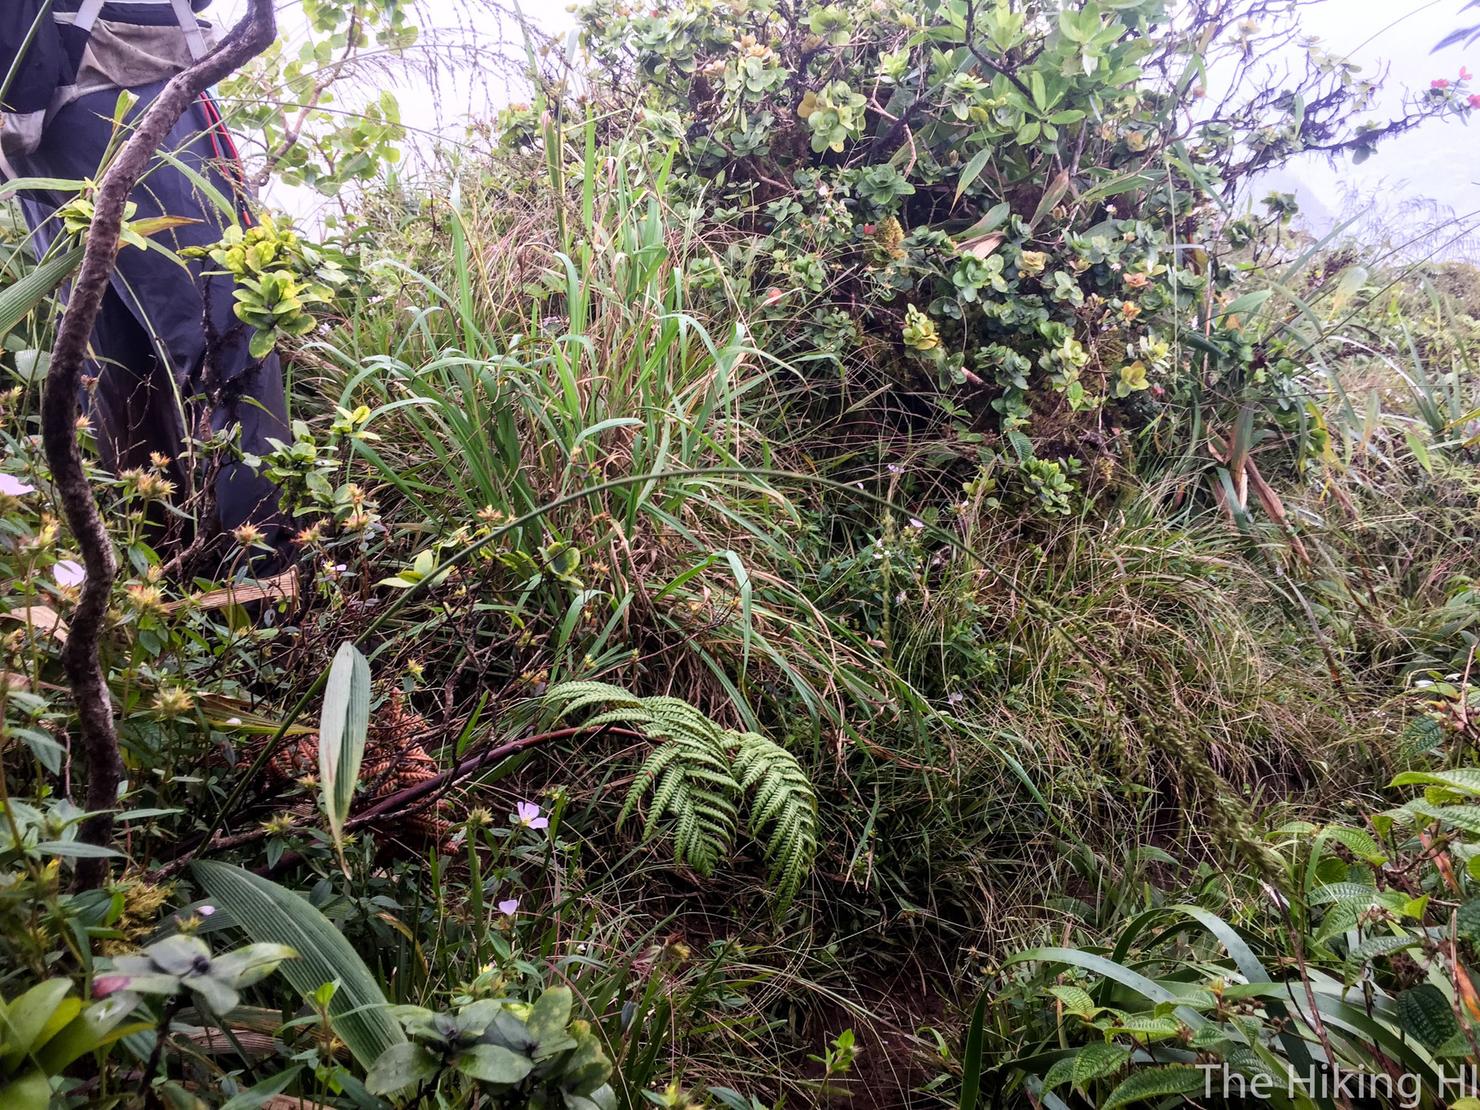
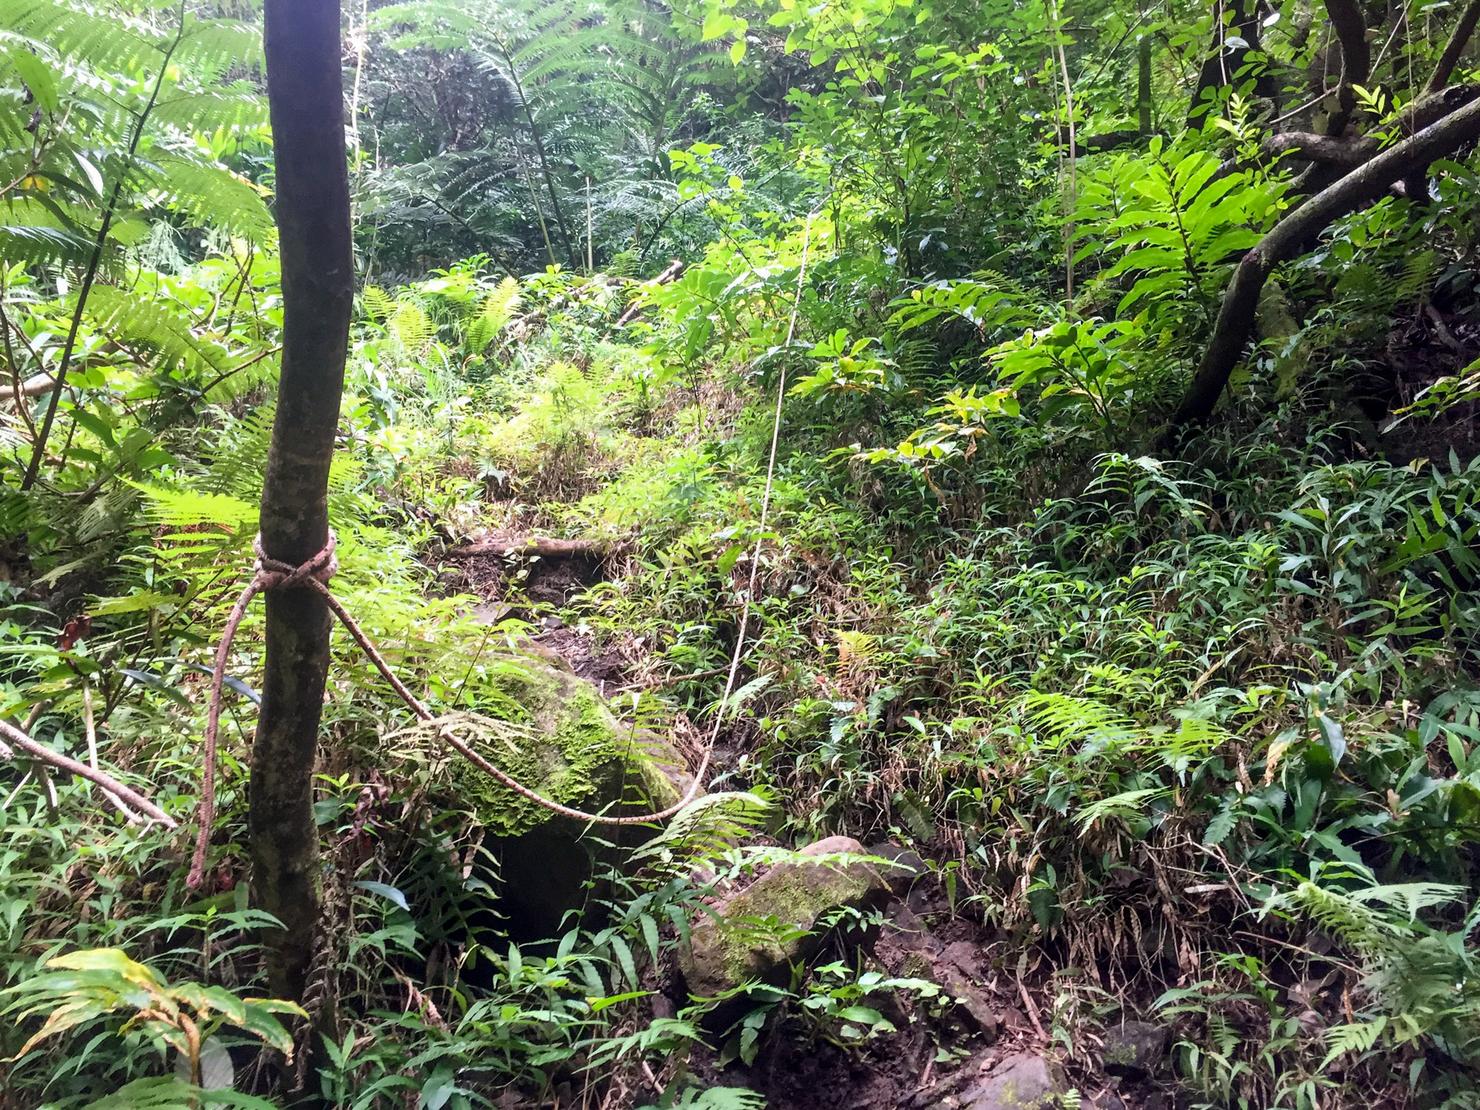
Time to head to K2. To get there, we must cross the saddle, the dip in the ridge that connects the two peaks. This portion of the hike was extremely muddy and overgrown.
After 30-40 minutes of bushwacking and slipping, we had reached K2.
After a quick snack break, we were ready to continue. The next portion we would be hiking along the Ko'olau Summit Trail (KST) towards Manoa Middle, a unofficial ridge that would serve as the path down to our car. Just after the K2 summit is this fork. Head LEFT to go to the KST. Right will take you down the Kalawahine Trail to Tantalus, a hike I did a little over a month ago.
**Note: If you are trying to do this hike more quickly, I'd recommend instead staging a car at Tantalus and take the Kalawahine Trail down. It's hard to be certain, but I think you could shave off an hour or two with this route.
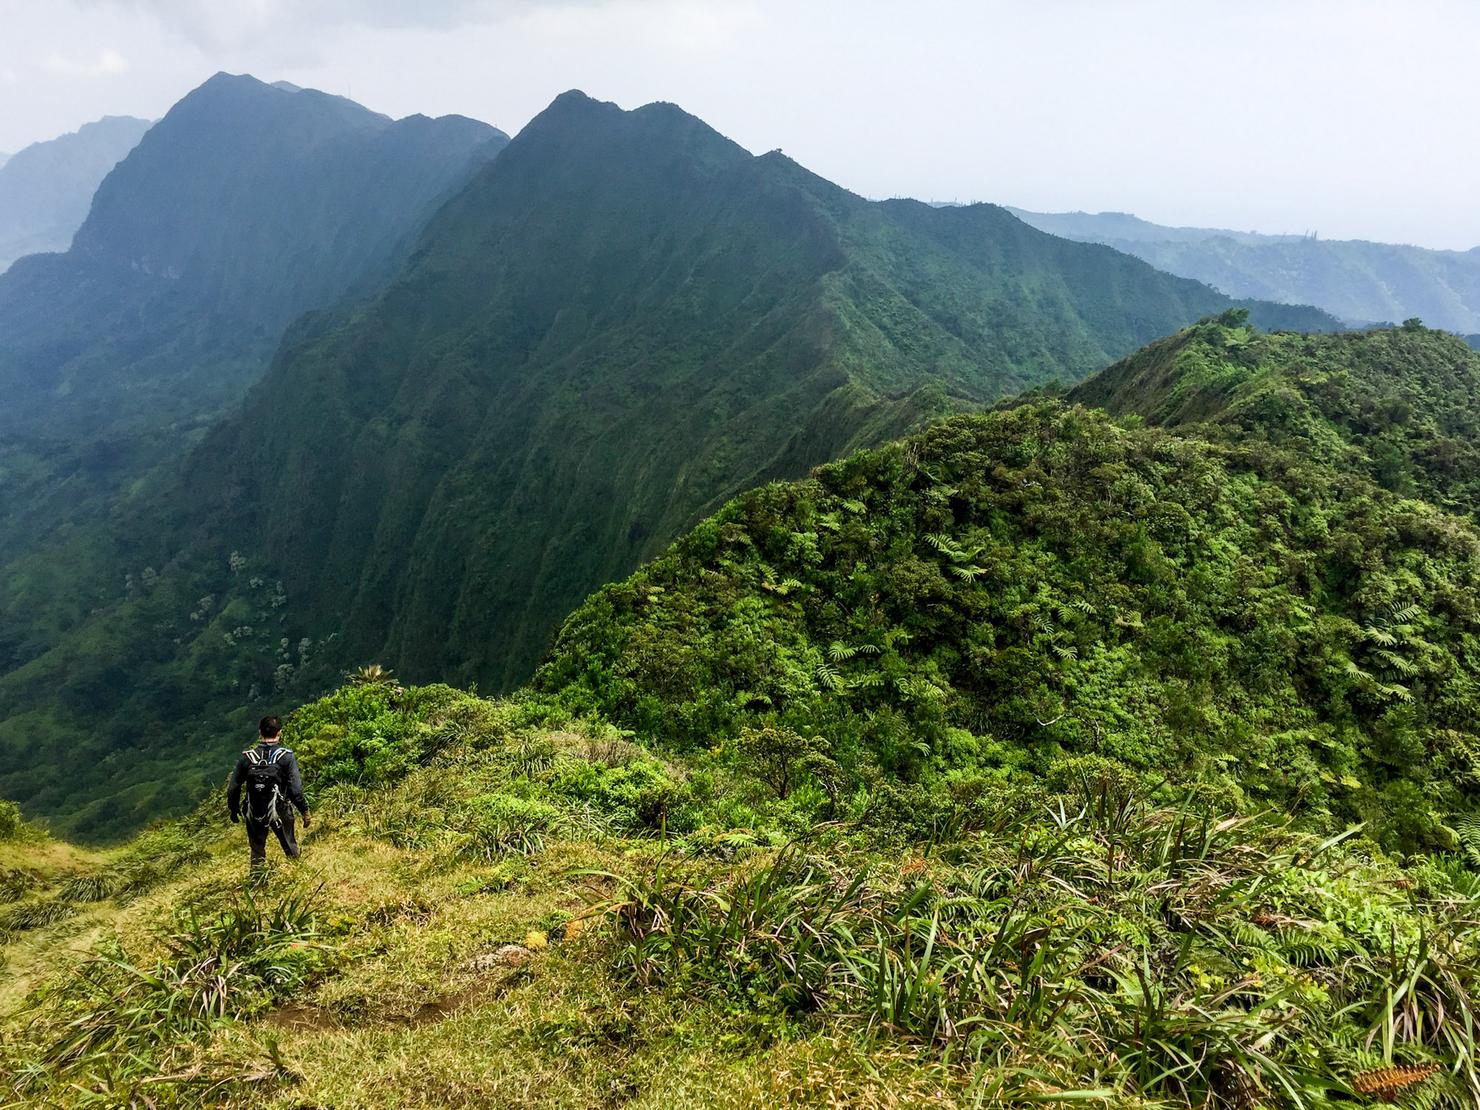
We still have to hike all of this. Manoa Middle isn't even visible yet. It's beyond these many peaks we have to summit.
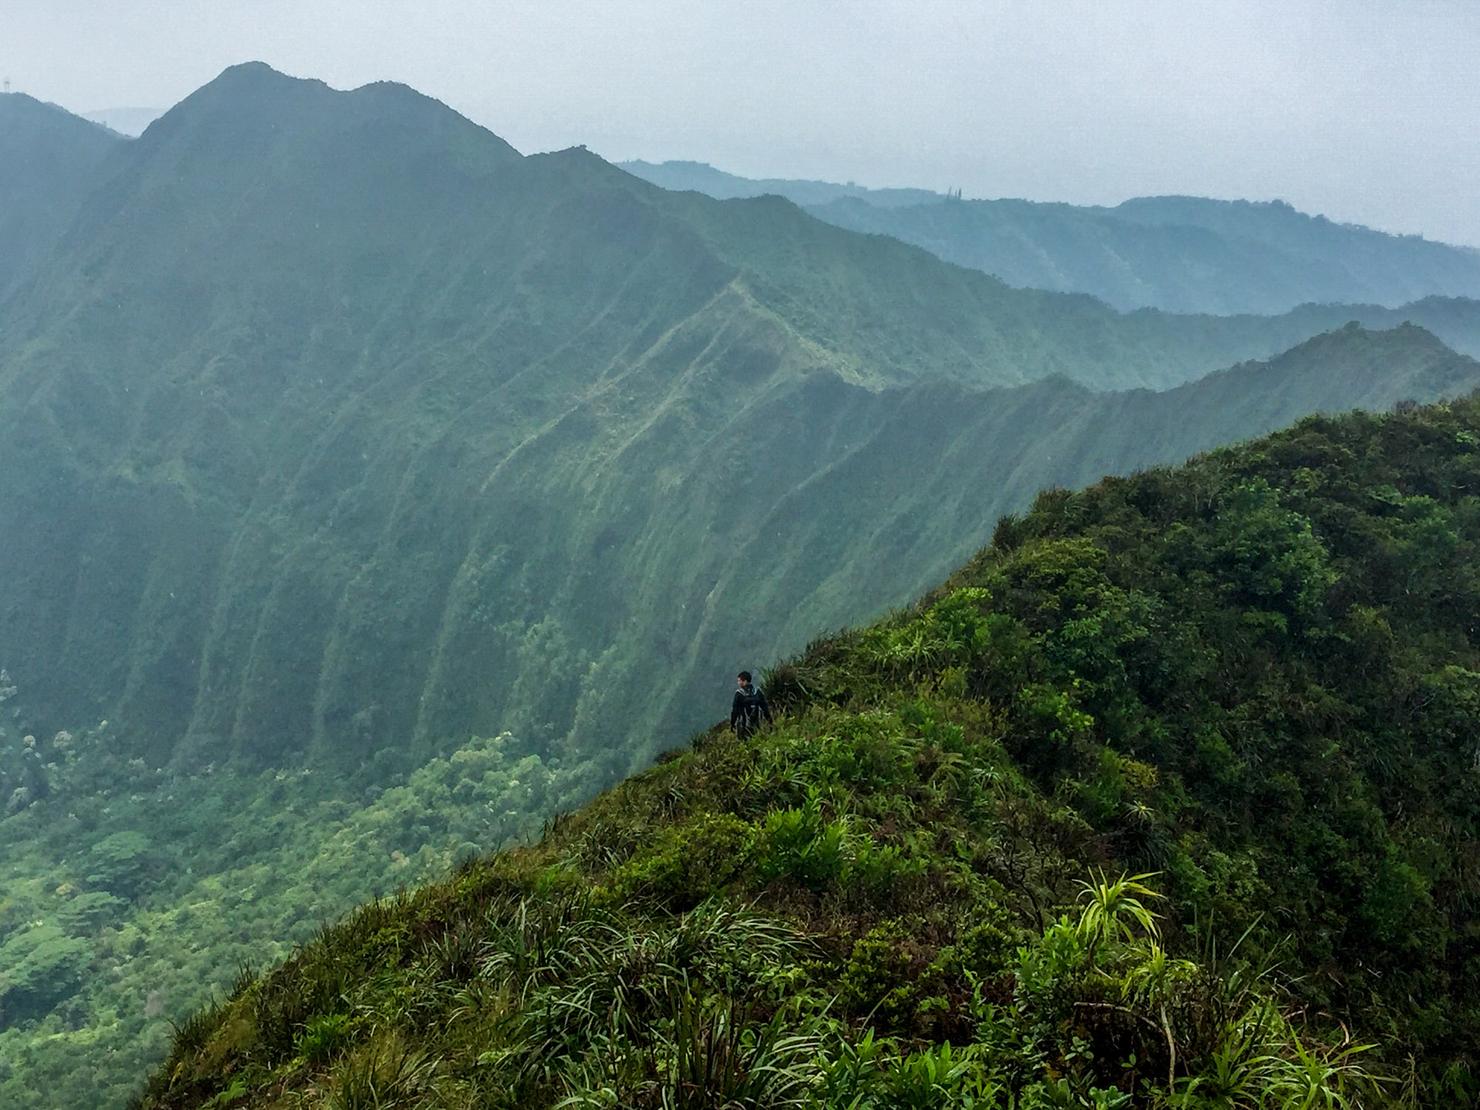
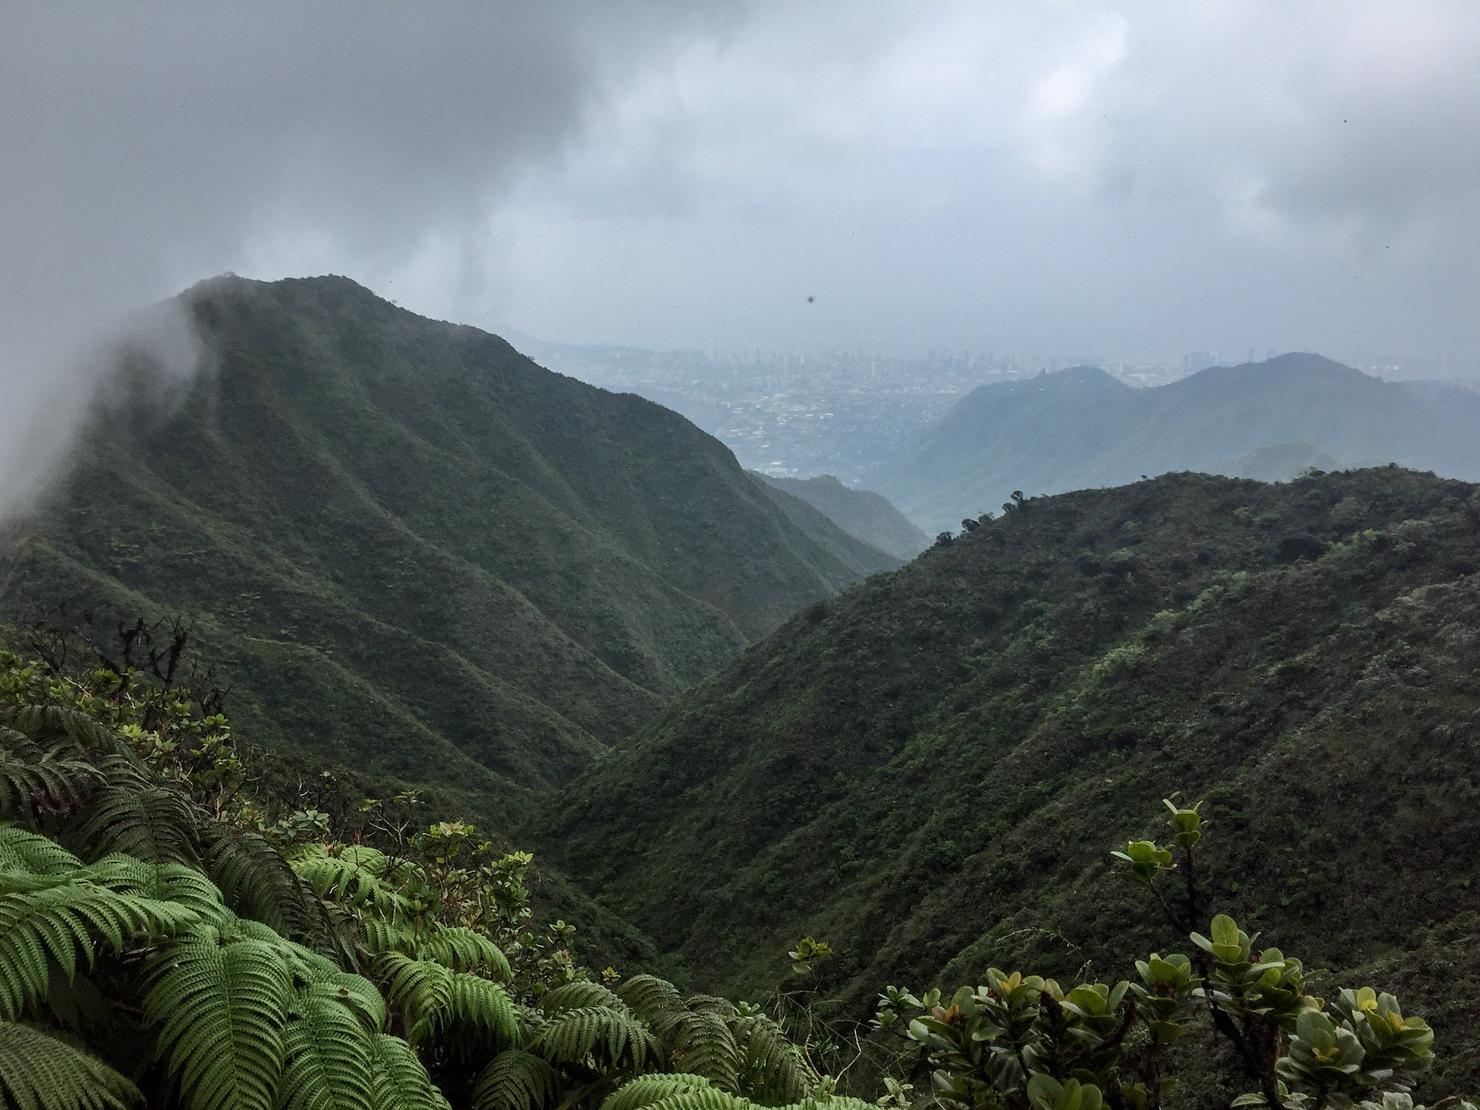
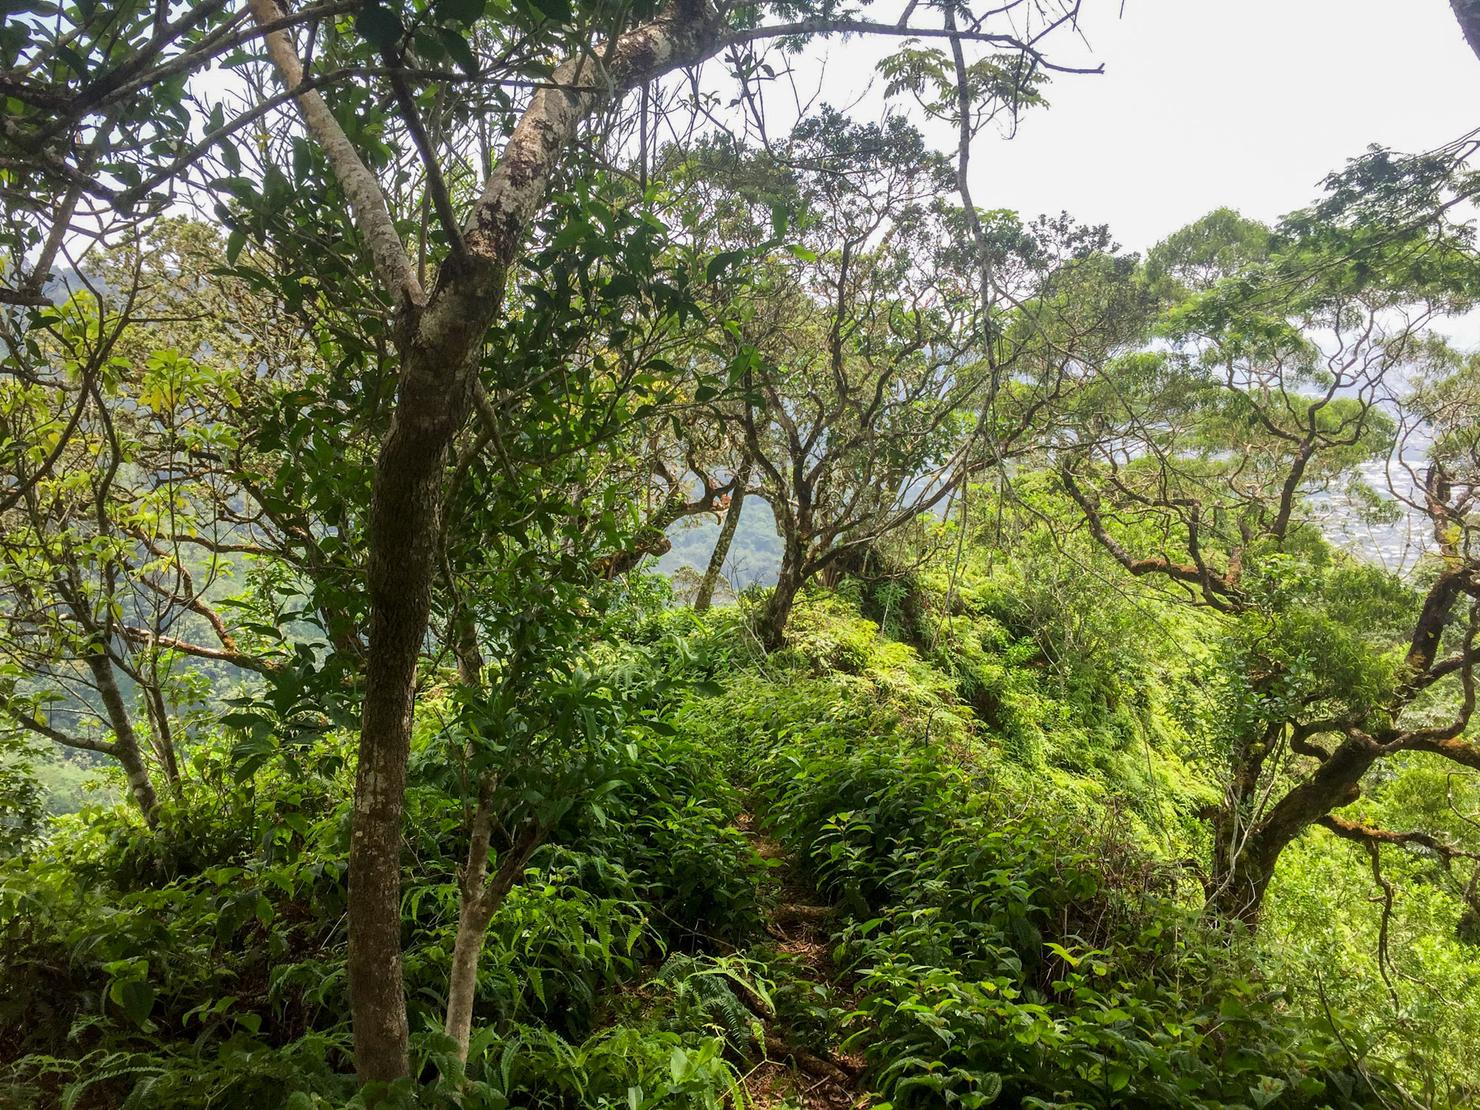
Despite the amount of hiking left, I was surprised how much I enjoyed the KST. It was so easy to feel the energy of these massive green Ko'olau Ridges. It was one of those moments where you feel so small compared to the immense beauty of mother nature.
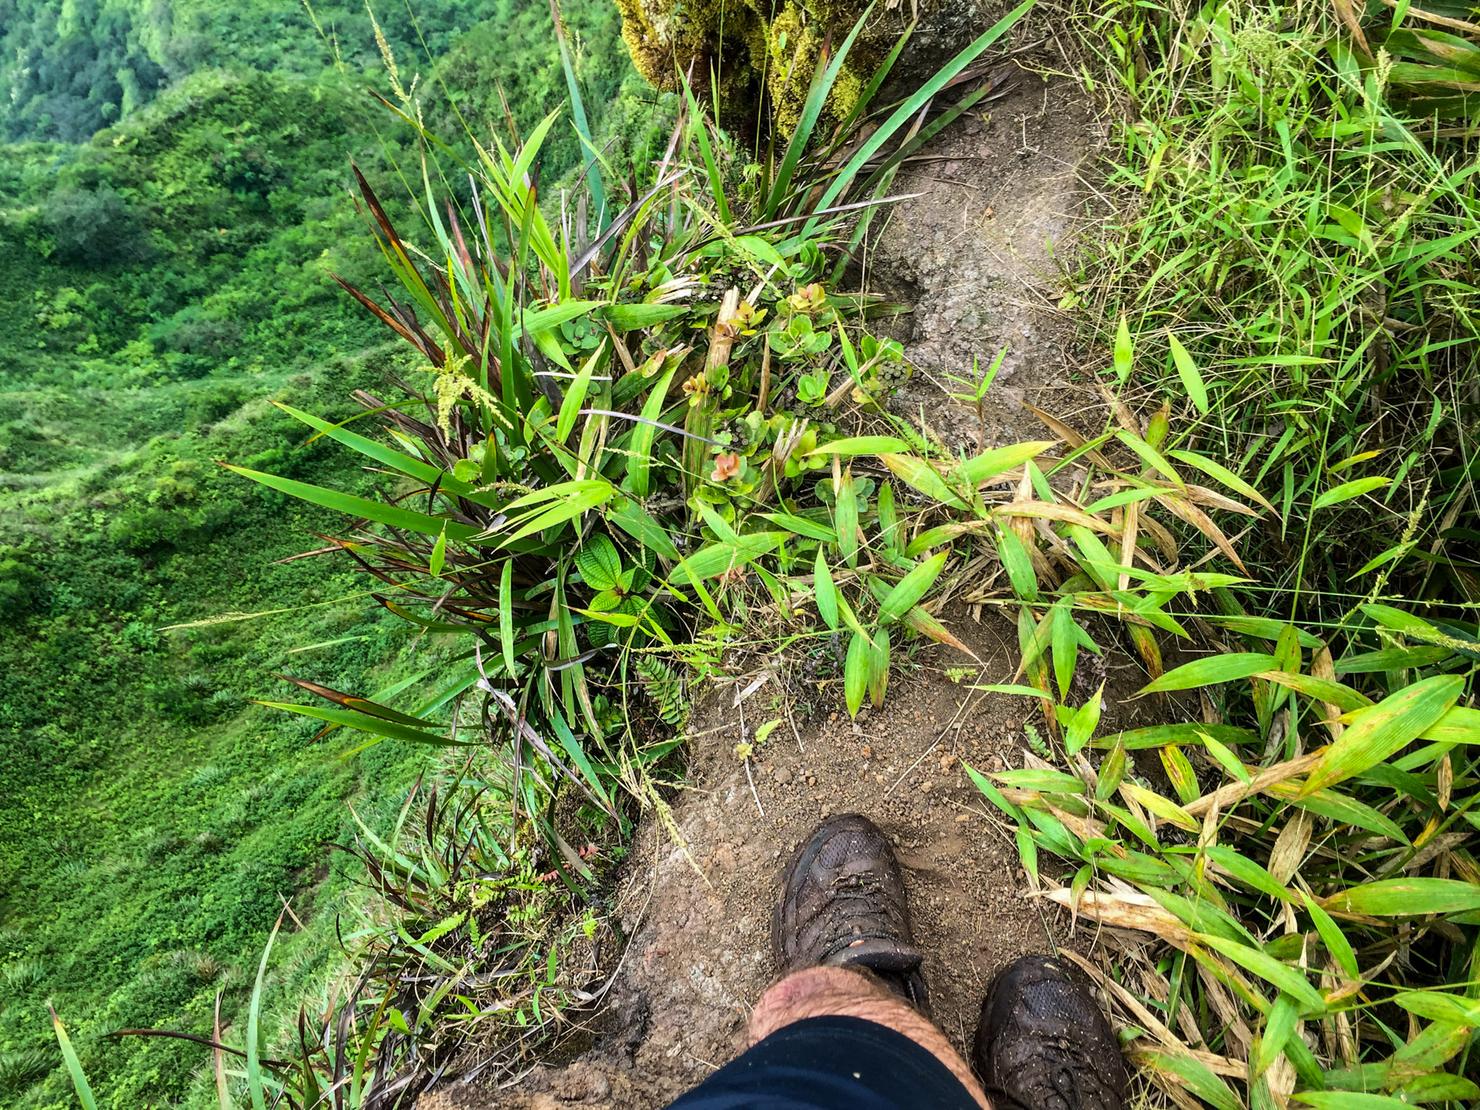
Of course with beauty often comes danger. The KST gets as narrow as this at times. This is an extreme hike after all.
After a lot of up and down, you will reach this open grassy area. This is an important landmark because it signifies the ridge down is soon to come.
After another down and up you will reach this flat and relatively open portion. The ridge referred to as Manoa Middle Ridge stems off here.

This is the view looking south from the top of Manoa Middle Ridge. If you weren't paying attention and kept going, you could follow that ridgeline all the way to Mount Olympus. Olympus is a good ridge... but not good enough to want to add an extra hour to our already long hike.
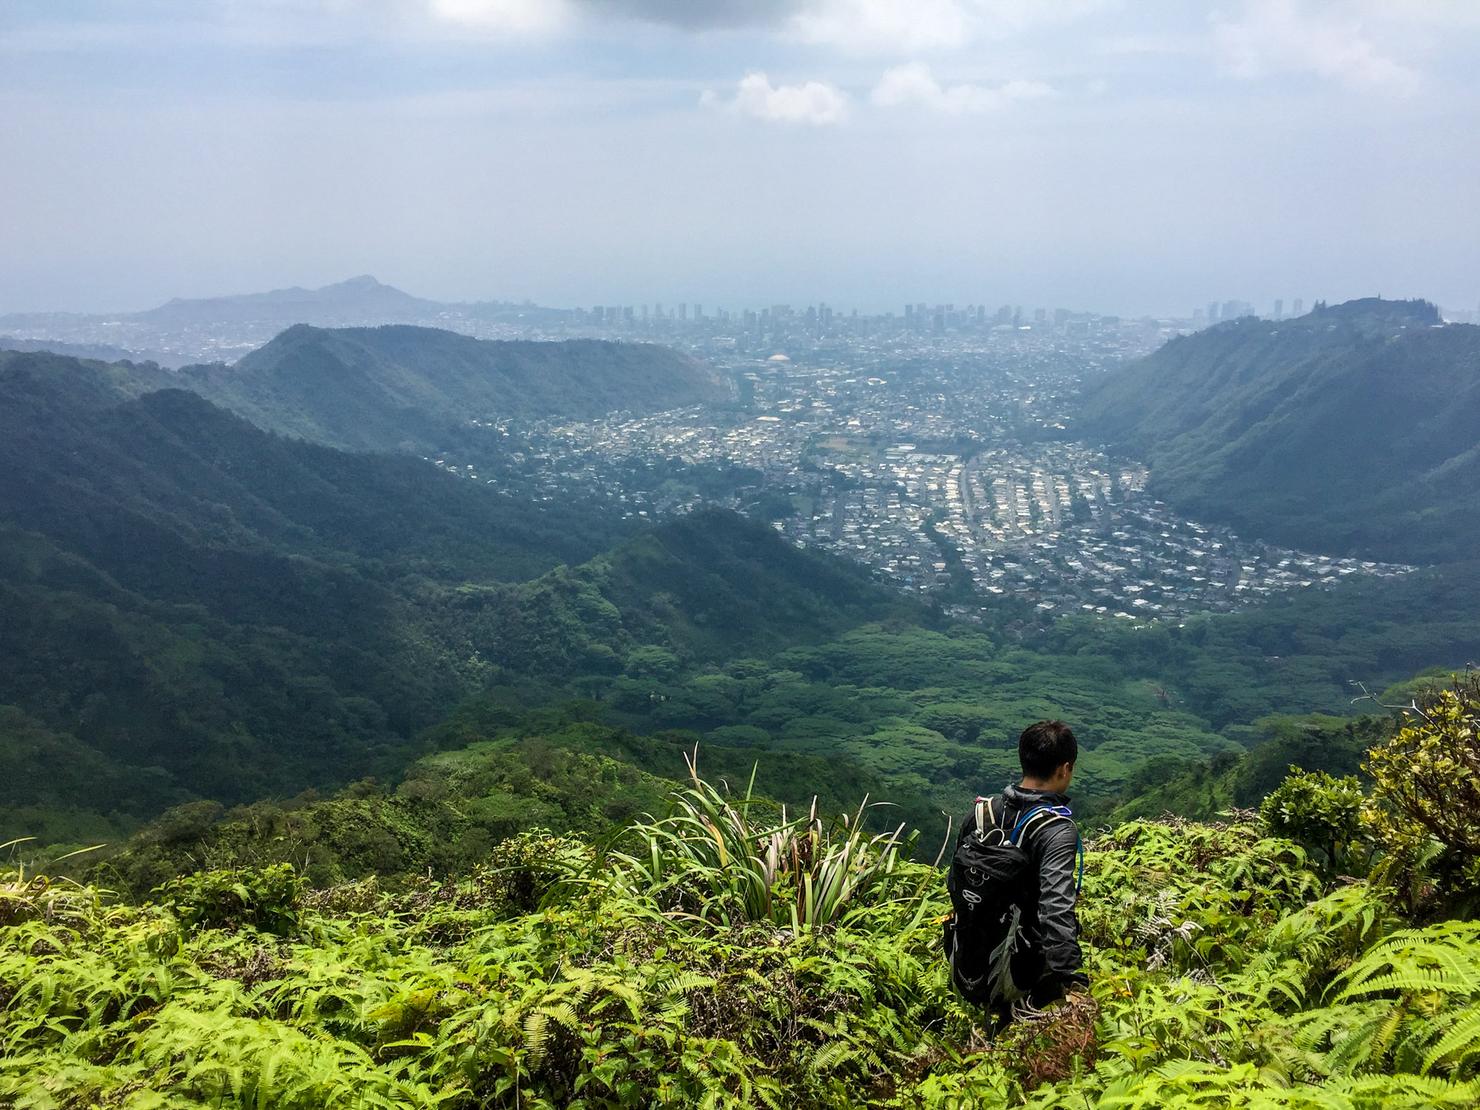
The path down is relatively obvious. No real markers, just a beaten down path. The ridge will veer left slightly from this picture's perspective. The vog was beginning to lift, giving us a decent view of Honolulu and Diamond Head.
The hike down Manoa Middle isn't anything special, just a partially shaded ridge descent.
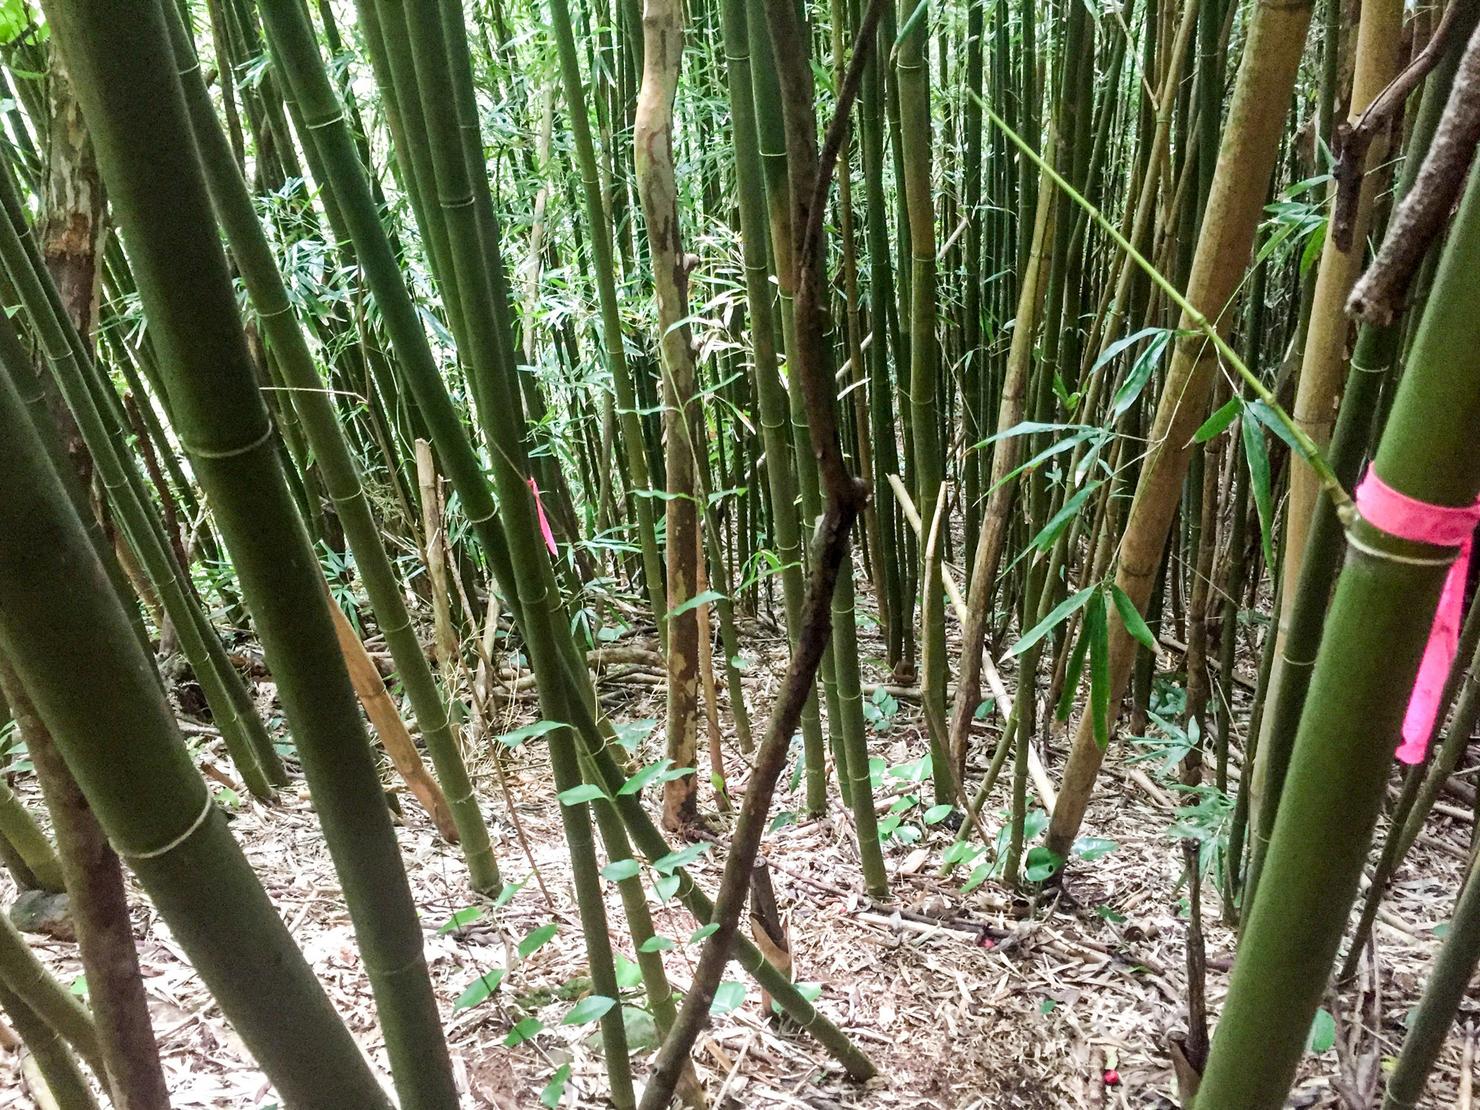
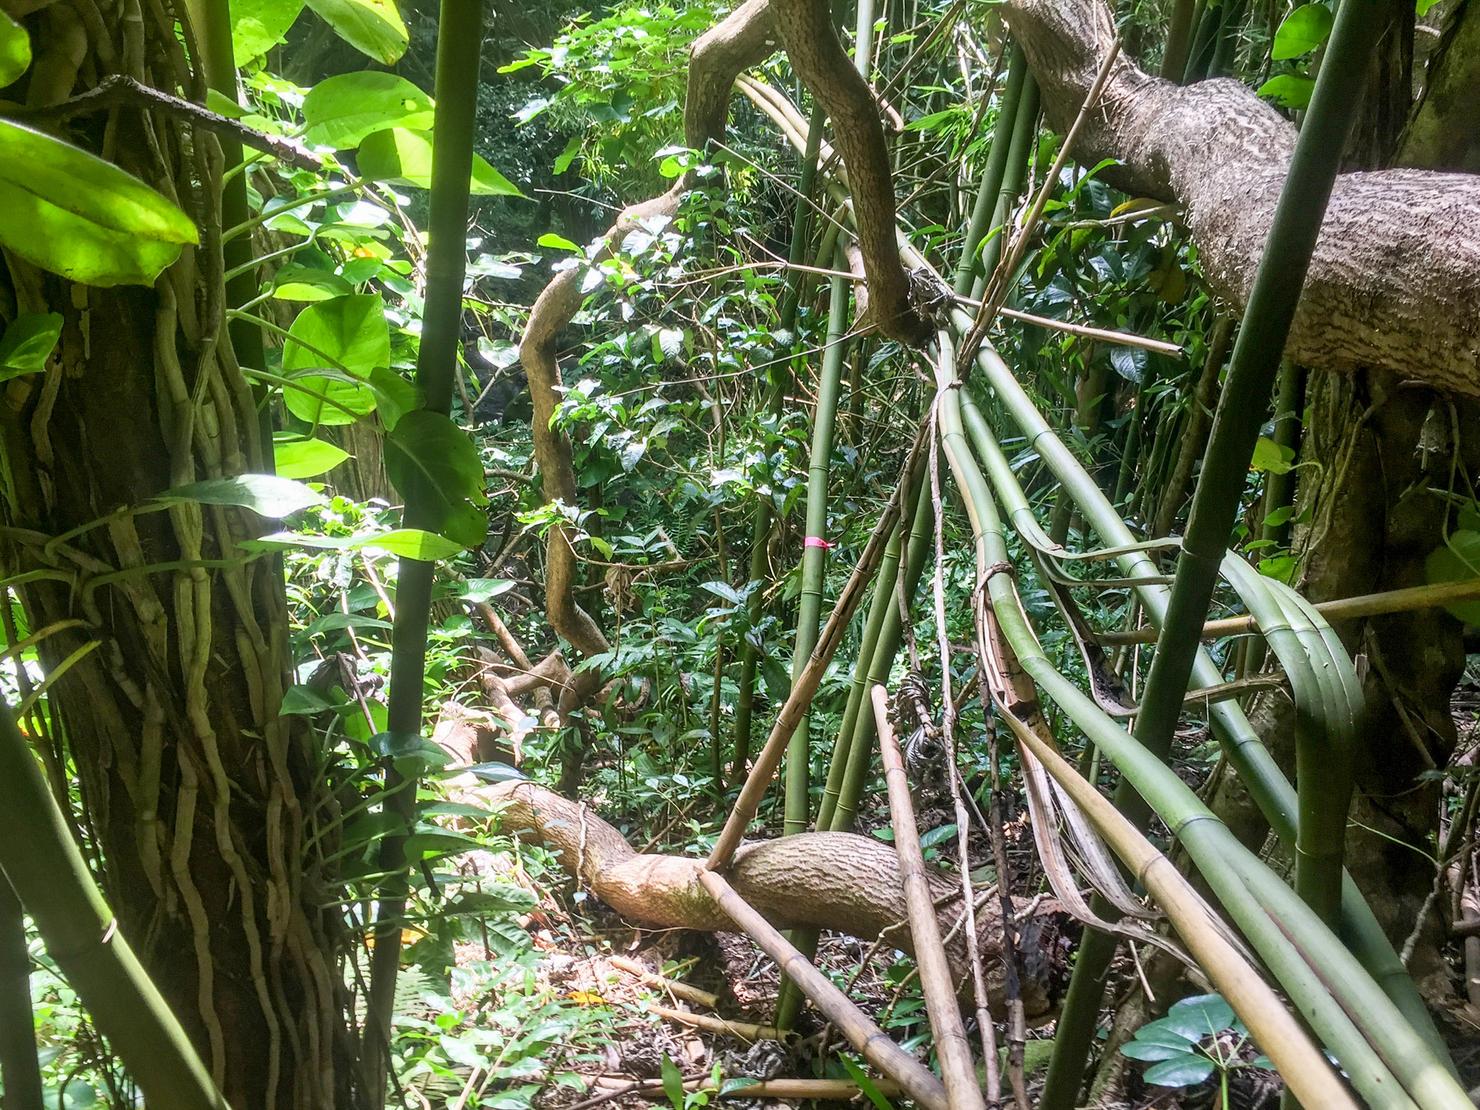
The ridge eventually runs into this bamboo forest. This section is actually quite steep, so the bamboo stalks were very useful for balance. Also those pink markers were CRUCIAL to follow. It would have been very easy to get lost, but they led us right where we wanted to go.
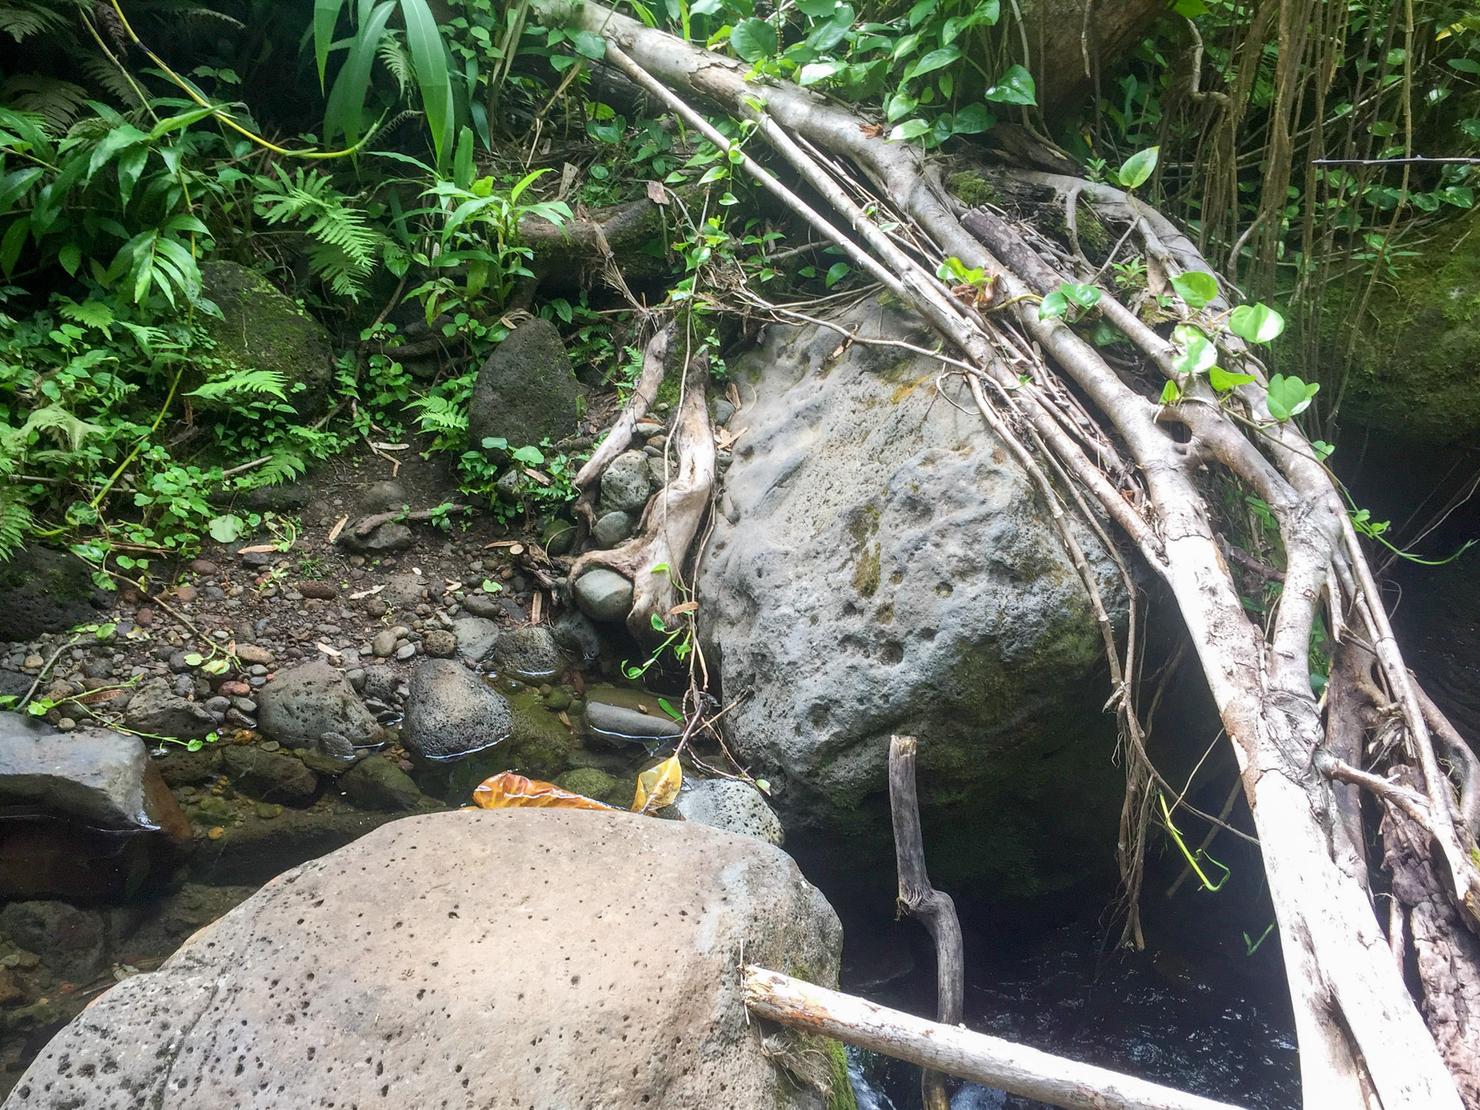
Which is right here (sorry the picture is not so great). To the left of this picture is Waiakeakua Stream. This is where we somewhat got lost and my directions will get confusing. To get back to our car, we needed to intersect the Pu'u Pia Trail. Geographically, the trail is located across the stream and above us.
We ended up following the stream downstream for a few minutes, but were forced to cross it here.
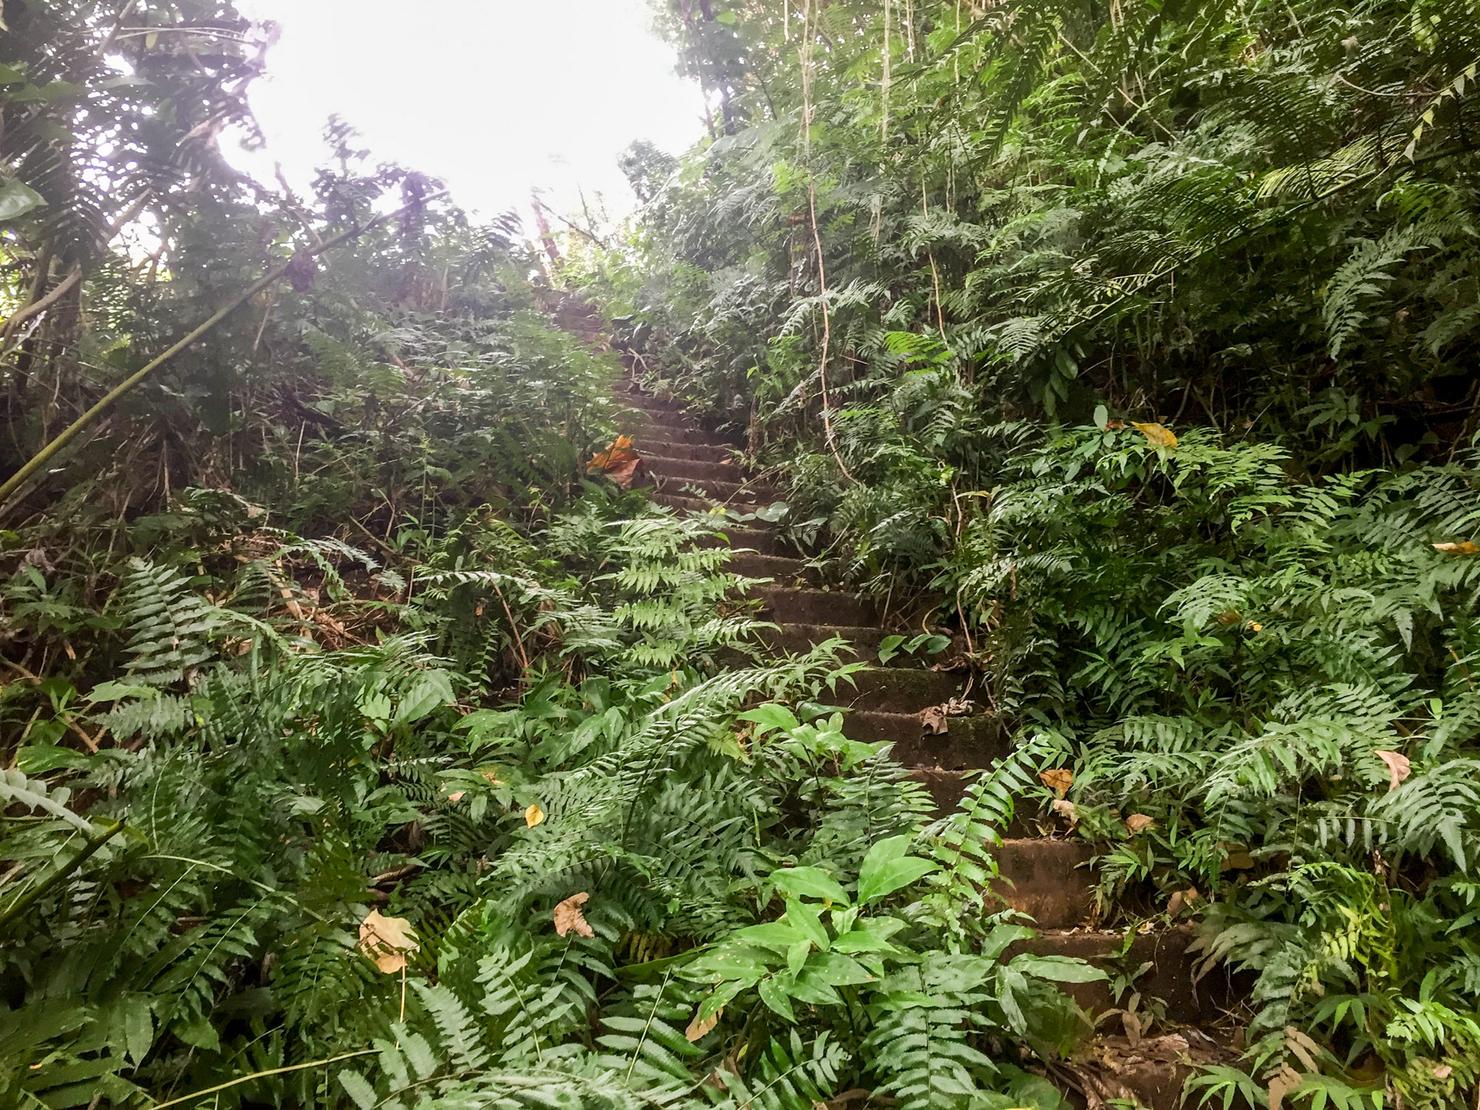
We then took a left and ended up going back upstream until we ran into these stairs. We were completely turned around. Luckily, I had good phone service and used AllTrails to figure out we were heading towards Pu'u Pia. There is a more direct path, but we must have missed it.
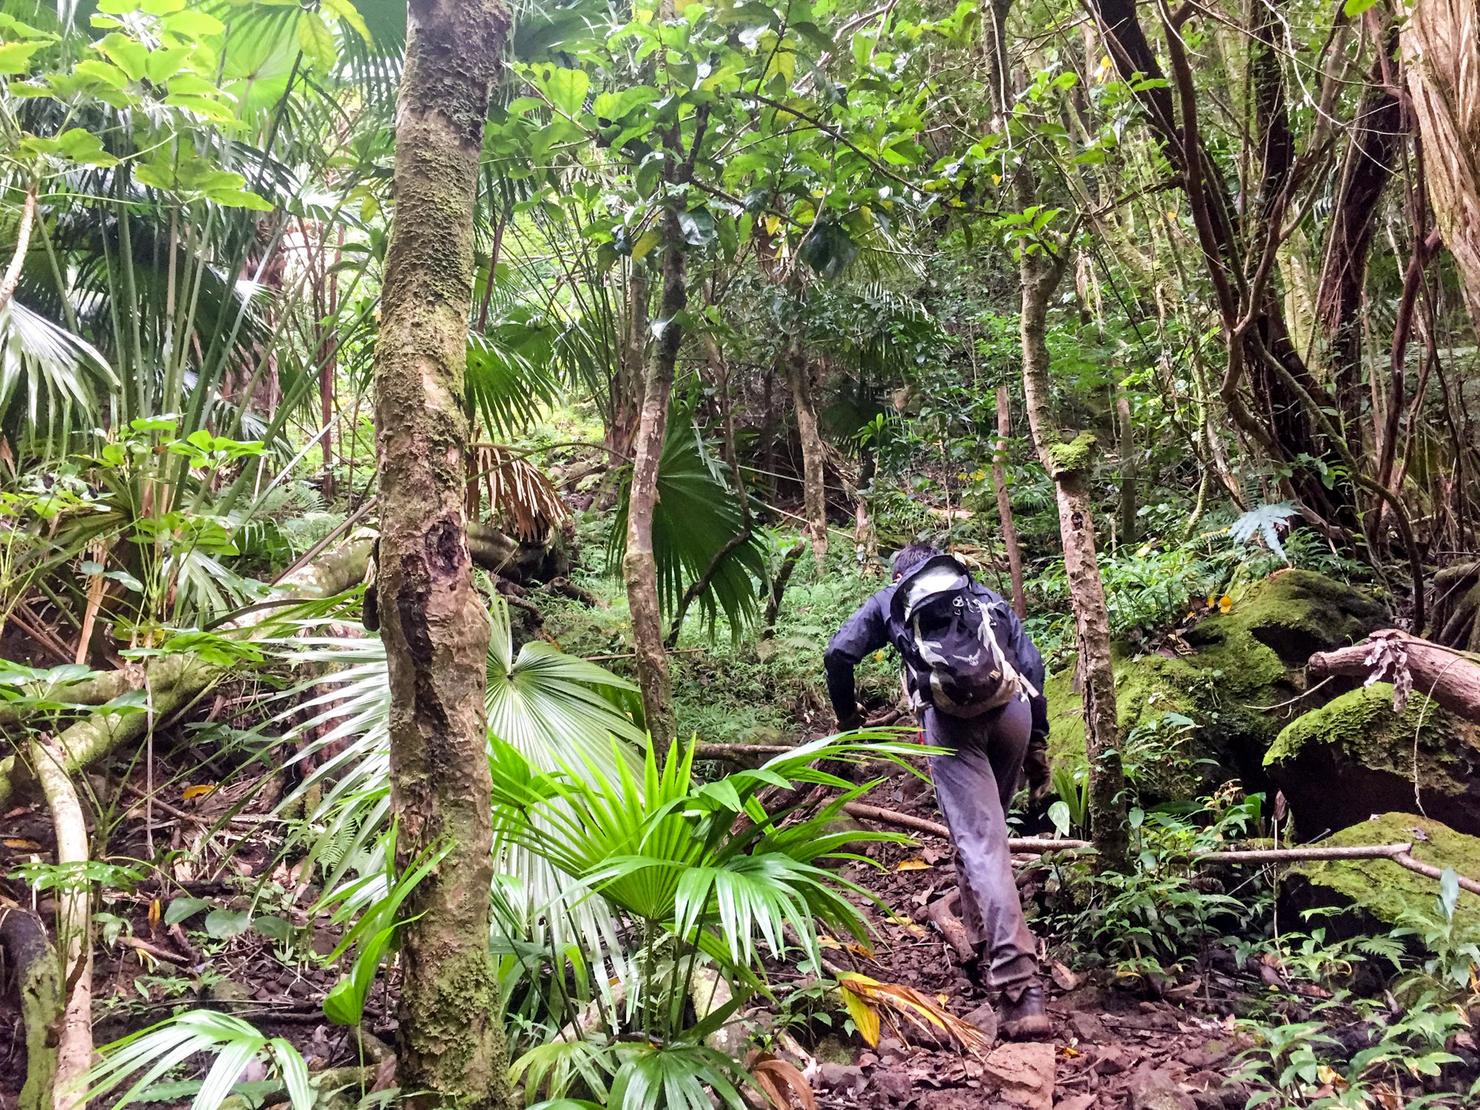
We continued heading back upstream until we reached a beaten down path. Peter had been here before and said there was a junction that would take us back uphill to meet the Pu'u Pia Trail.
And he was right. What he failed to mention is how steep this climb was. After nearly 8 hours of hiking, my legs were shot. Luckily there were some ropes and I happily used them to help ascend.

With a lot of sweat (and maybe some tears from me), we reached Pu'u Pia Trail. We took a left here and the trail looped back to Alani Drive, where we had staged our car.
It took one year of talking about it for Peter and I to finally conquer this hike. It was difficult no doubt. But having had the goal in mind for so long and finally achieving it was incredibly rewarding. It is an adventure and accomplishment I will always be proud of.