Difficulty: INTERMEDIATE
Time: 2-3 HOURS
Distance: 3.5 MILES
Elevation Gain: 1100 FEET
Foot Traffic: LOW
Challenges: Shadeless, Steep descents with loose and sharp rock, Finding the Rock Bridge
Sights: Hanauma Bay, Koko Head Crater, Rock Bridge, Honolulu
What to Bring: Decent Shoes, Sunscreen, Water
Not to be confused with the Koko Crater Trail (home to the Stairmaster from Hell), this hike begins on the ocean side of the Kalanianaole Highway. It is often called the Haunama Bay Rim Trail because of its beautiful perspective of the bay. It begins as a uphill climb on a road along the bay, before you turn towards the ocean to begin your descent into Koko Head. Eventually, you will reach the outermost point of the rim, giving you amazing coastal views and the exterior of Koko Crater. From here, you can choose to descend the outer cliff to get back to sea level, where you will be greeted with beautiful sea cliffs and a natural (and dangerous) rock bridge.
I decided to keep up with my weekday hike routine because let's be honest, there really isn't a better way to break up the workweek. I had the intention of tackling the Koko Crater Stairs to get in a good workout, maybe even running them to see how quickly I could reach the top. However, when I reached the park, my antisocial nature kicked in, and I decided I didn't feel like dealing with the crowds. I decided to call an audible and tackle the lengthier Koko Head/Hanauma Bay Rim trail right across the street. It was a great decision.
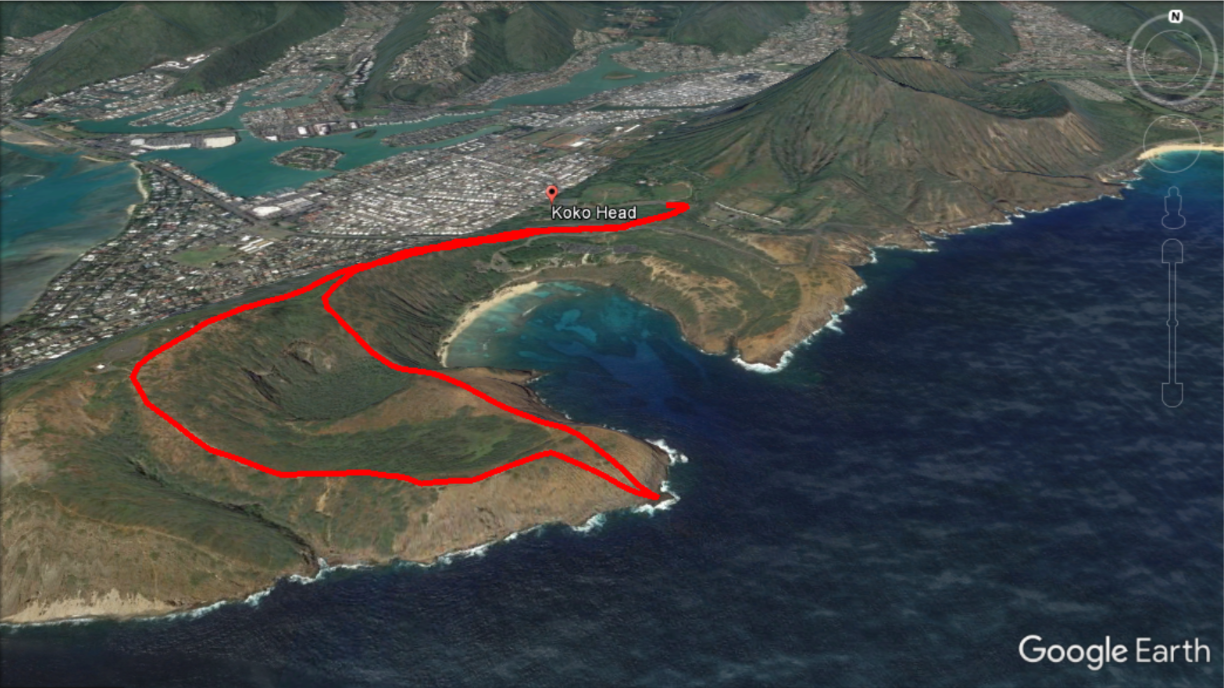
Here's a Google Earth view of the path. As you can see it starts from Koko Head District Park. I often call this the Koko Head Rock Bridge hike and I've heard others call it the Hanauma Bay Rim Trail. Regardless of how you refer to it, it is a great alternative to the stairs... although slightly less legal.
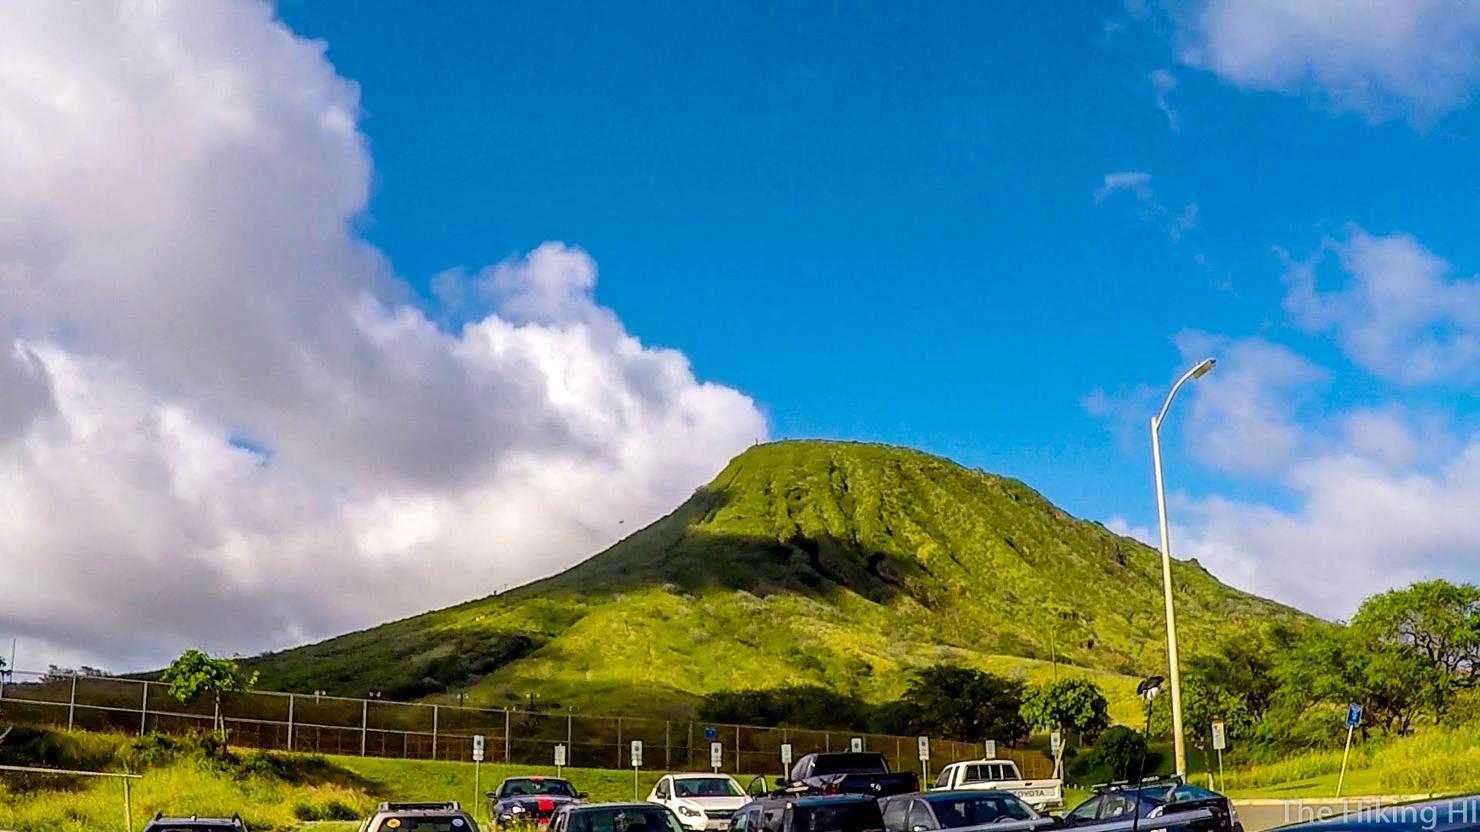
The best place to park is in the Koko Head District Park where you would typical start the crater hike. You could also park closer at Hanauma Bay Nature Preserve, but then you would have to pay...
To get to the hike, follow the road uphill past the parking lot.
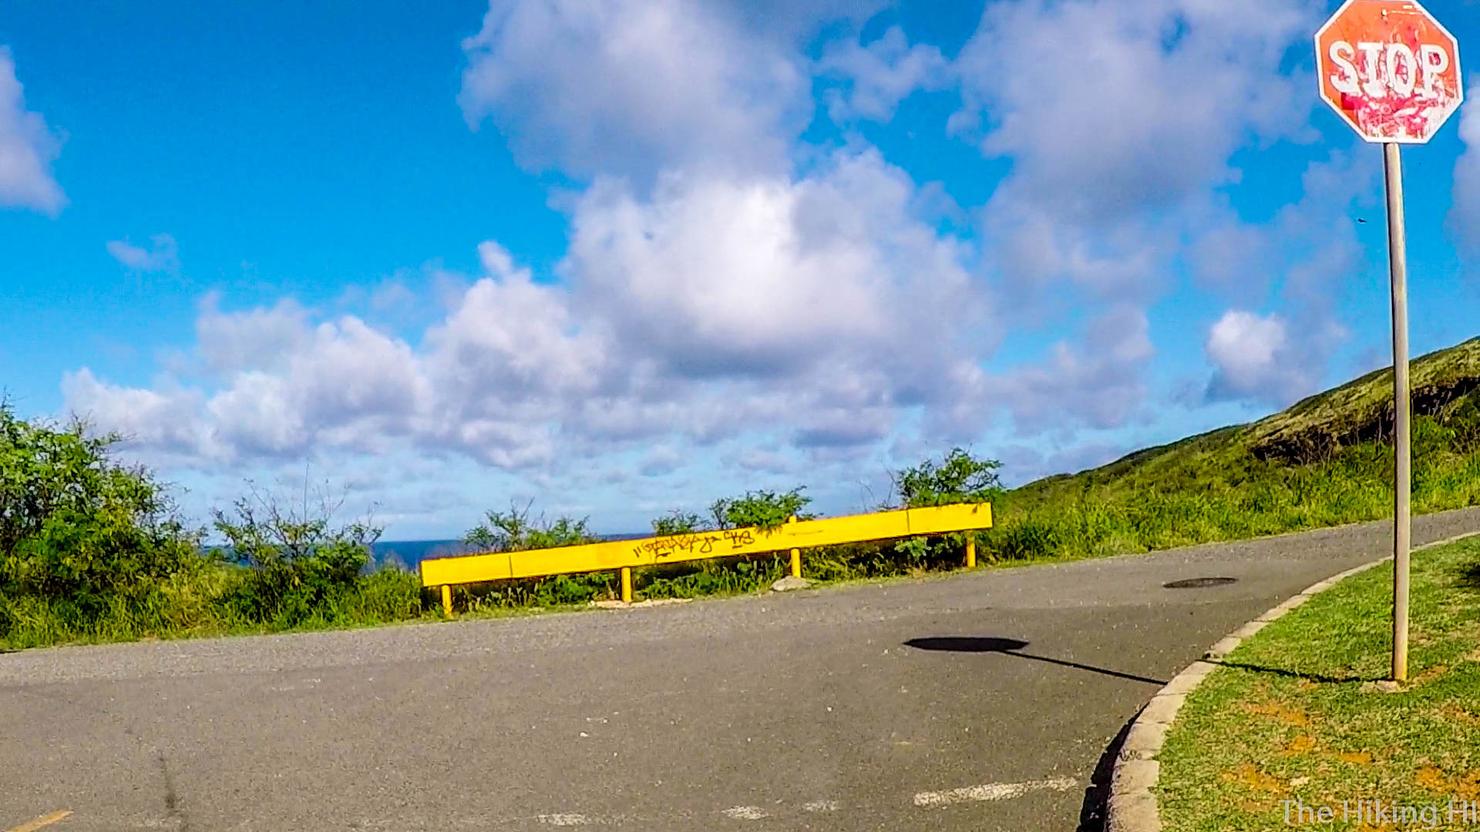
You will reach this fork in the road at the stop sign, turn right here. Don't be surprised if you hear loud pops. There is a gun range just beyond this ridge.
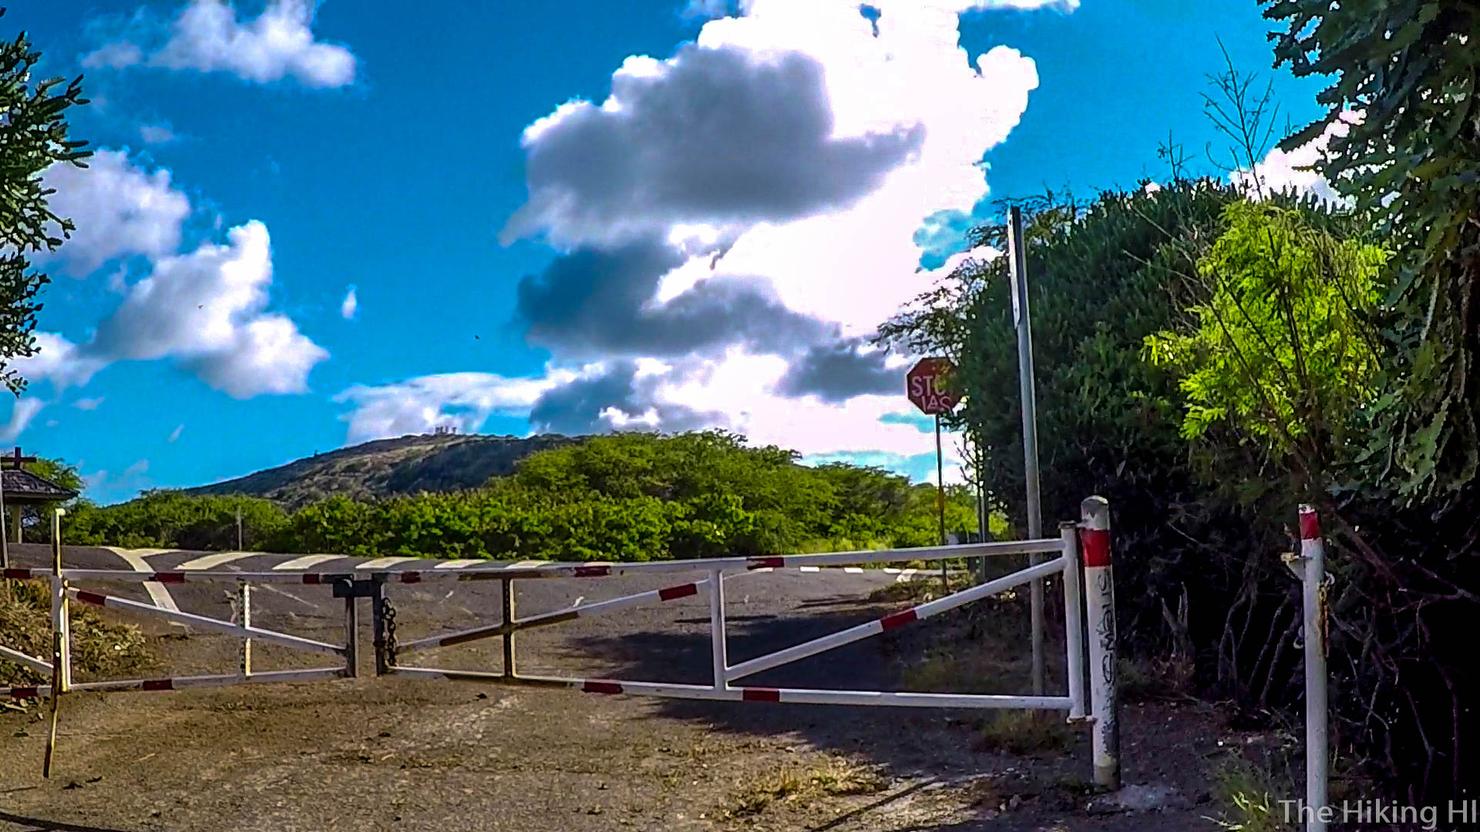
Soon you will reach this gate which leads to Kalanianaole highway.
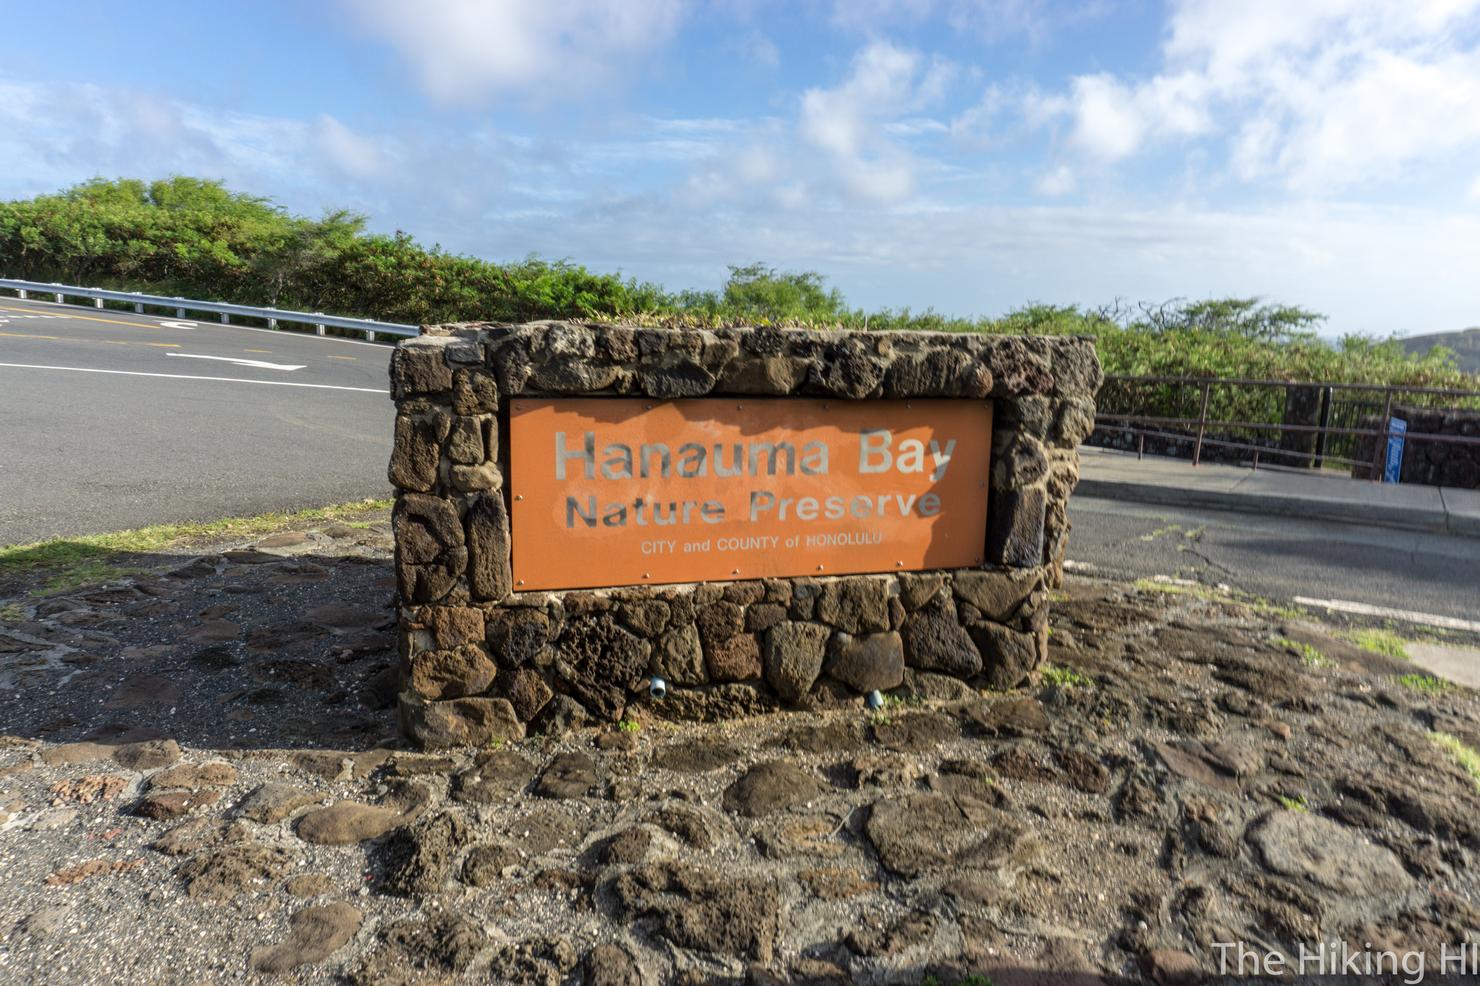
After you cross the highway you will see the sign for Hanauma Bay Nature Preserve (another amazing Oahu spot I might add).
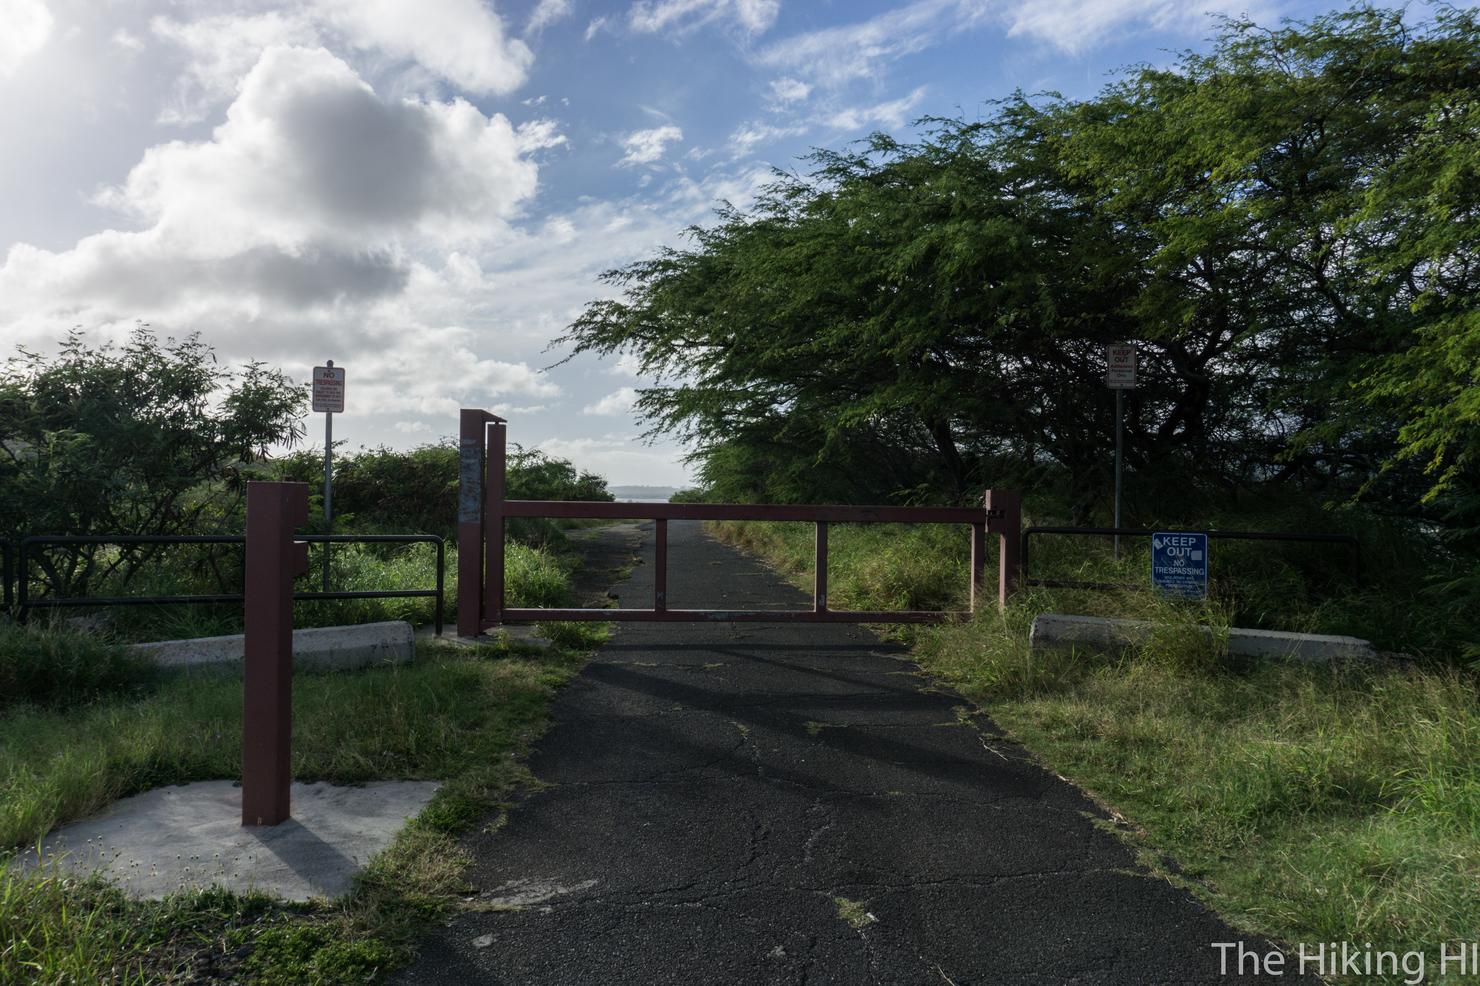
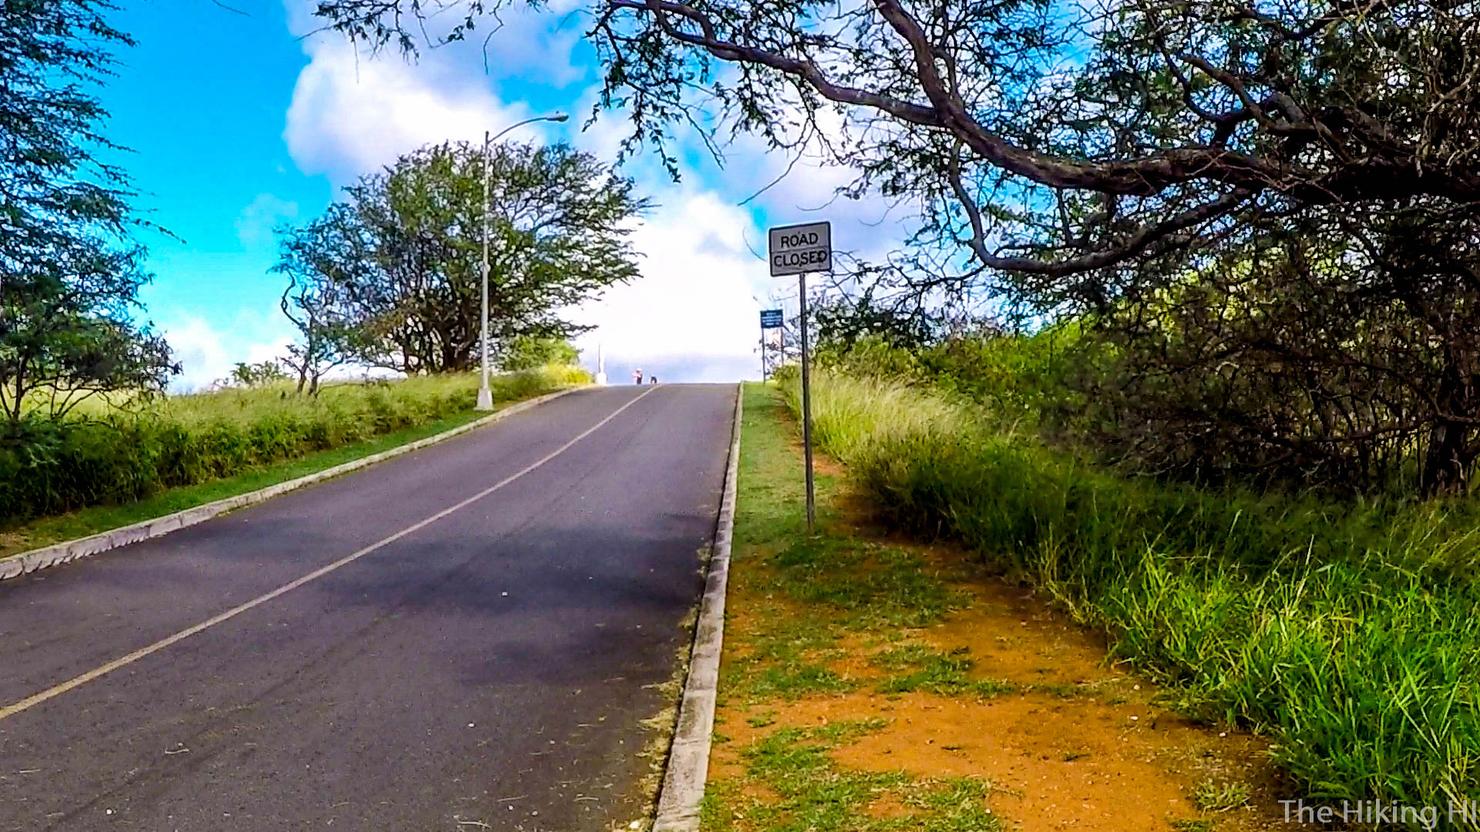
And just beyond that sign is a gate with some not so inviting signs. This road is technically closed, so enter at your own risk...
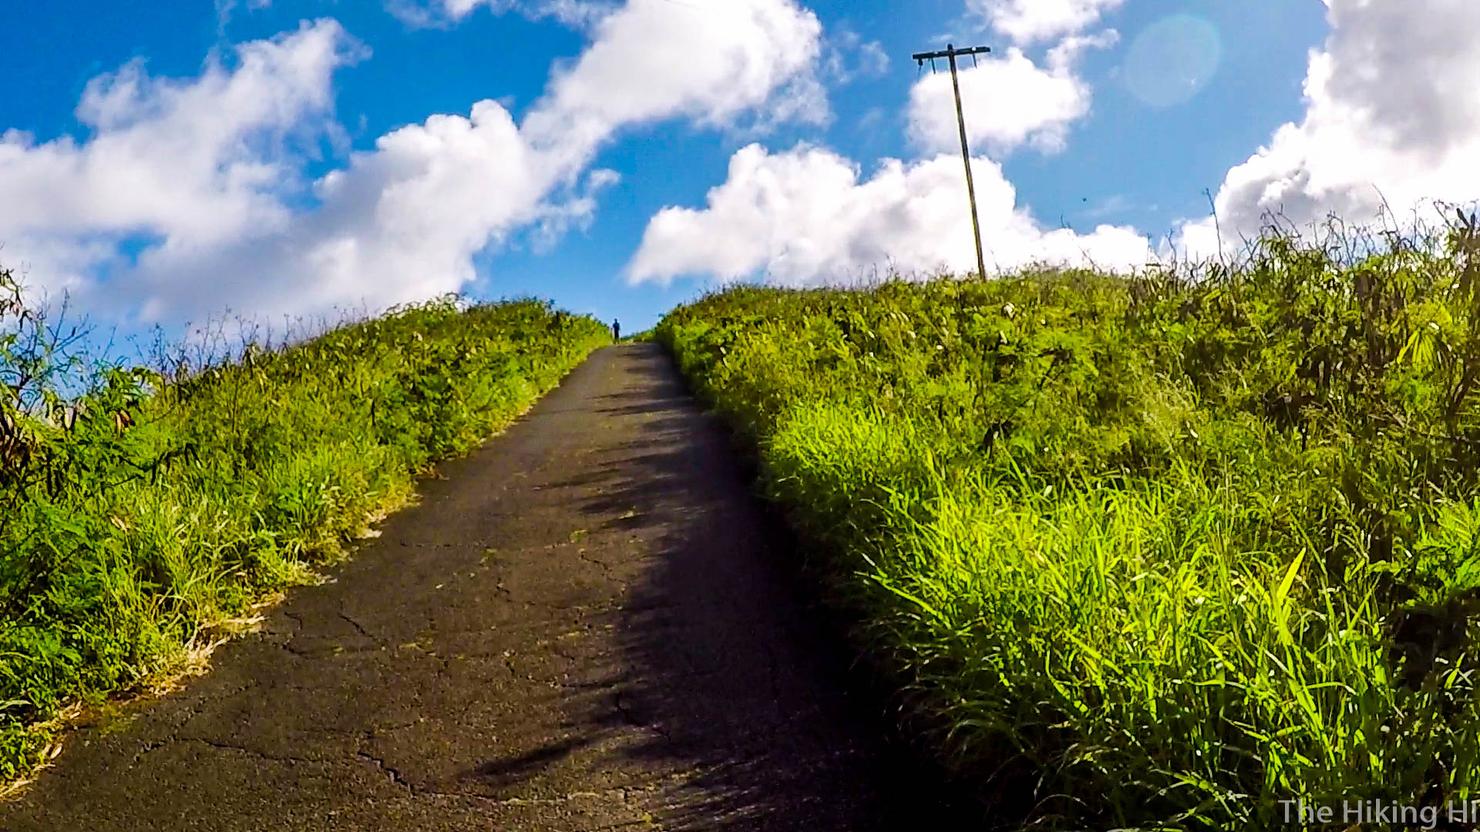
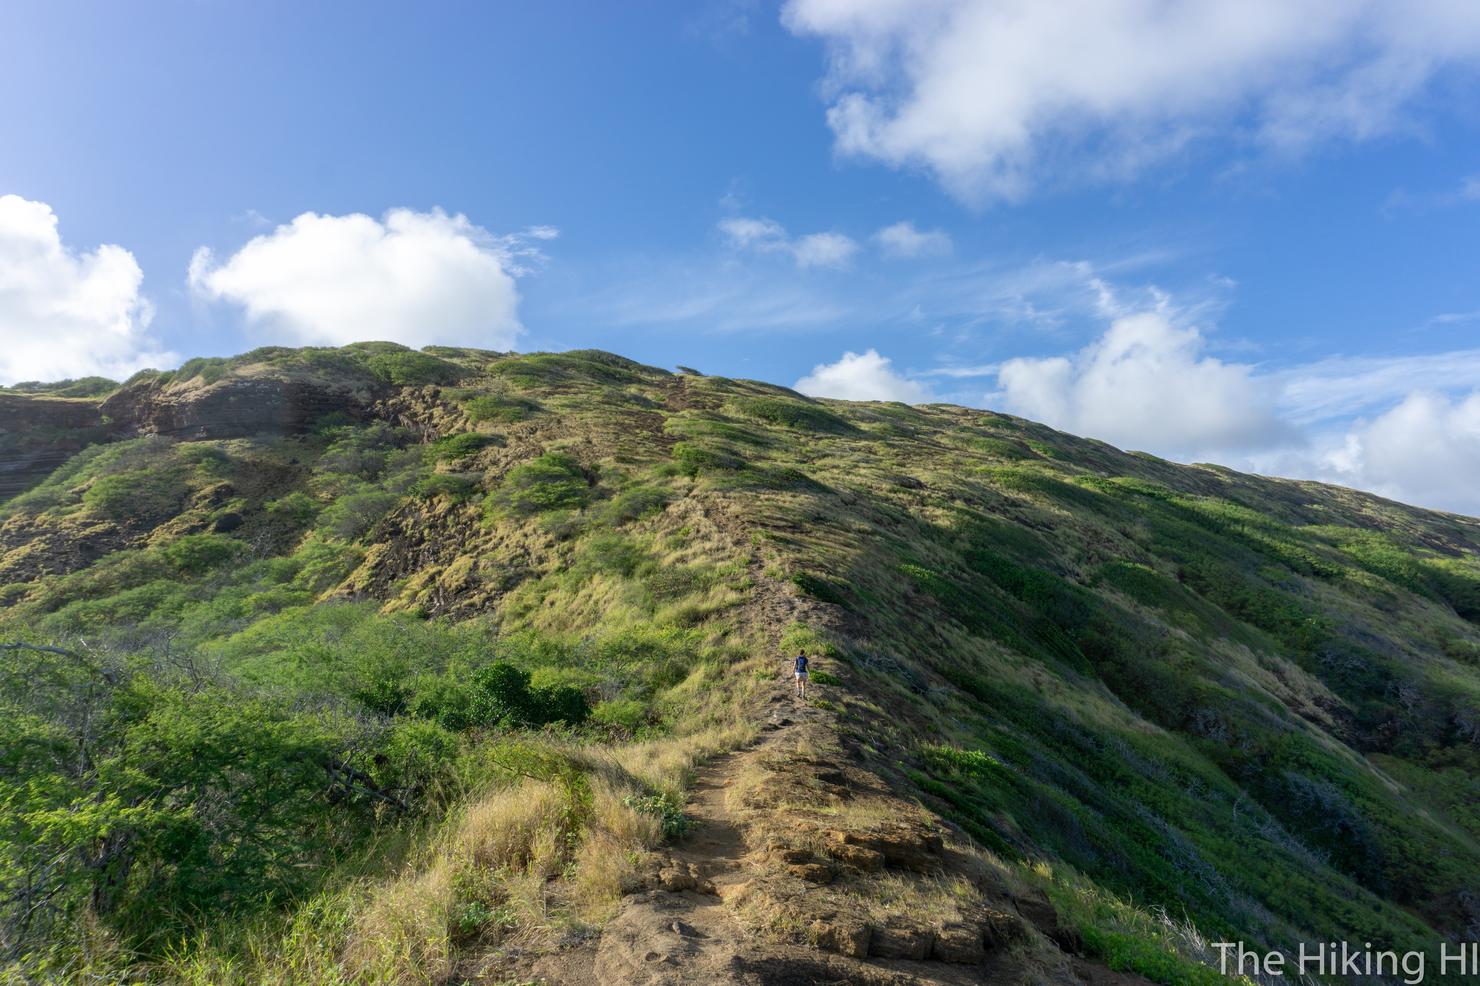
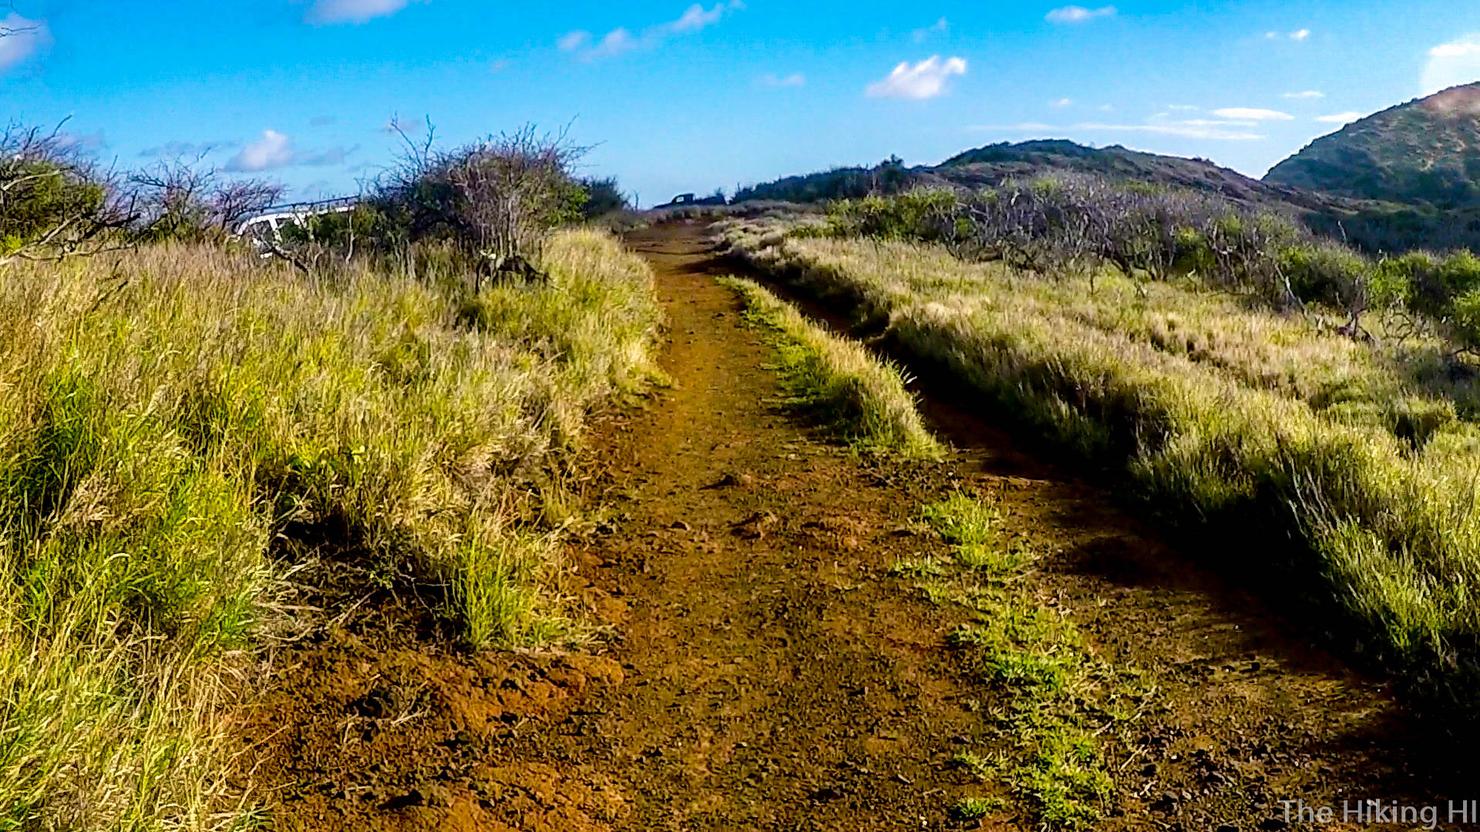
But every time I've done this hike, I've seen plenty of people using this closed road. The first part of the hike is along this road, which is a long and somewhat steep uphill climb. A lot of locals use this spot for a good run.
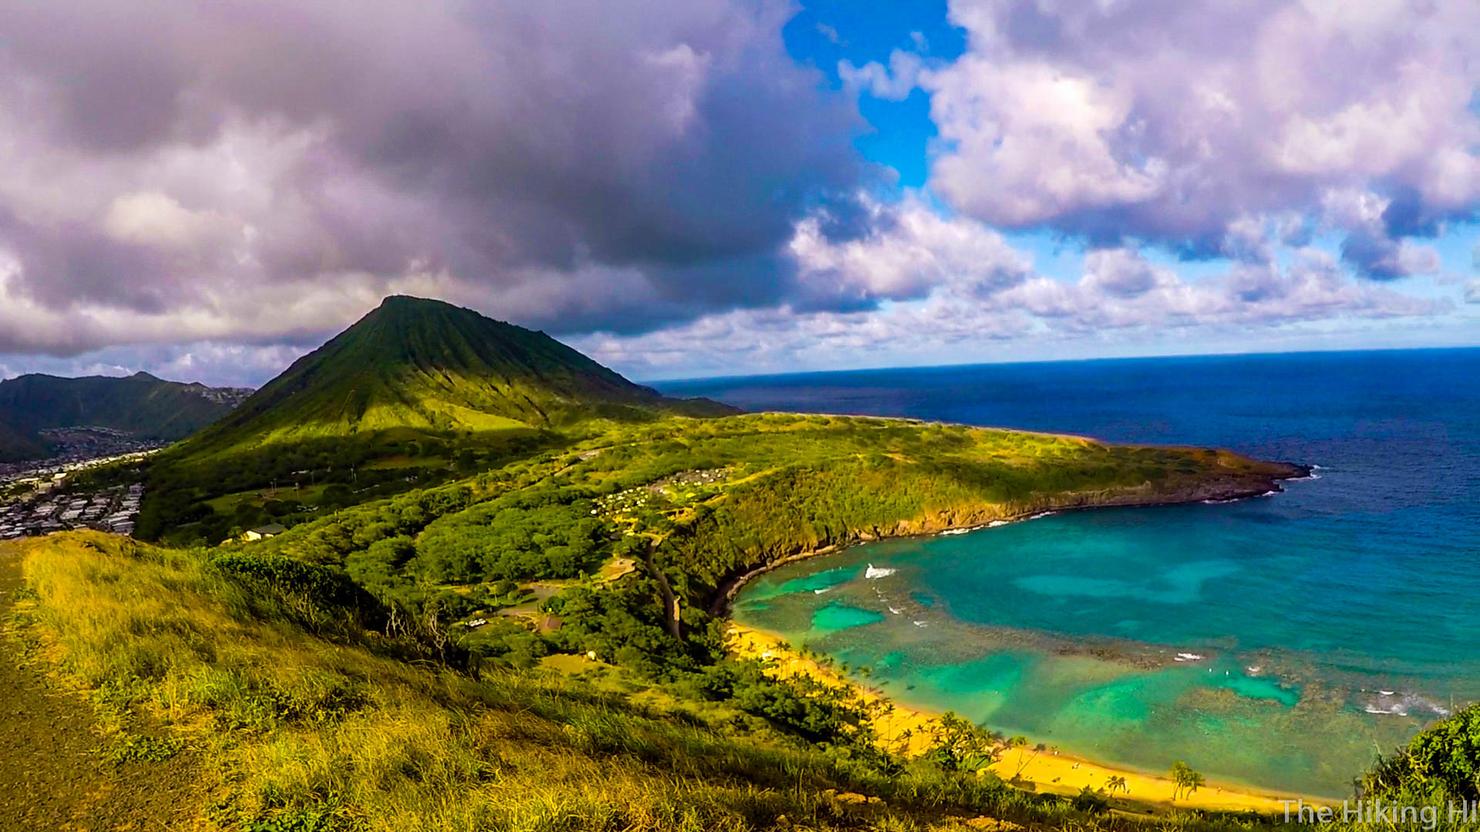
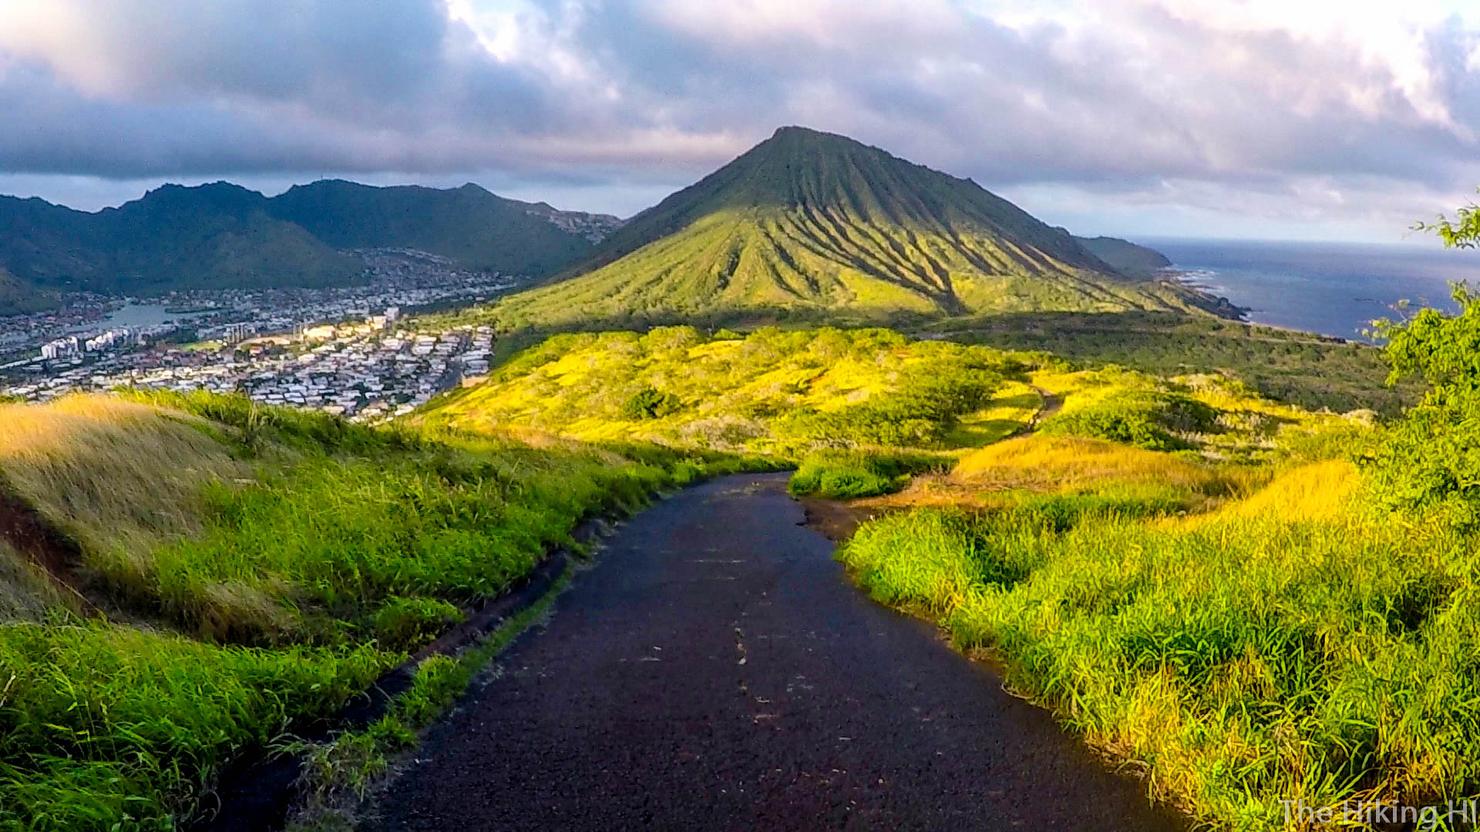
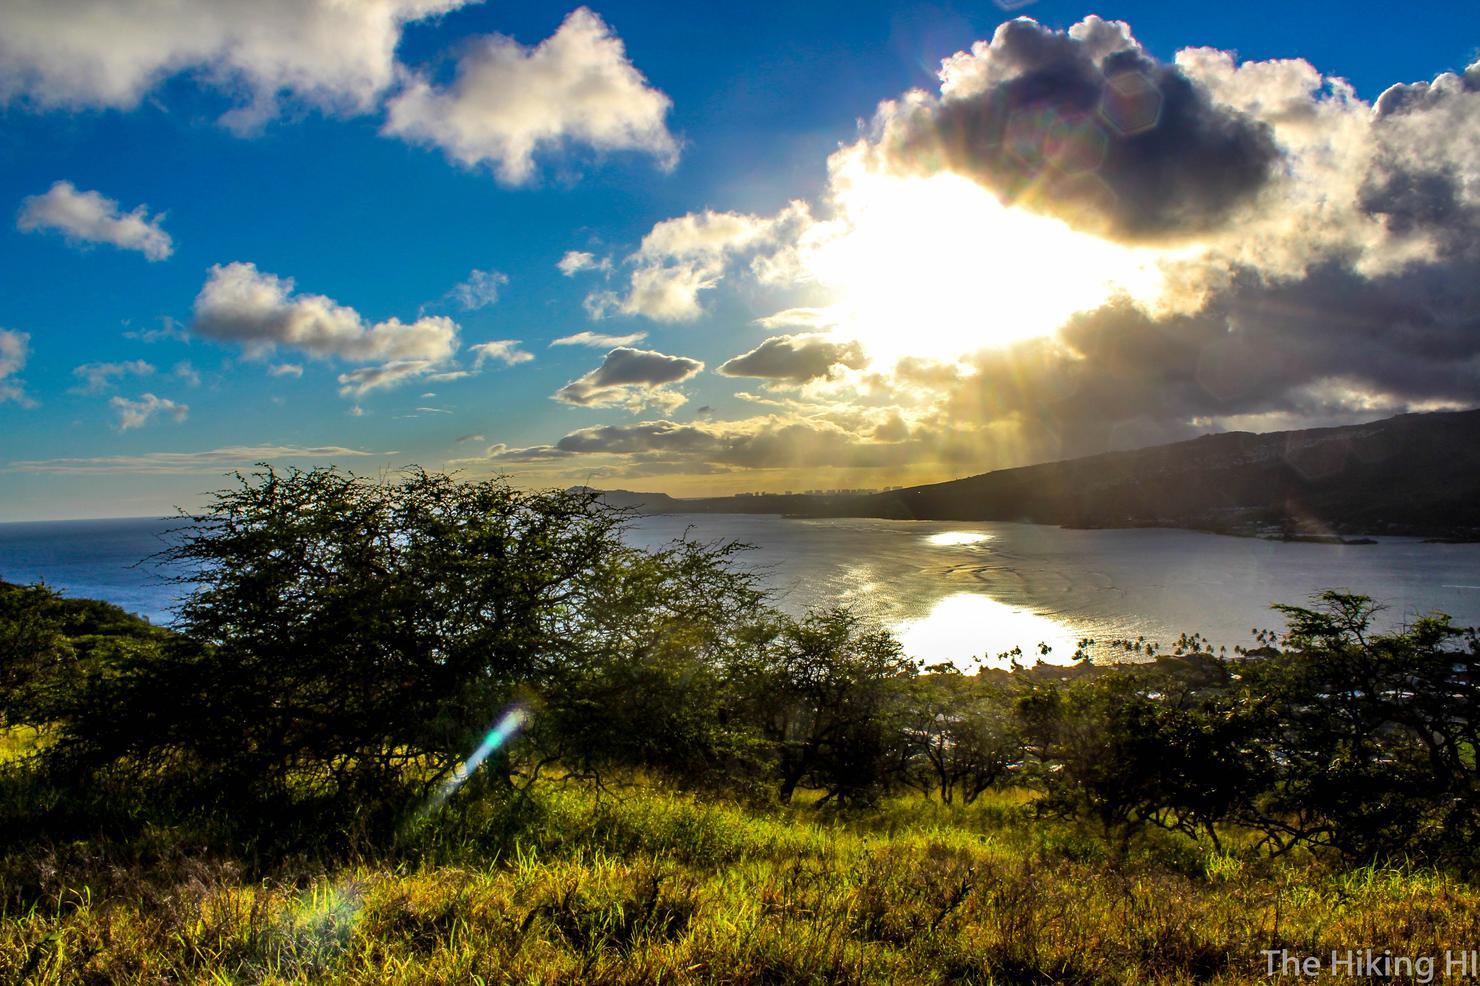
After you ascend little ways, the grass lining the road opens up to give you a beautiful view of the exterior of Koko Crater and Hanauma Bay. I really love the colors of the Bay with this late afternoon glow.
Almost to the top. My calves are starting to burn!
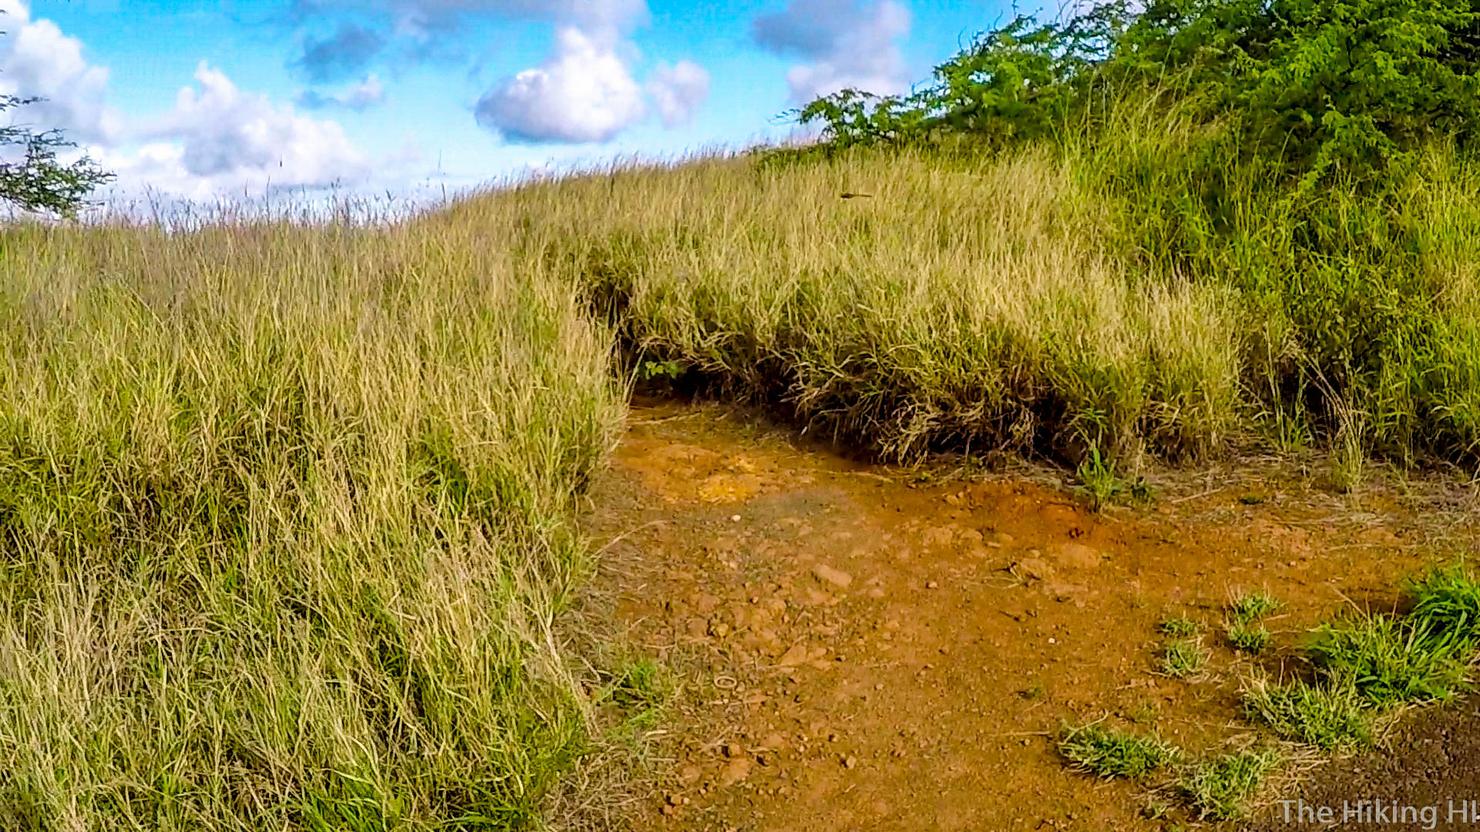
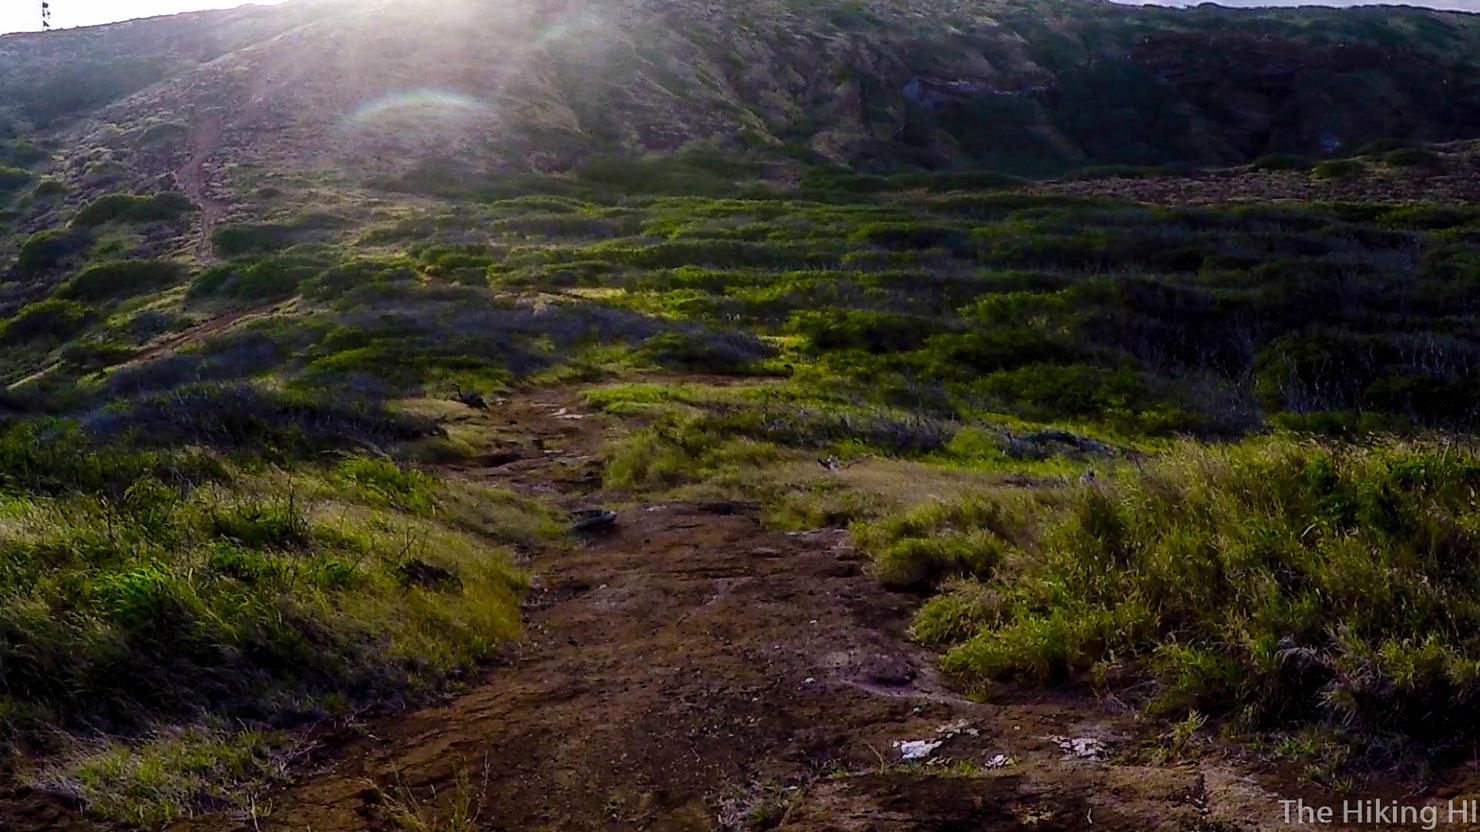
Shortly after the road levels off, you will see this opening in the brush. Enter here for the path to the sea cliffs and rock bridge.
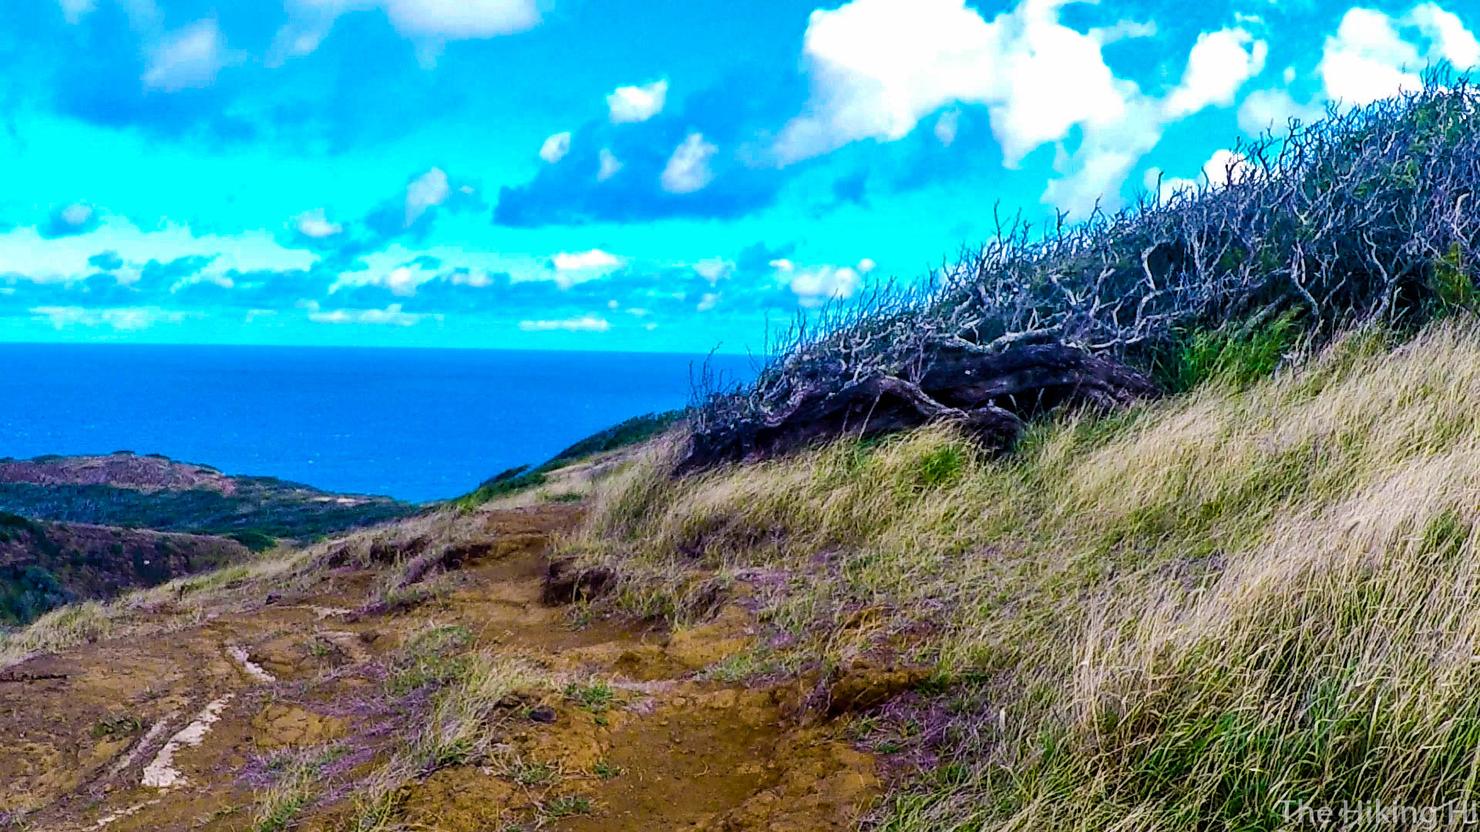
And follow the natural beaten down path along the ridge.
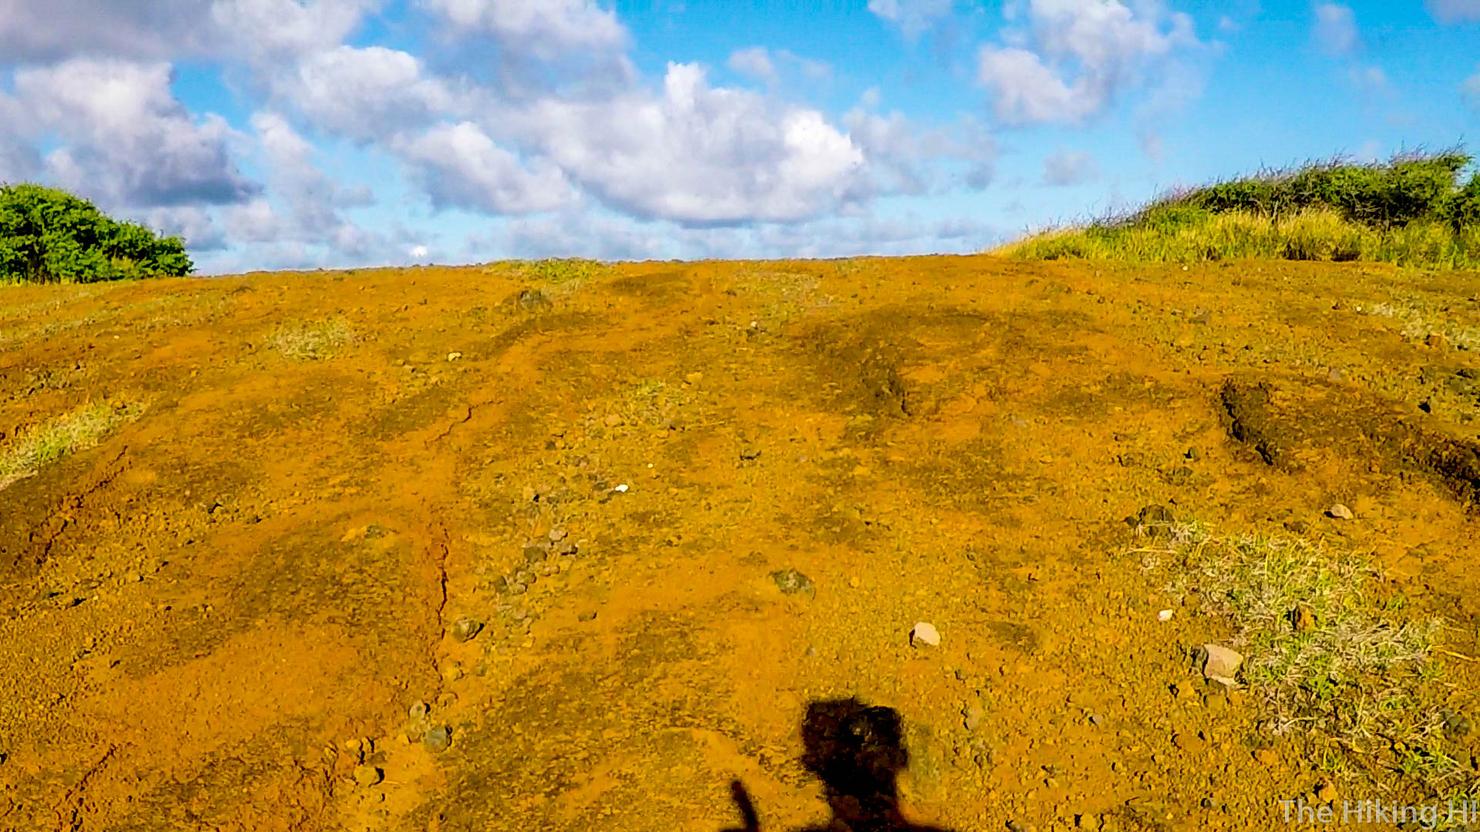
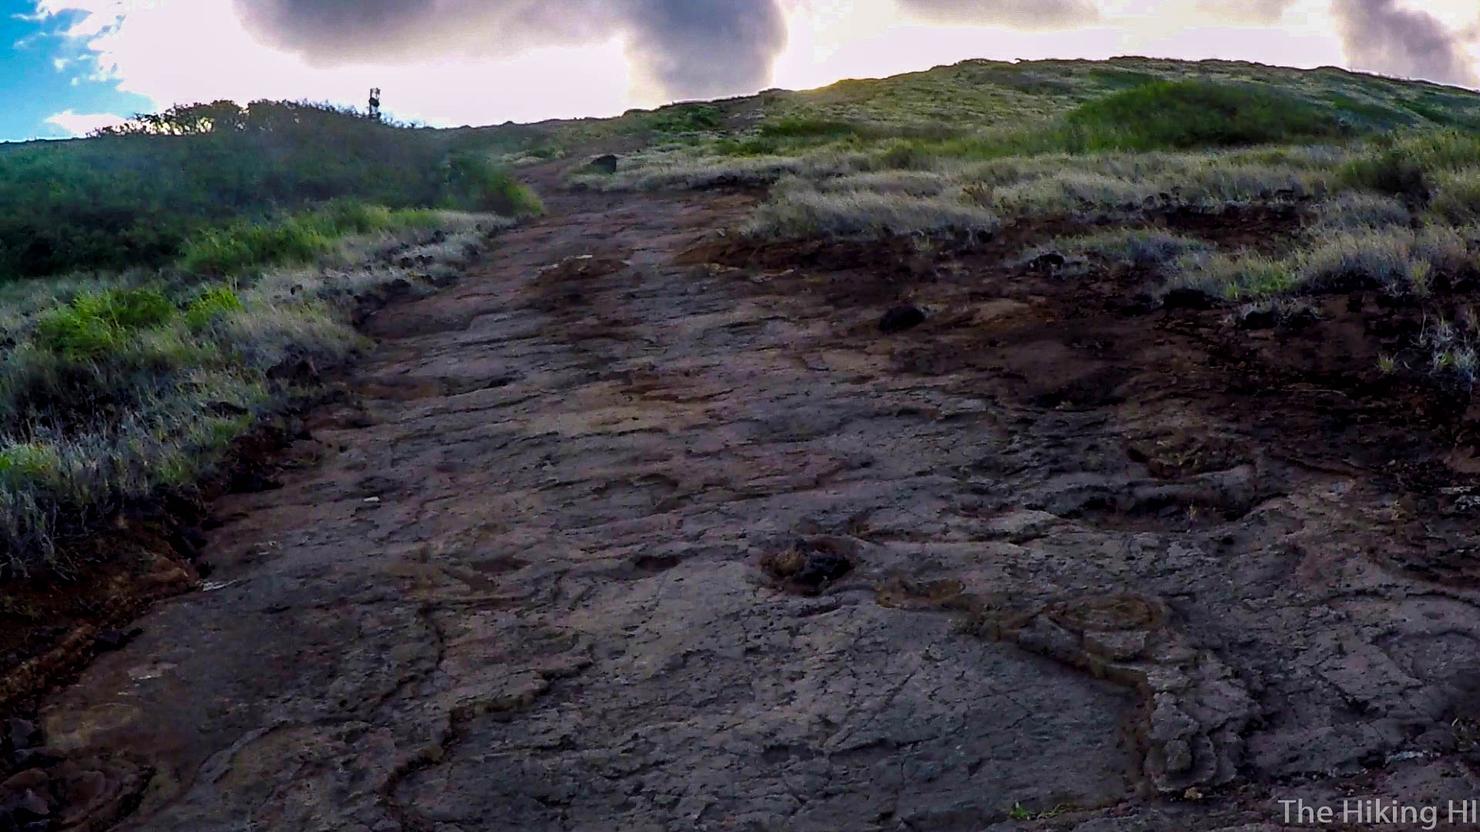
And it will lead you to an obvious path that will allow you to descend down the cliff. This path is quite steep. It typically has a lot of dry dirt and some loose rock, so the footing can be tricky.
A shot looking back up. Like I said, it's no joke!
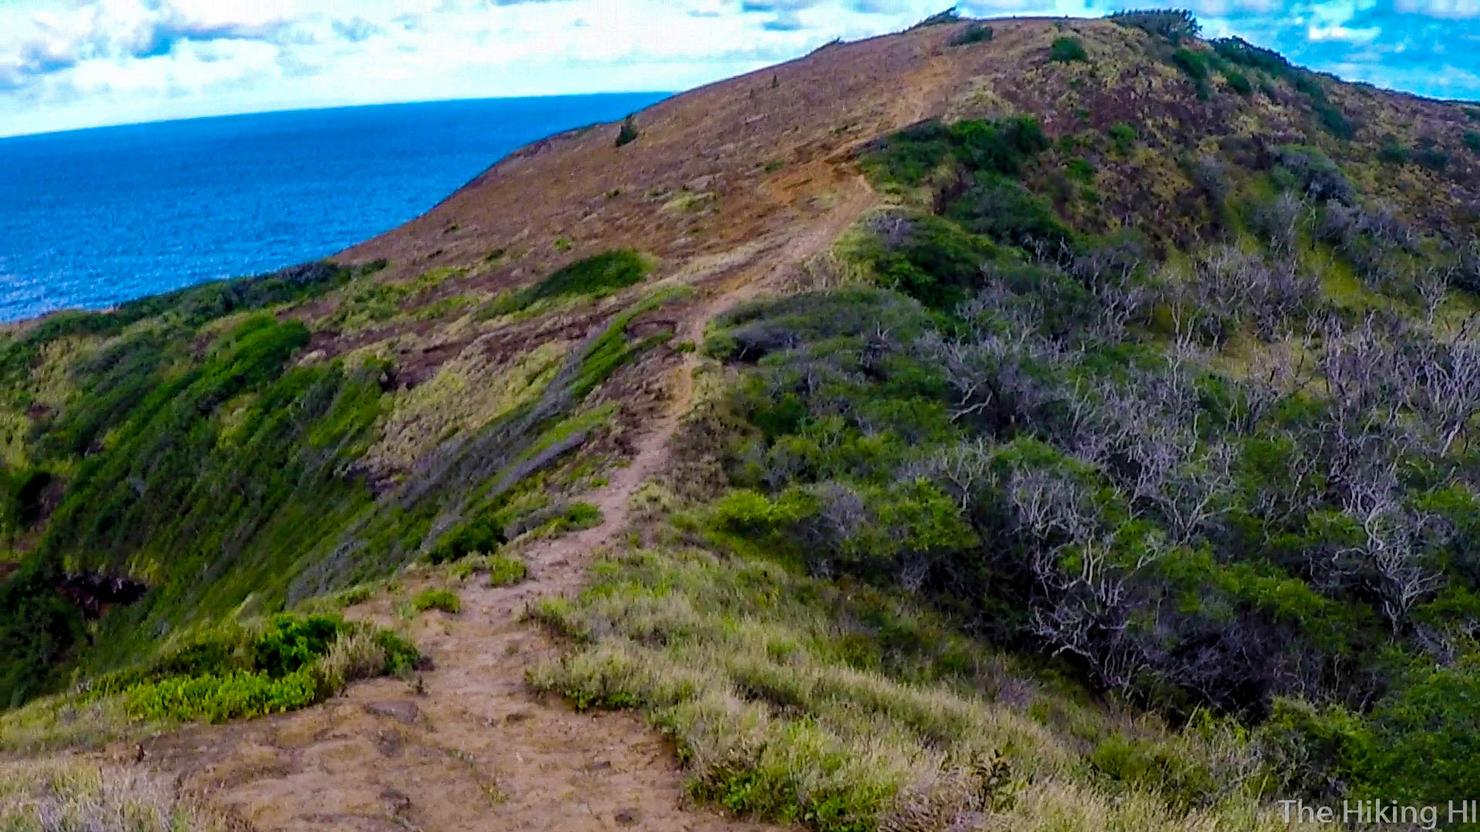
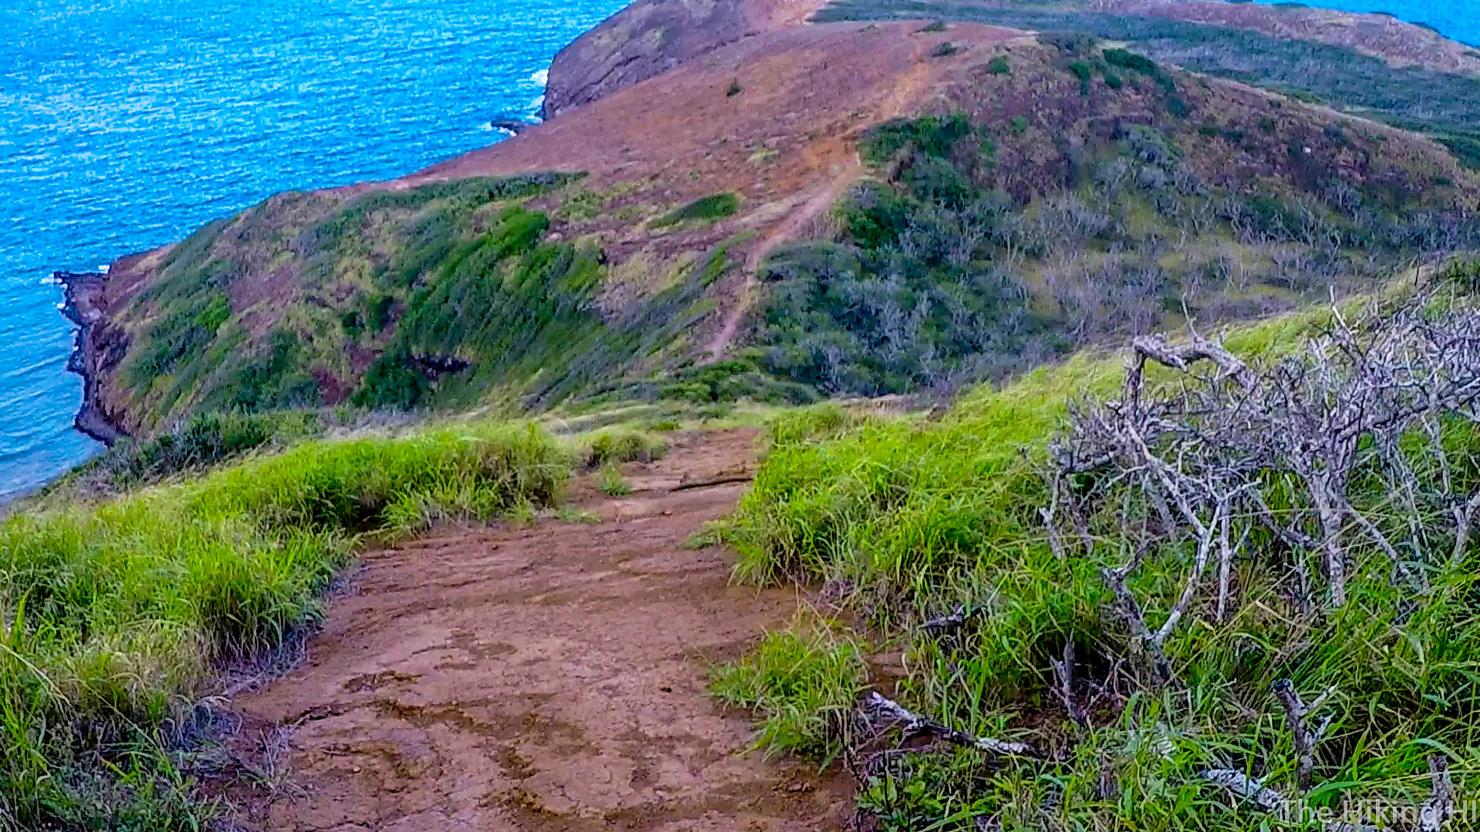
After the trail levels off, you continue following it to the left of these dead trees.
Which means yet another uphill...

Which means another break for views at the top. This is a shot along the southern/leeward coast of Oahu and was actually taken at a later date (model credit to my friend Indre). I like this hike so much, I find myself coming back again and again.
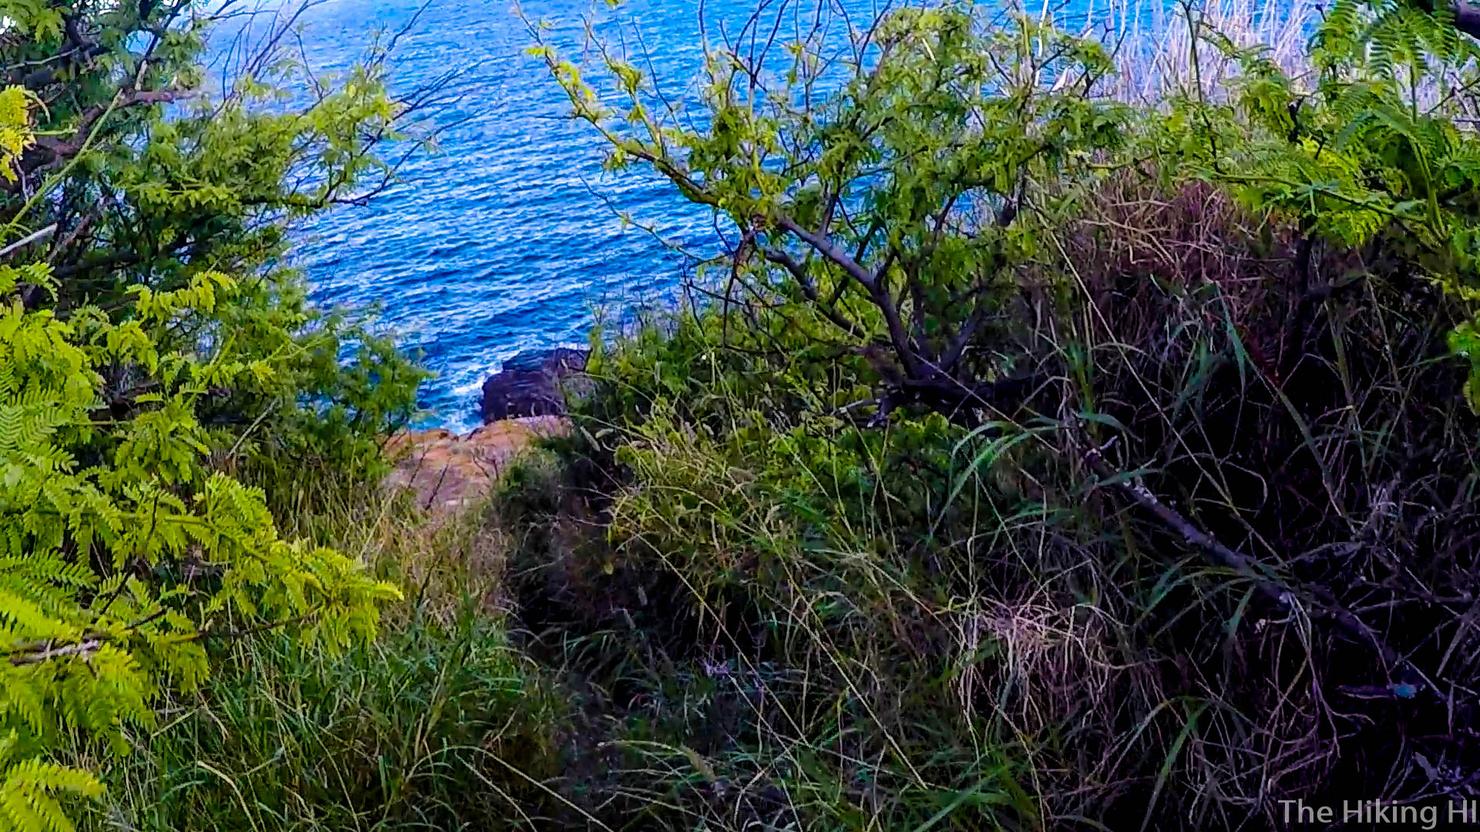
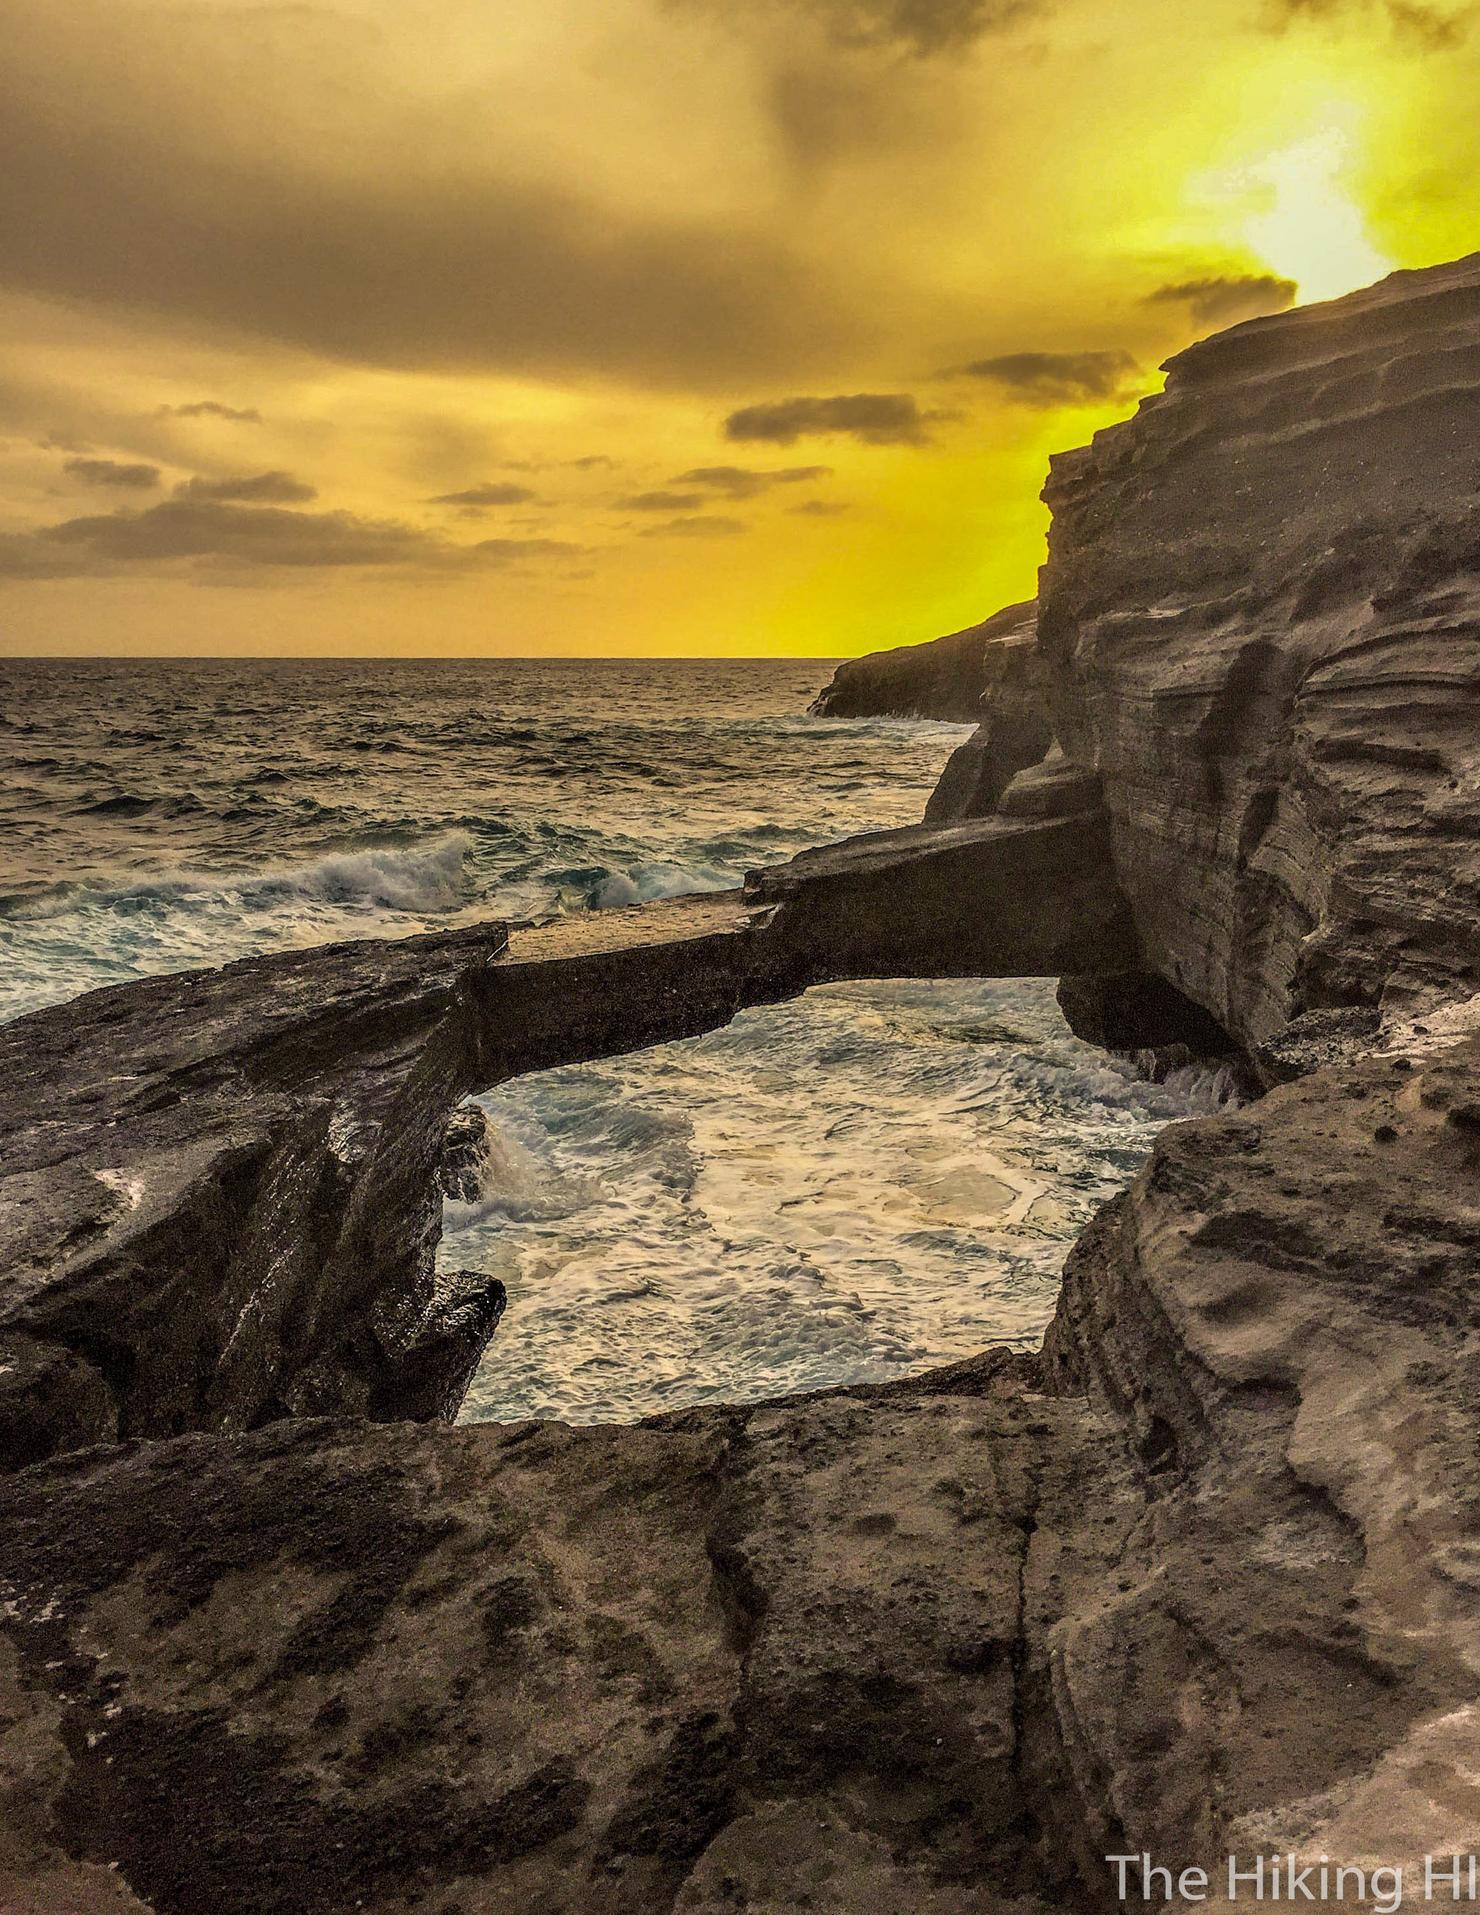
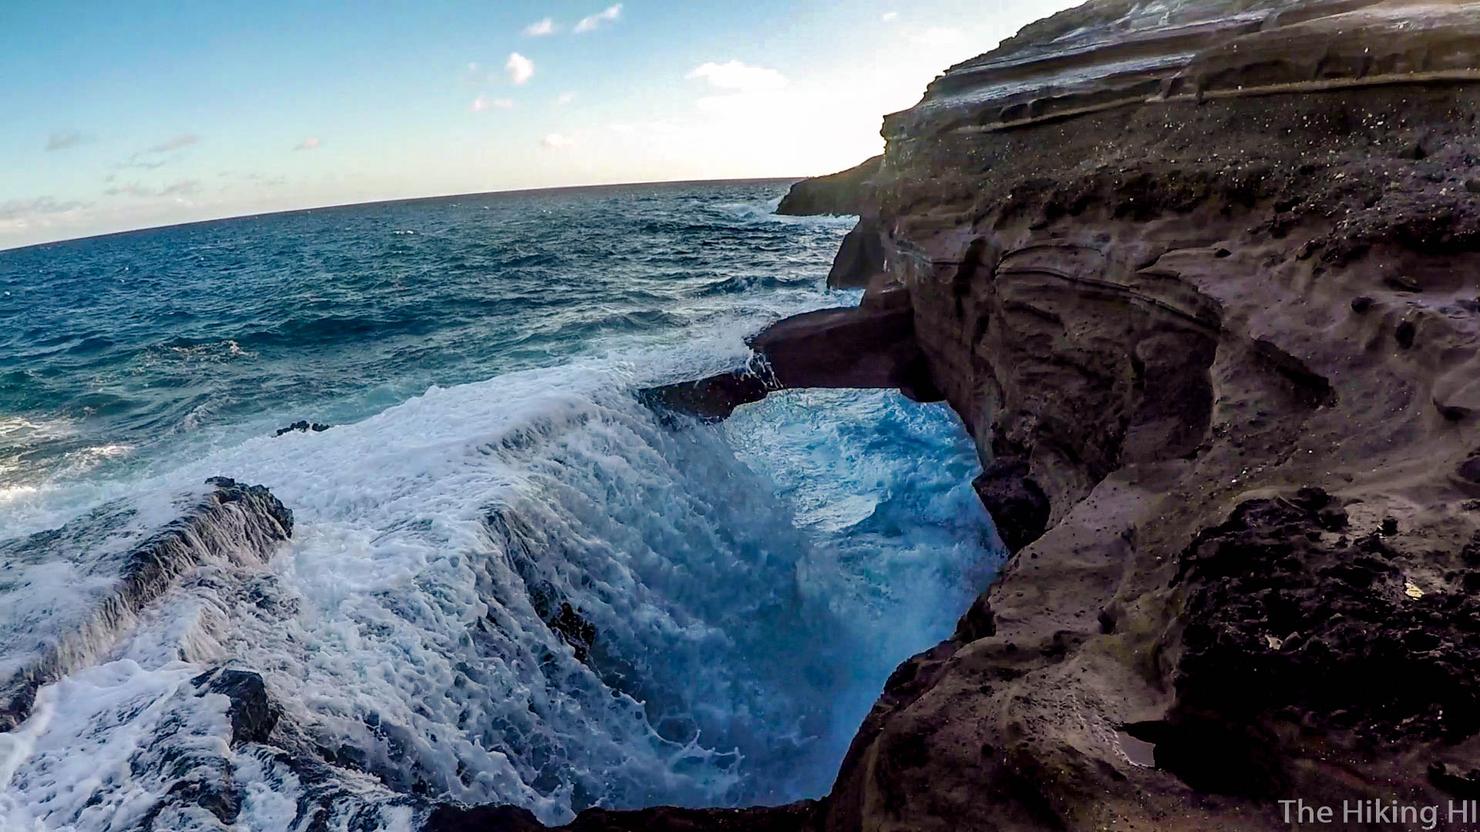
It's time to find the rock bridge! There's a flat rock at sea level that serves as a landmark to guide you in the right direction. You won't quite be able to see it from the top of the ridge so you will have to start your descent first, but it's pretty easy to find. If you reach the ocean, you've gone too far! The trail I drew on Google Earth is a good point of reference.
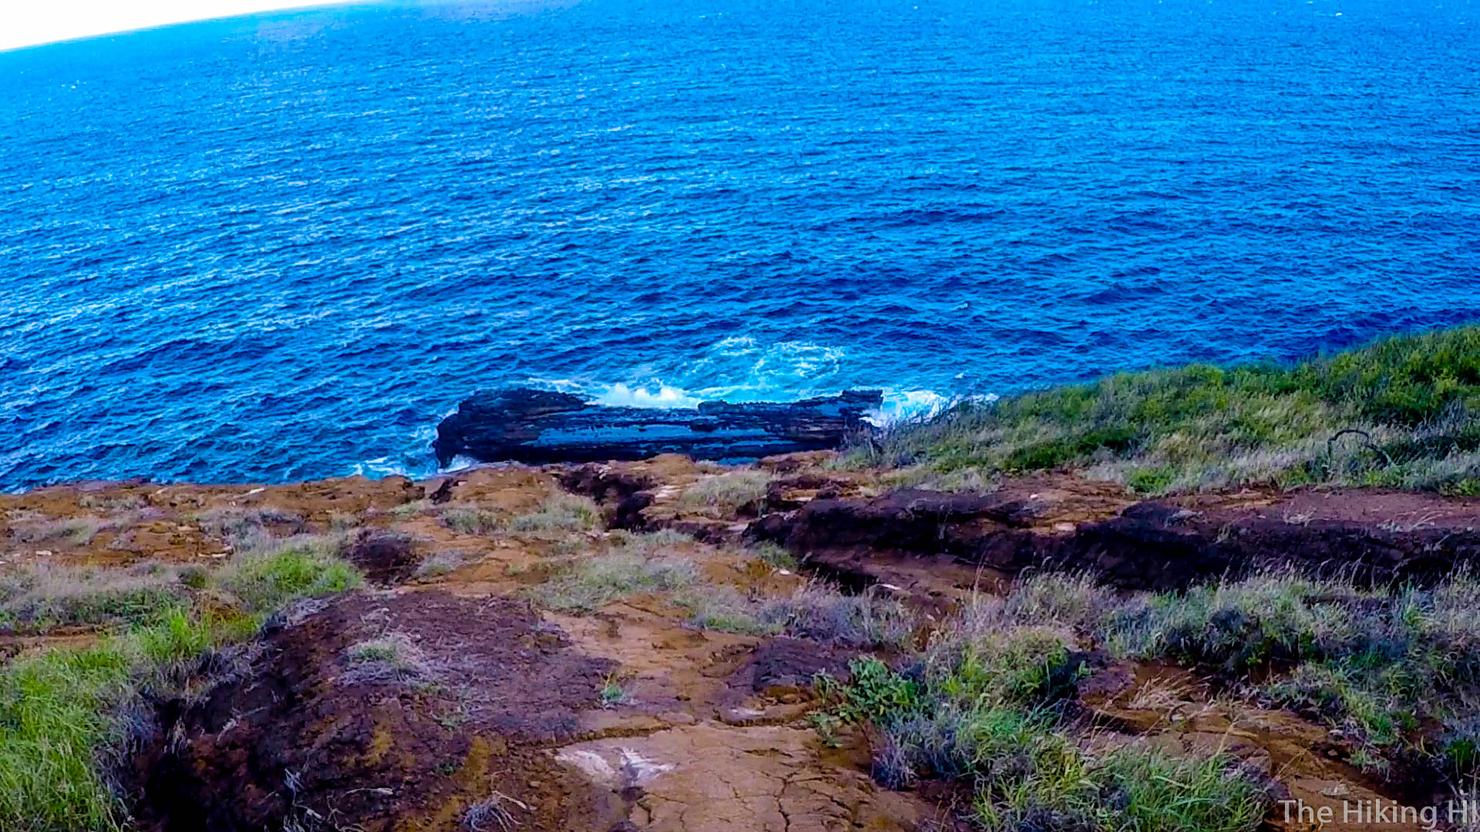
There's the "landmark" where the rock bridge is located. I should warn you that the bridge is only accessible at low tides. When it's high tide, it will be covered, and it's probably too dangerous to be down there anyway. Check out the Hanauma Bay tide charts to plan accordingly.
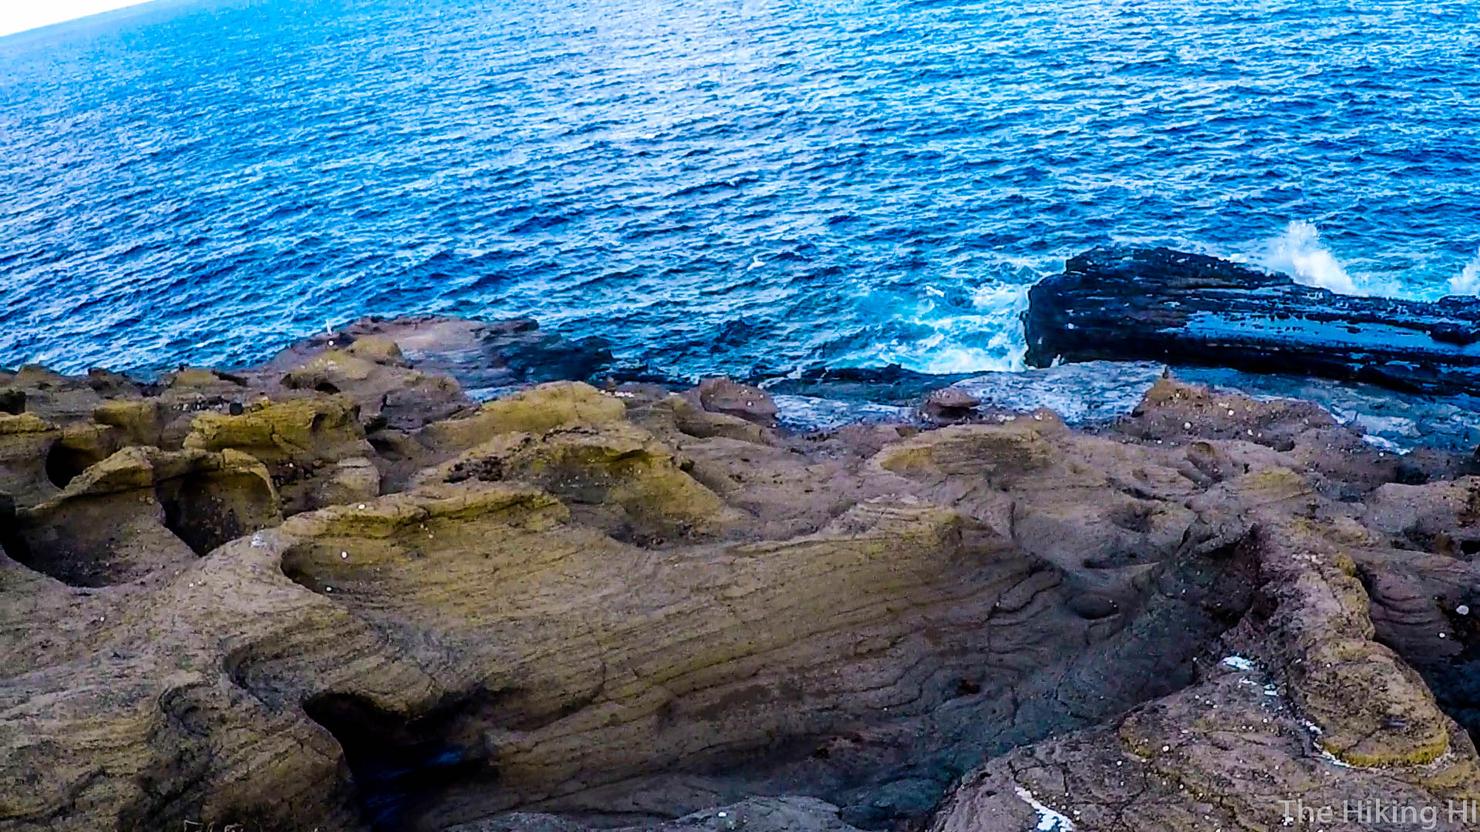
It's another tricky descent down to the bridge. You are basically walking in little pits created by the ocean waves. There's a lot of uneven footing and sharp rock, so definitely take your time.
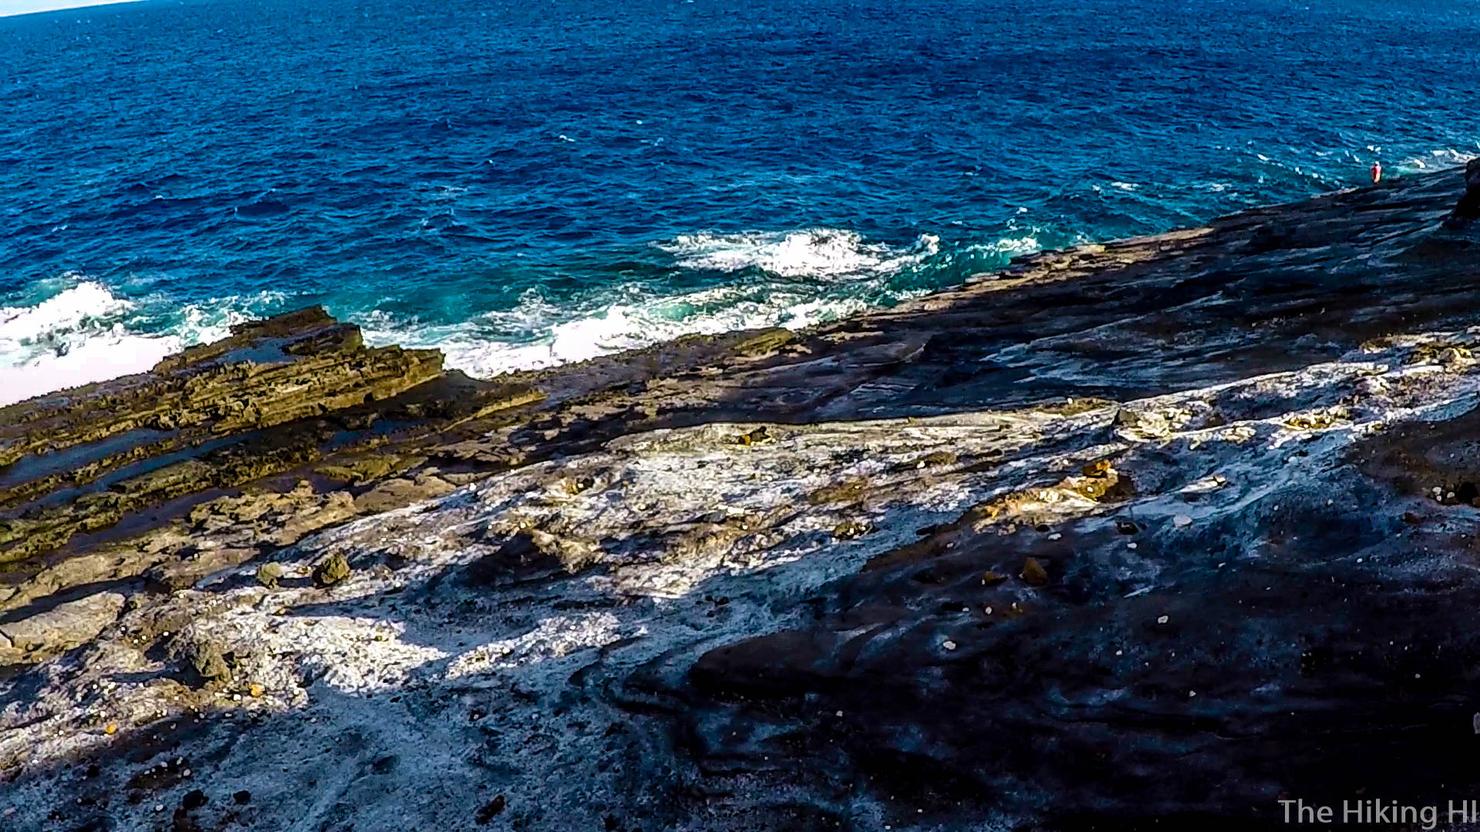
Almost there! I can only assume this is salt deposit from high tide.
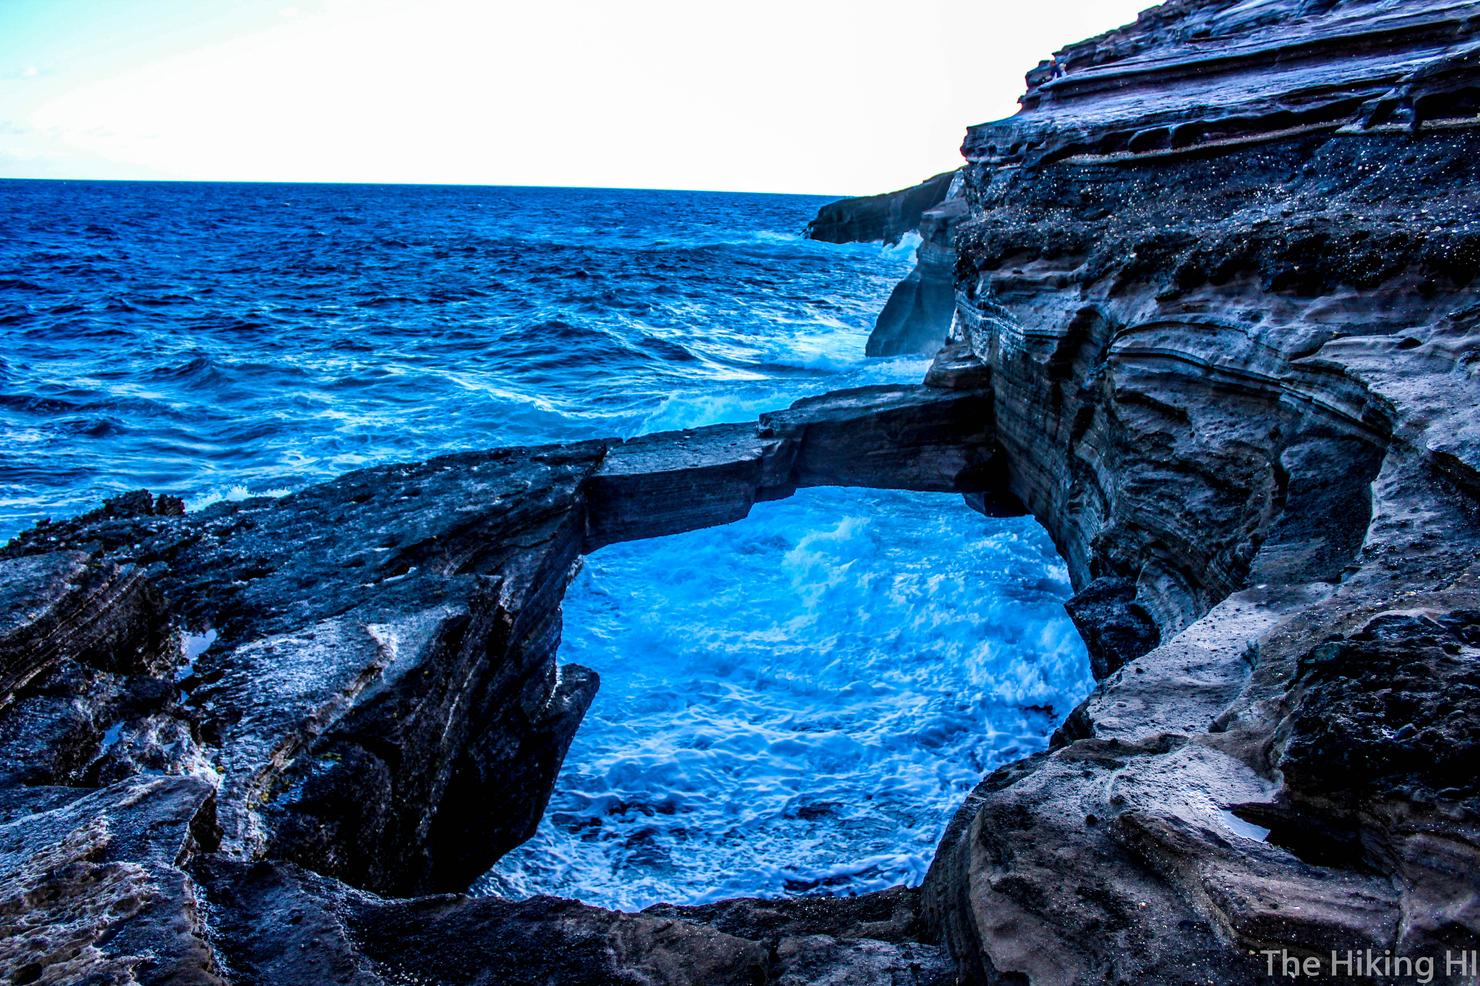
Once the surface levels off and you are basically at sea level, head right and you should find the rock bridge. It really is a beautiful sight. I am always in awe of these structures created by the random forces of nature.
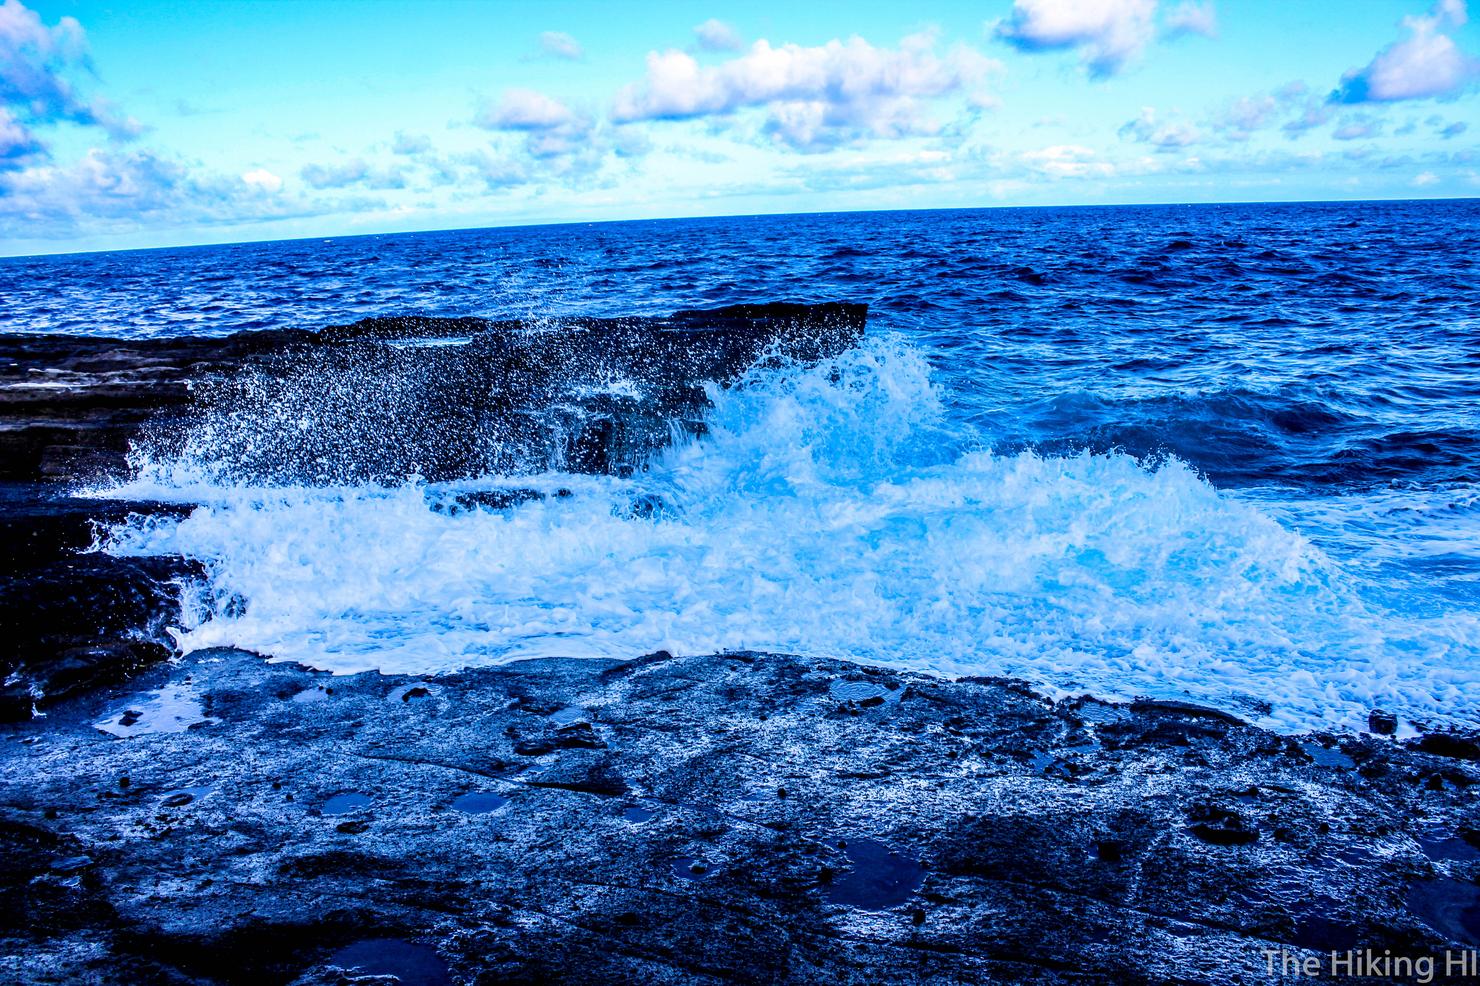
But remember, those forces are still present and very powerful. They could easily knock you off your feet if you aren't paying attention. Always keep one eye on the ocean. There were several occasions where I had to scurry back up the cliff a bit. It was mainly so I didn't get my shoes wet, but still...
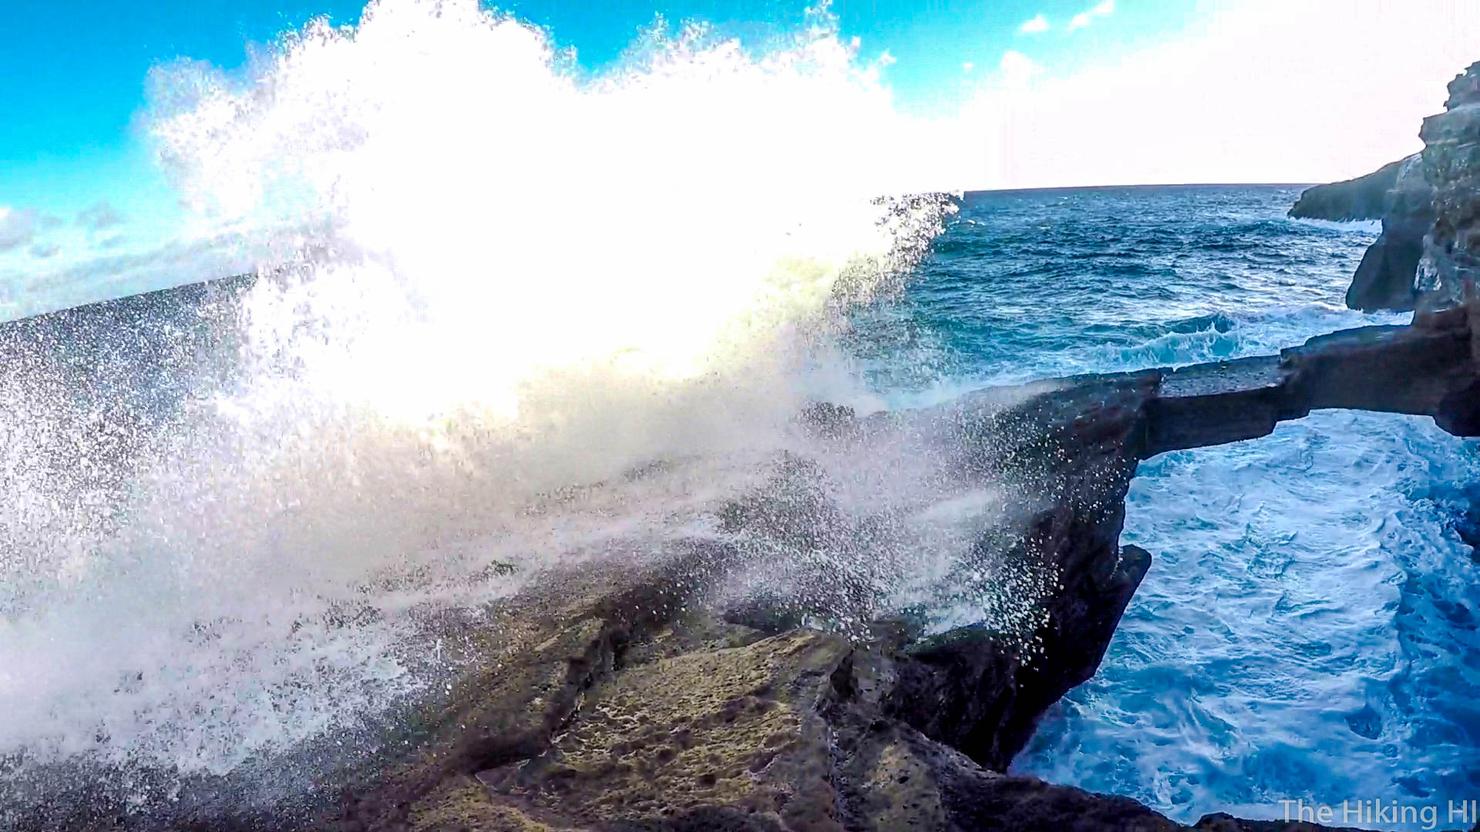
A lot of people try to take a picture standing on the rock bridge. Here is a good example of why that isn't the safest idea...
I'm perfectly happy viewing the bridge from right here. I'm all for thrill seeking, but I don't typically mess with something as random and strong as the ocean waves. I'll choose a sketchy rock climb over something like this any day.
One last picture before we head back up. I cheated... this was a picture from a different time I did the hike. But that glow is just too beautiful to not include in this post. This picture also made for a great Mother's Day gift :)
I headed back up the cliffs to reach the top of the ridge. You have the option to head back the way you came, or head left (north) to make this a semi-loop hike. I went left.
You will then descend back down into the crater.
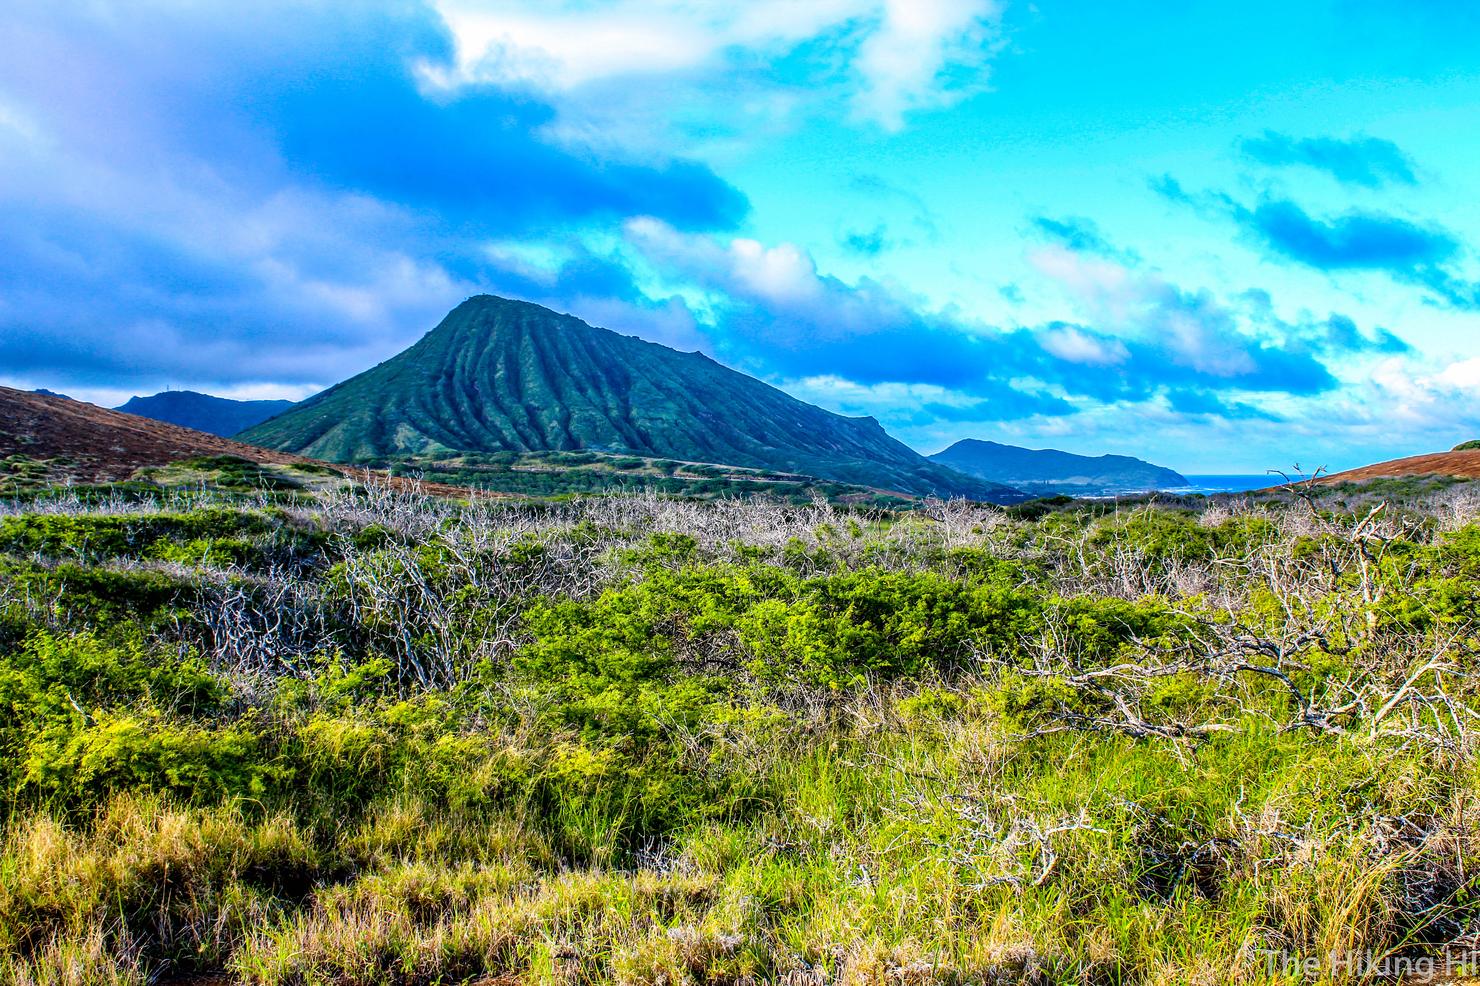
Once I reached the bottom, I decided to take a picture of this scene. Something about the brush in the foreground and Koko Crater in the background feels very volcanic (I wonder why that is...)
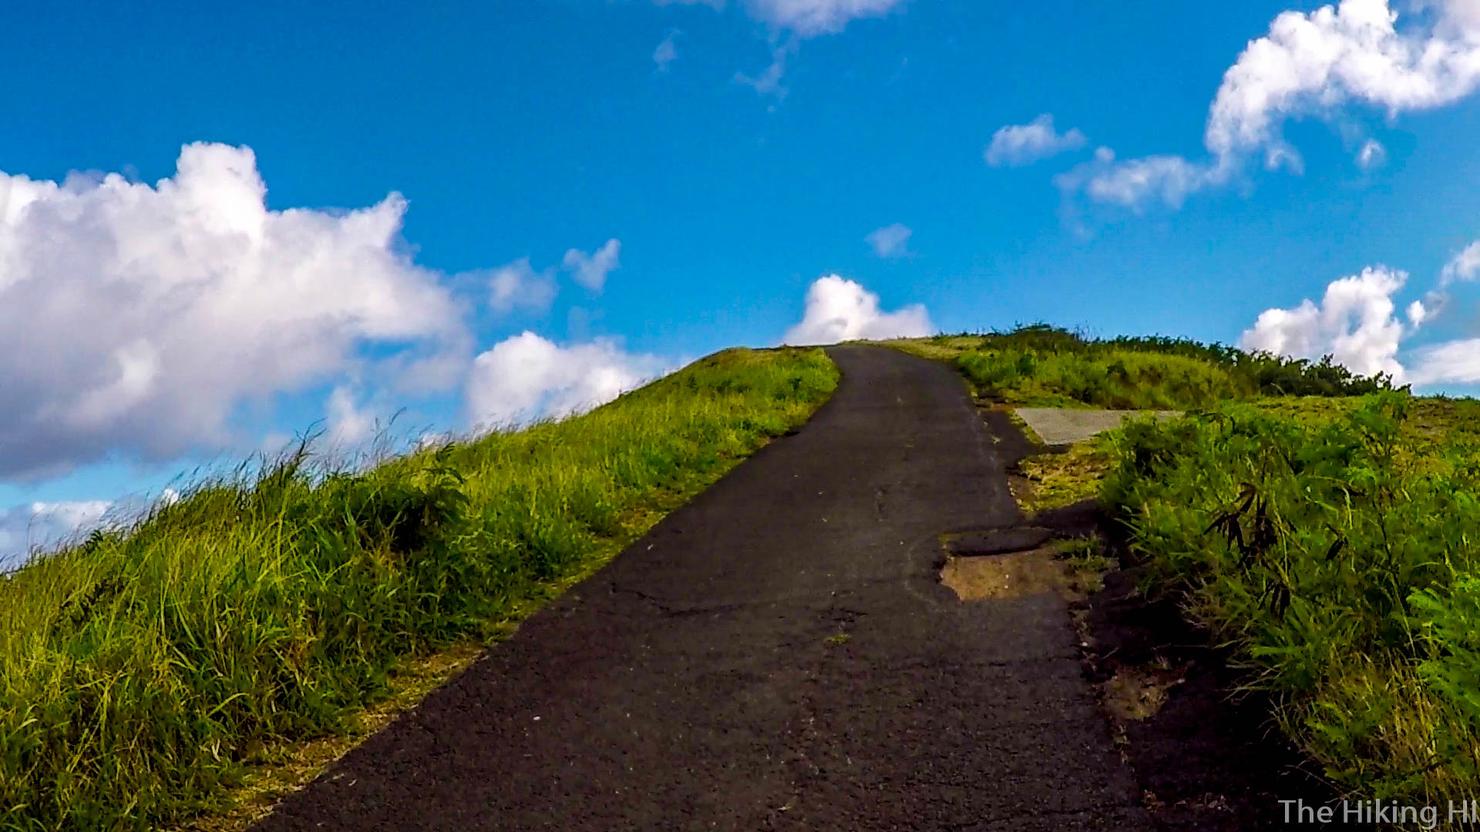
And now its time to ascend back up to the road. I don't know if it was because I'd already hiked over 2 miles, but this felt like the most difficult part of the hike. There's enough up and down on this hike to surpass the total elevation gain of the Koko Crater Stairs.
Finally, we've reached the road! It's all downhill from here. I had to take one last picture of the partially shaded Koko Crater.
Before I made my way back to the car, I found a short little side road that led to this vantage point. I had to take this picture of the late afternoon sun over Honolulu. I realized this would probably be an awesome spot for a sunset. But I was also getting hungry. I was torn... Dinner or Sunset?
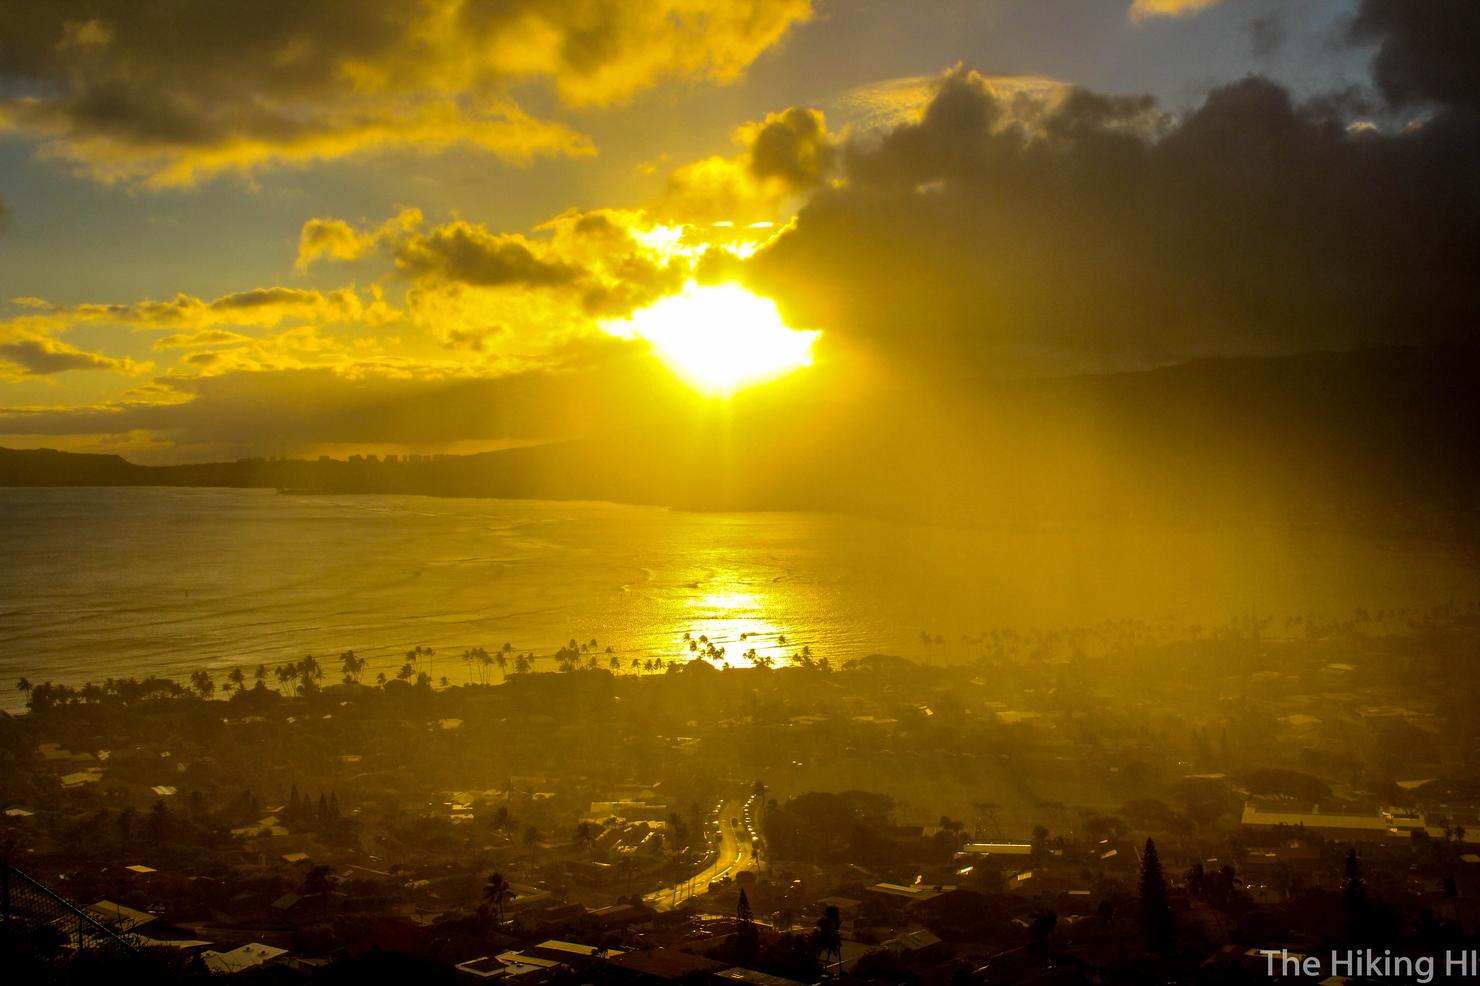
And then it started raining. I decided that was Mother Nature telling me to listen to my gut (literally), and go eat. But not before I took one final picture of the sun shining through the rain. It was a very unique sight. What an awesome afternoon it had been at Koko Head! No better way to split up the work week!
Check out my video of this beautiful afternoon!
Have you ventured around the Koko Head Rim Trail? Share your story below!